
Vector Styling and Filtering
Where to find it
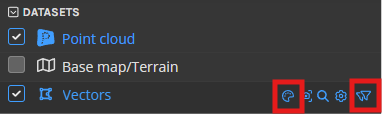
Open the dataset options on the vector dataset.
Click the palette icon to open
Styling. (visual differentiation)Click the filter icon to open
Filters. (visibility control)
Styling is where you change colours, symbols, line sizes and labels. Filters is where you hide or show features based on attribute values.
Default styling
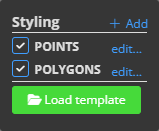
In Styling, features are organised by feature type. Each group shows an edit... action for the default style for that feature type.
Use the default style when you want a base appearance for all features of that type. This is the best place to set the general look first, then add more specific conditional styles underneath it.
Inside the style editor:
Many controls start as
Use dataset default. This means that property is still inheriting the dataset's current default behaviour.Some geometry-related controls use
Use geometry default. This means the feature keeps its original geometry setting, such as altitude handling.
Recommended approach
Set the general point, line, polygon, or label appearance with
edit....Add narrower conditional styles only for the features that need to look different.
Style overrides
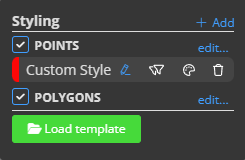
Style overrides let you style only the features that match one or more attribute rules.
To create one:
Open
Styling.Click
Add.Enter a style name.
Choose the feature type.
Open the filter button for that style and click
Add attribute filter.Choose the attribute, operator, and value.
Open the style button to set the appearance for matching features.
Style ordering
Put more specific styles above more general styles.
You can drag a style to reorder it. Use the coloured strip at the left side of the row as the drag handle area.
Create a broad base look first.
If two styles could both match, the one nearer the top should be the more specific rule.
Dataset filters
Filters is separate from Styling.
Use Filters when you want to hide or show features, not recolour them.
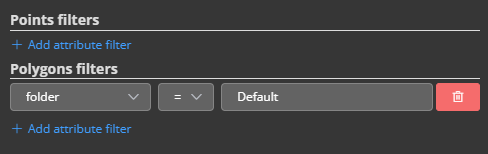
In the Filters popover:
Filters are grouped by feature type.
Each section can have one or more attribute filters.
Add attribute filteradds another rule for that feature type.
This is the right tool when your goal is things like:
show only one material type
hide inactive features
reduce visual clutter before inspection
If your goal is to keep all features visible but make one subset stand out, use Styling instead.
Persisting styling changes
The standard way to persist styling changes in a project is to save the scene default properties and create bookmarks.
Save the scene default properties when you want the current styling and scene state to become the project's normal starting view.
Create bookmarks when you want to save useful alternate views or styling combinations that people can return to later.
Save as dataset default is different. It saves the style on the dataset itself, so any projects using that same dataset can receive those styles.
If a project also has its own default scene, the project's default scene overrides the dataset default when the project loads.
Recommended workflows
Colour features by an attribute
This is the best workflow when you want different attribute values to get different colours automatically.
Open
Styling.Find the feature type you want to style.
Open
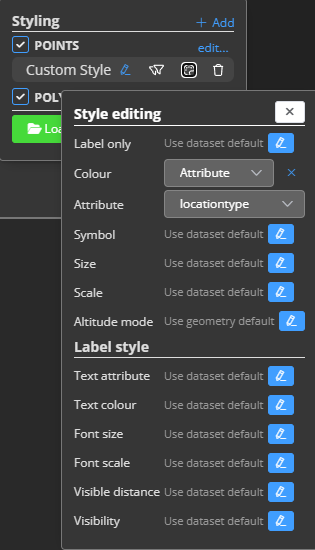
edit...for the default style, or create a specific conditional style withAddif you only want this on a subset.In the style editor, enable the colour override.
Change the colour mode from fixed colour to
Attribute.Choose the attribute you want to drive the colours.
Review the result in the viewer.
Highlight one subset without hiding the rest
Use Styling, not Filters.
Set a calm default style for the whole feature type.
Click
Addto create a new conditional style.Add one or more attribute filters for the subset you want to highlight.
Give that subset a stronger colour, larger size, thicker line, or clearer label style.
Move the style higher in the list if it should take priority over broader rules.
This keeps the rest of the dataset visible for context while making the important subset stand out.
Hide everything except a target subset
Use Filters.
Open
Filters.Find the relevant feature type.
Add an attribute filter for the subset you want to keep visible.
Confirm the remaining features in the viewer.
This is the better choice when non-matching features should disappear entirely instead of just fading into the background.