How do I show the location of other scan setups?
In the ScanView window, use the Show Scan Markers option in the Visibility menu to display the location of other scan setups overlaid on the current scan image.
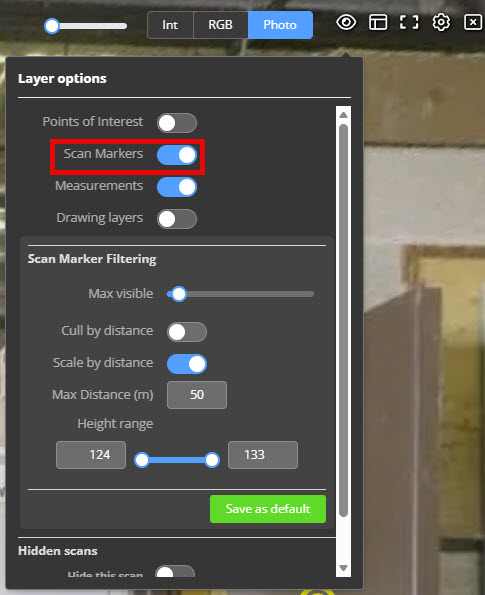
When you turn on the scan markers, you will see the location of other scan setups shown as a yellow semi-transparent "bullseye" marker. as shown below.
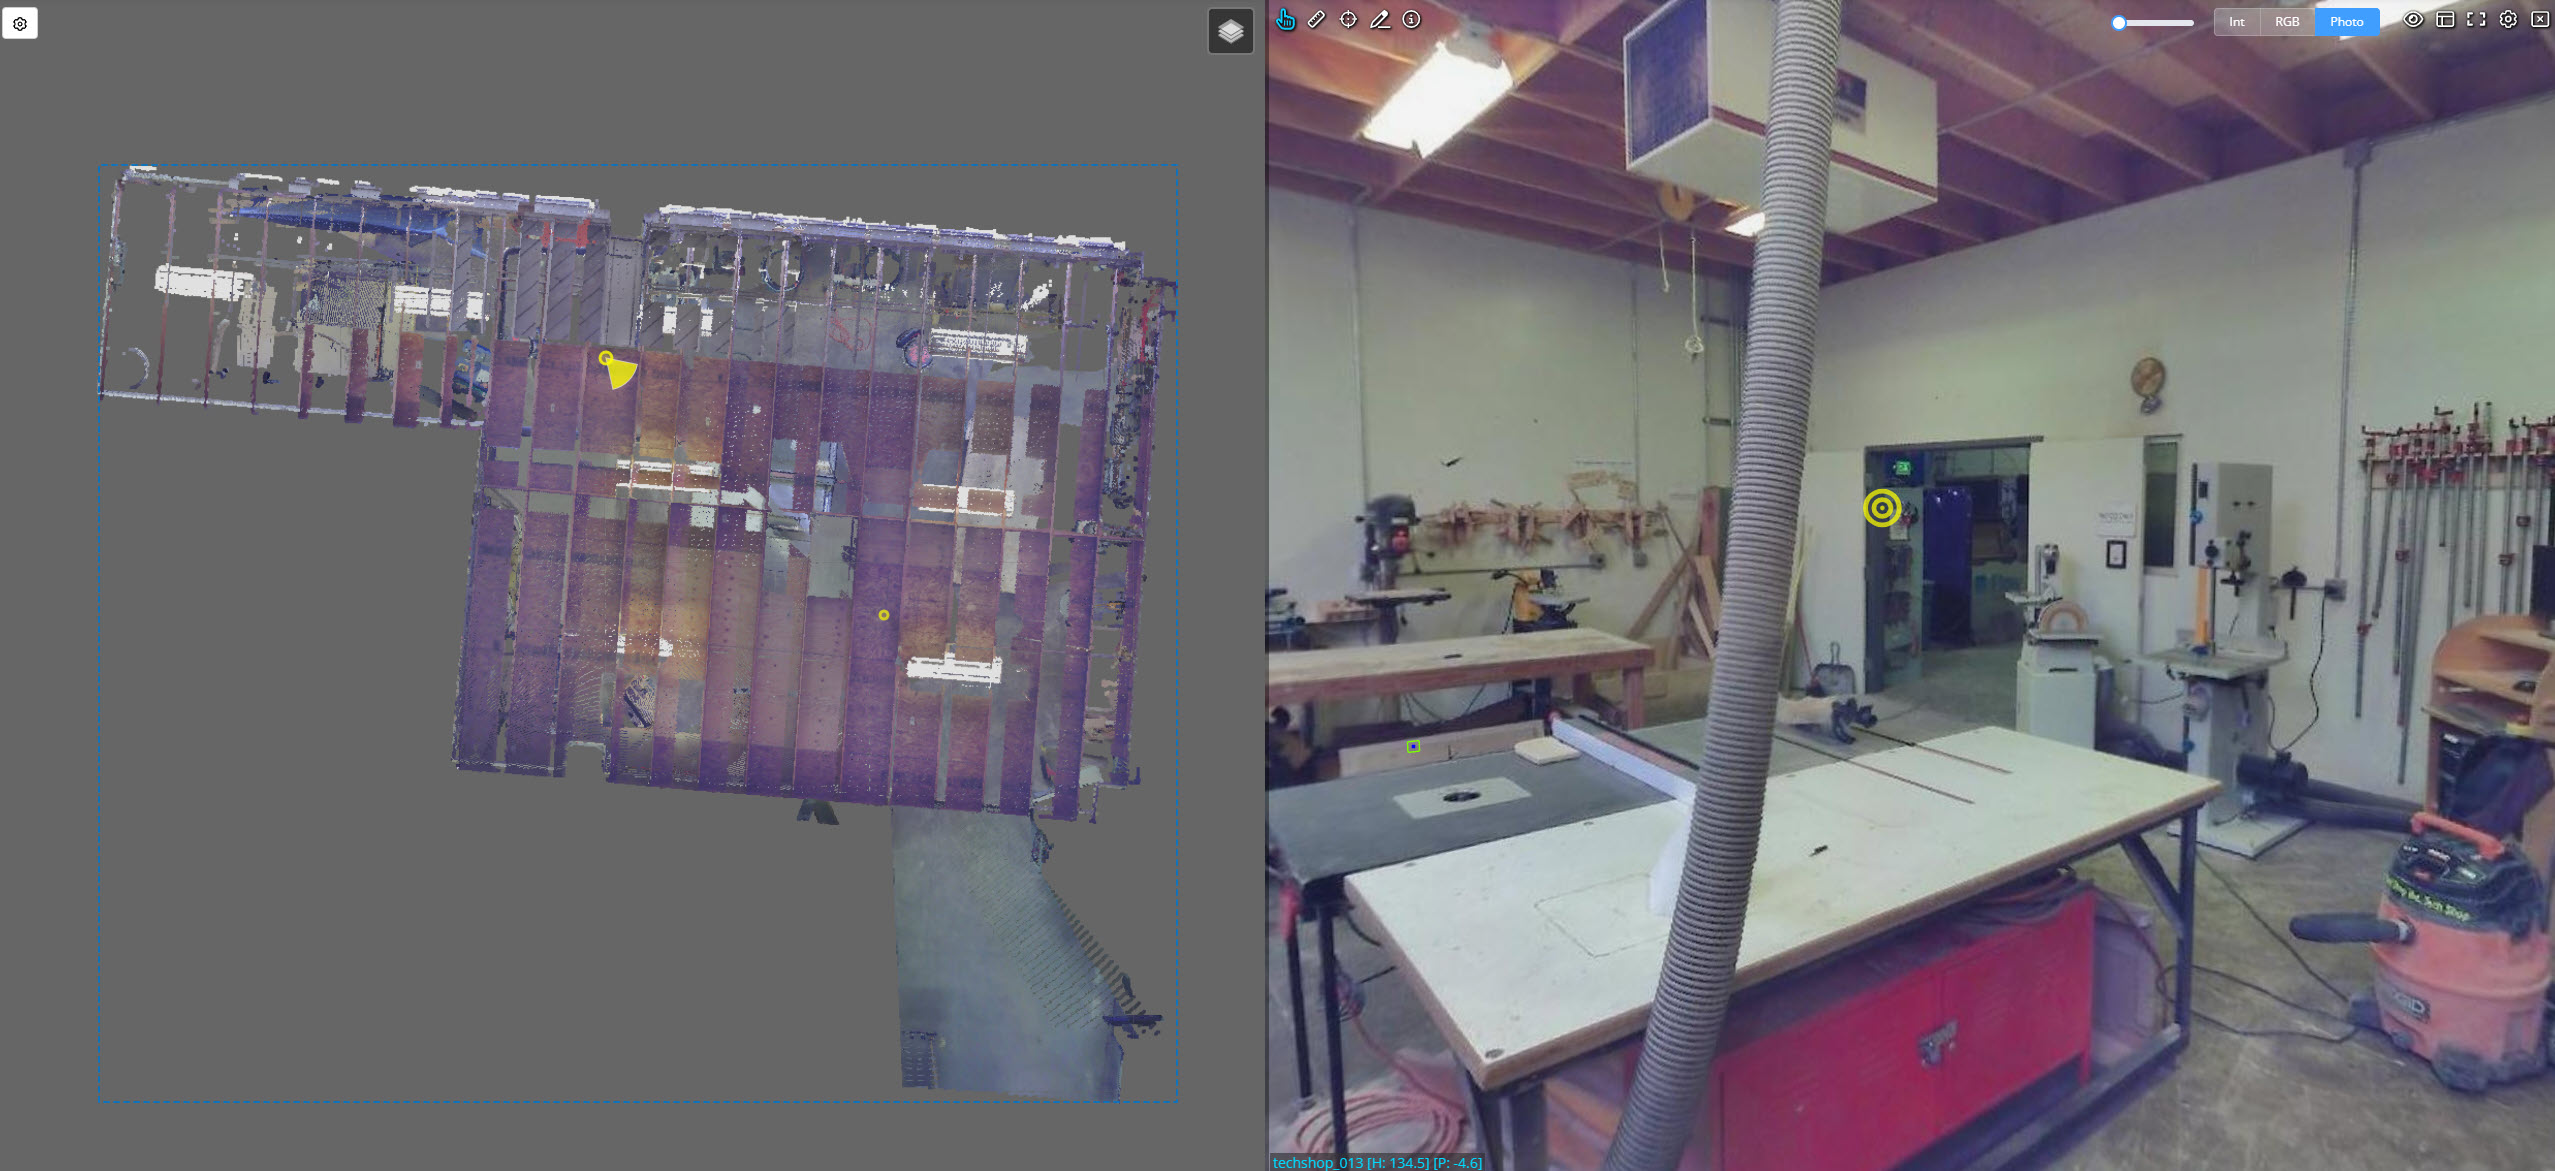
You can hover your mouse over the marker to get information regarding the distance to the scan and the height difference from the current setup. If you have the overview map displayed (as shown below), the selected scan will also highlight in the overview window

Click on the scan marker to transition your view to the selected scan setup.
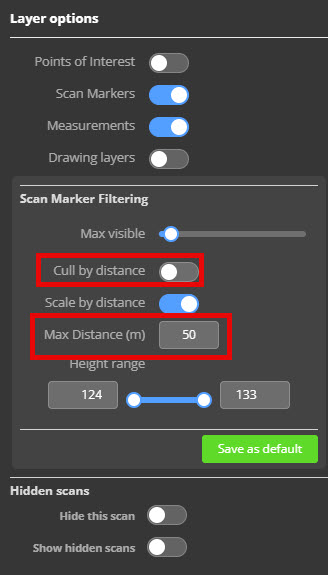
Setting the maximum number of markers to display
If you have a large number of scans, then it may be useful to set a maximum number of markers to display. By default, the closest 25 scan positions (after other filtering has been taken into account) will be shown. You can adjust this value by using the Max visible slider.

This will show you the maximum number of scan markers that are currently being displayed, along with the total number that are available. Adjust the slider as required to de-clutter the display.
Filtering displayed scans by distance
If you have a large number of scans, you can filter the displayed scan markers based on the distance from your current scan. Toggle the Cull by distance option in the Visibility menu to enable filtering. Use the Max Distance field to edit the culling distance (press enter after setting the value to update filtered scanners). A visual representation of the culling radius is displayed in the Scan location map.