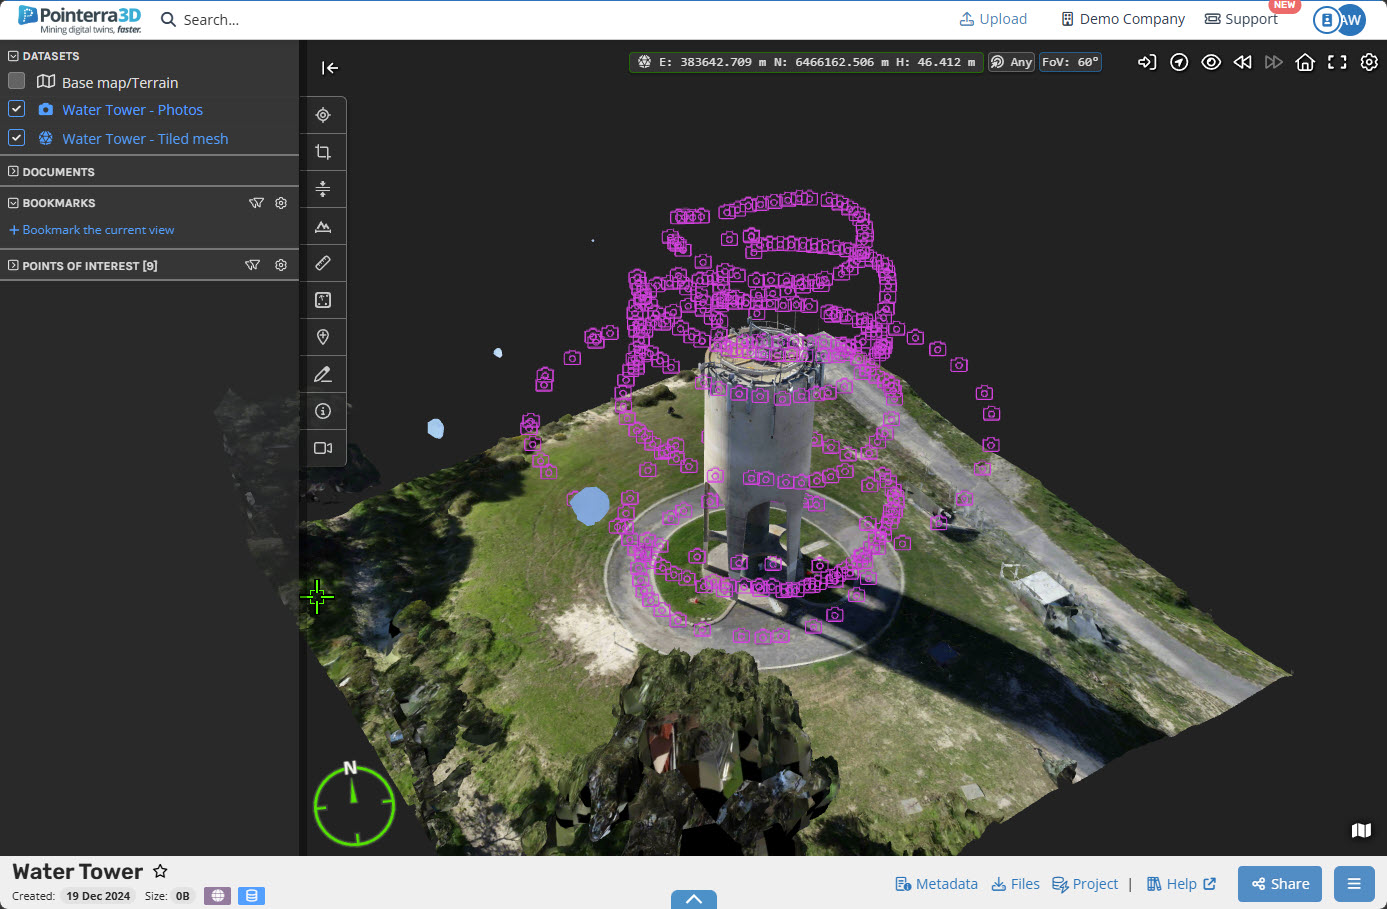
Uploading a Cesium 3D Tileset mesh
A Cesium 3D Tileset is the optimal format for view 3D reality meshes or surface mesh models on the Pointerra platform as it supports Level-of-detail (LOD) loading. Hence if your reality capture or CAD software supports exporting in this format it is highly recommended over the other supported 3D model formats. However if you are unable to, please seethis help article on how to upload non 3D tileset reality meshes.
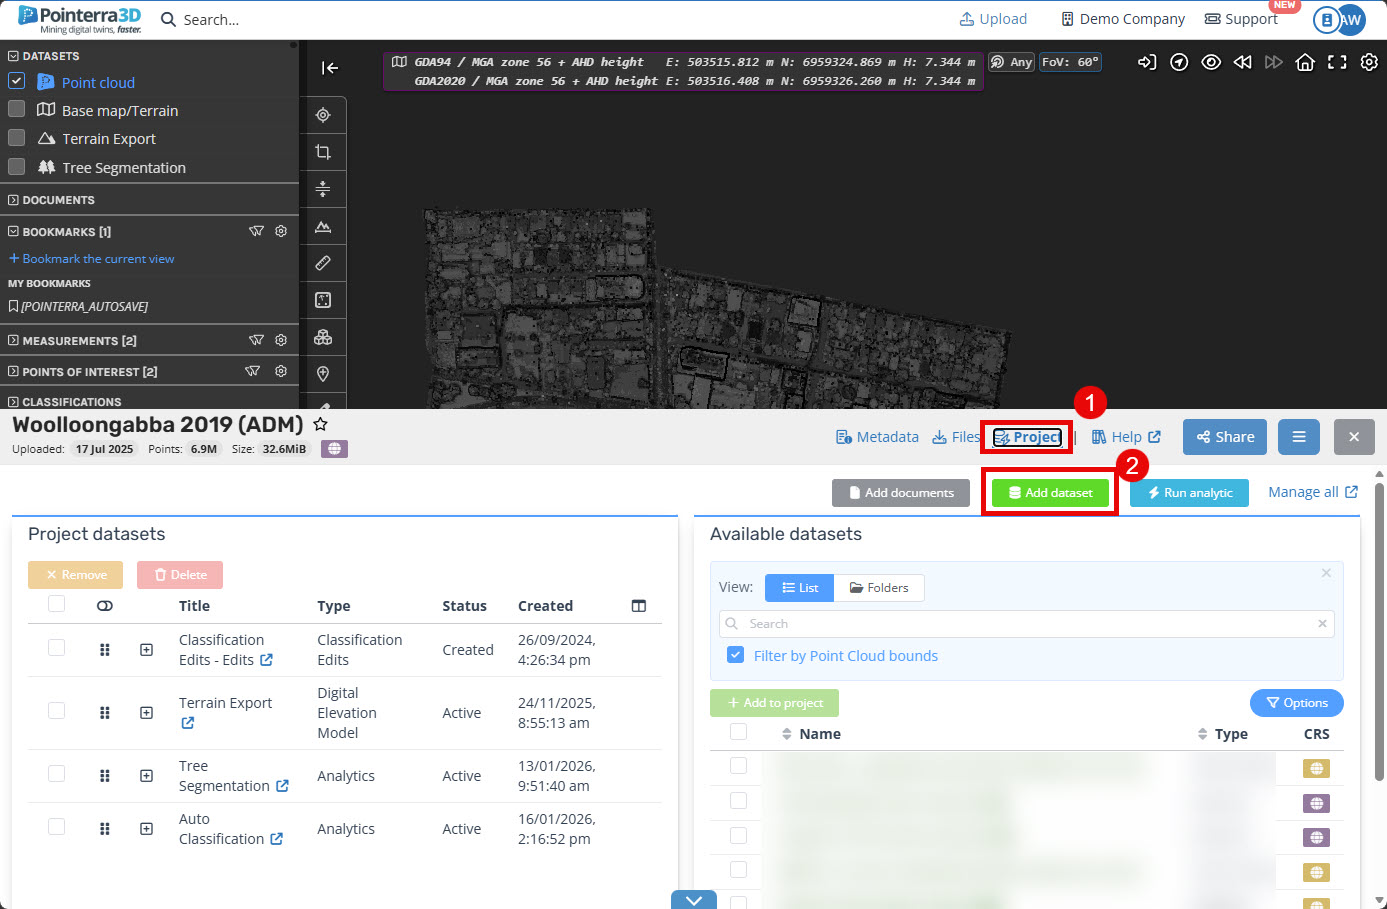
Load the Point Cloud project and navigate to its Projects (1), as shown below. Click Add dataset (2)
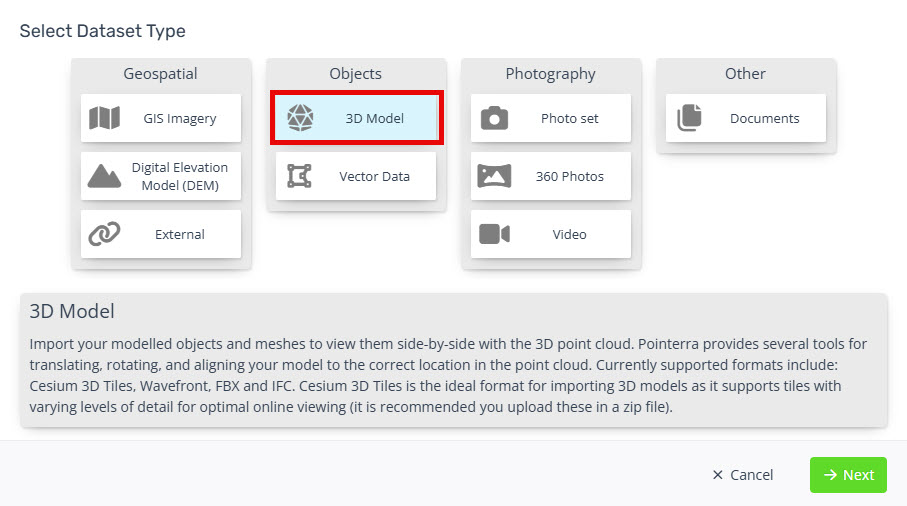
Click the 3D Model button and click Next.
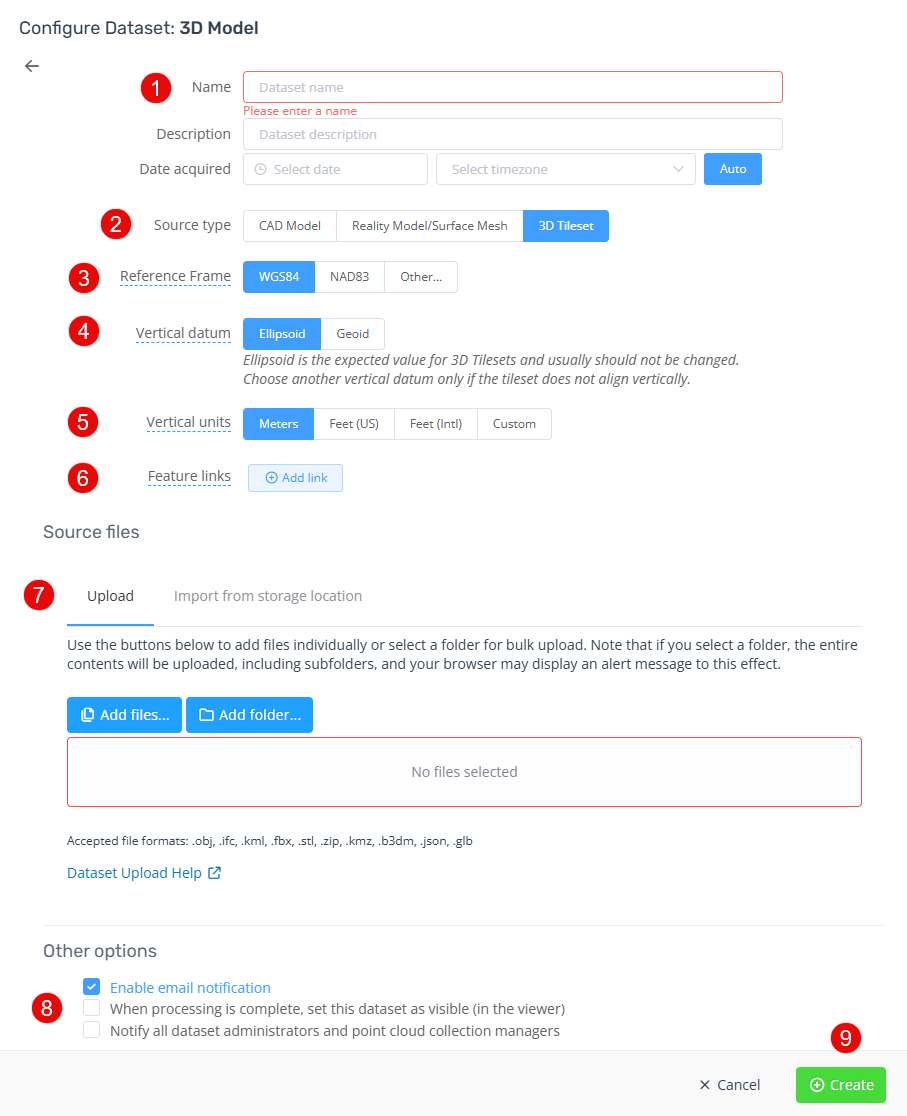
Give the dataset a name, description (optional) and date acquired (optional)
Choose 3D Tileset
-
Choose the desired reference frame.
Most cases will be WGS84, but if you see an offset try either NAD83 or Other.
Choose either Ellipsoid or Geoid
Choose the desired Vertical units.
Specify one or more URL templates to display when a feature is selected with the info tool.
-
Select the source files/folders.
Cesium 3D Tiles should be zipped.
Choose if you wish to make this dataset visible by default and/or email all dataset administrators.
Click Create to start the upload and import.
Once the upload and import completes, you will receive an email notification saying the dataset is ready for viewing, reload the Point Cloud project web page to view the Mesh.