Cropping points with the Vertical Cropping Tool
The Vertical Cropping Tool allows you to set a maximum height and minimum height for points to be view-able in the 3D viewer. The tool can be accessed from the tools palette.
 Once the tool is activated, clicking on a point in the 3D view will set the maximum height to that point's height. A white slider will appear (turns green when hovered over) that allows you to control the upper height limit interactively.
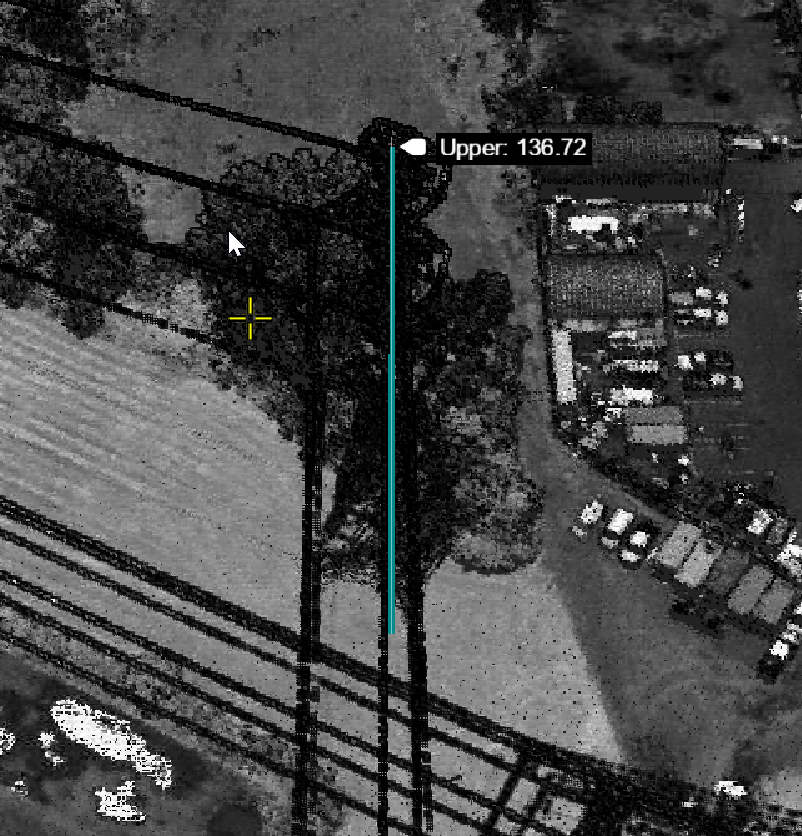 A lower height limit can be set by either right clicking and selecting Set Lower Clip from the context menu, or using SHIFT+Left Click. Like the upper limit, you can adjust the lower height limit manually via a slider.
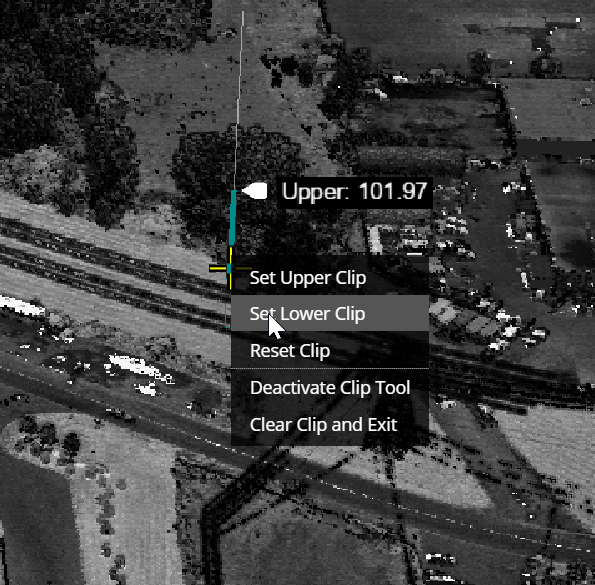
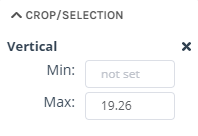
When a vertical crop has been initialized, a pop menu appears on the right side of the viewer. Here you can manually input both minimum and maximum vertical crop values, instead of doing it with the sliders.
The current clipping values can be reset by selecting Reset Clip from the context menu or pressing the ESCAPE key. This will keep the tool active and allow you to select new values.
You can deactivate the tool by deselecting the tool from the tool palette, selecting Clear Clip and Exit from the context menu or by pressing the ESCAPE key to clear the current cropping and again to exit the tool.
The Vertical Cropping tool can be used in conjunction with the Horizontal Cropping Tool to crop and slice selected regions of a point cloud.