Taking Measurements in ScanView
The measurement tool allows you to make accurate measurements from the structured scan data within ScanView. Measurements made while in ScanView are synchronised with the 3D view, allowing you to view measurements made within a scan in 3D.
Creating a measurement
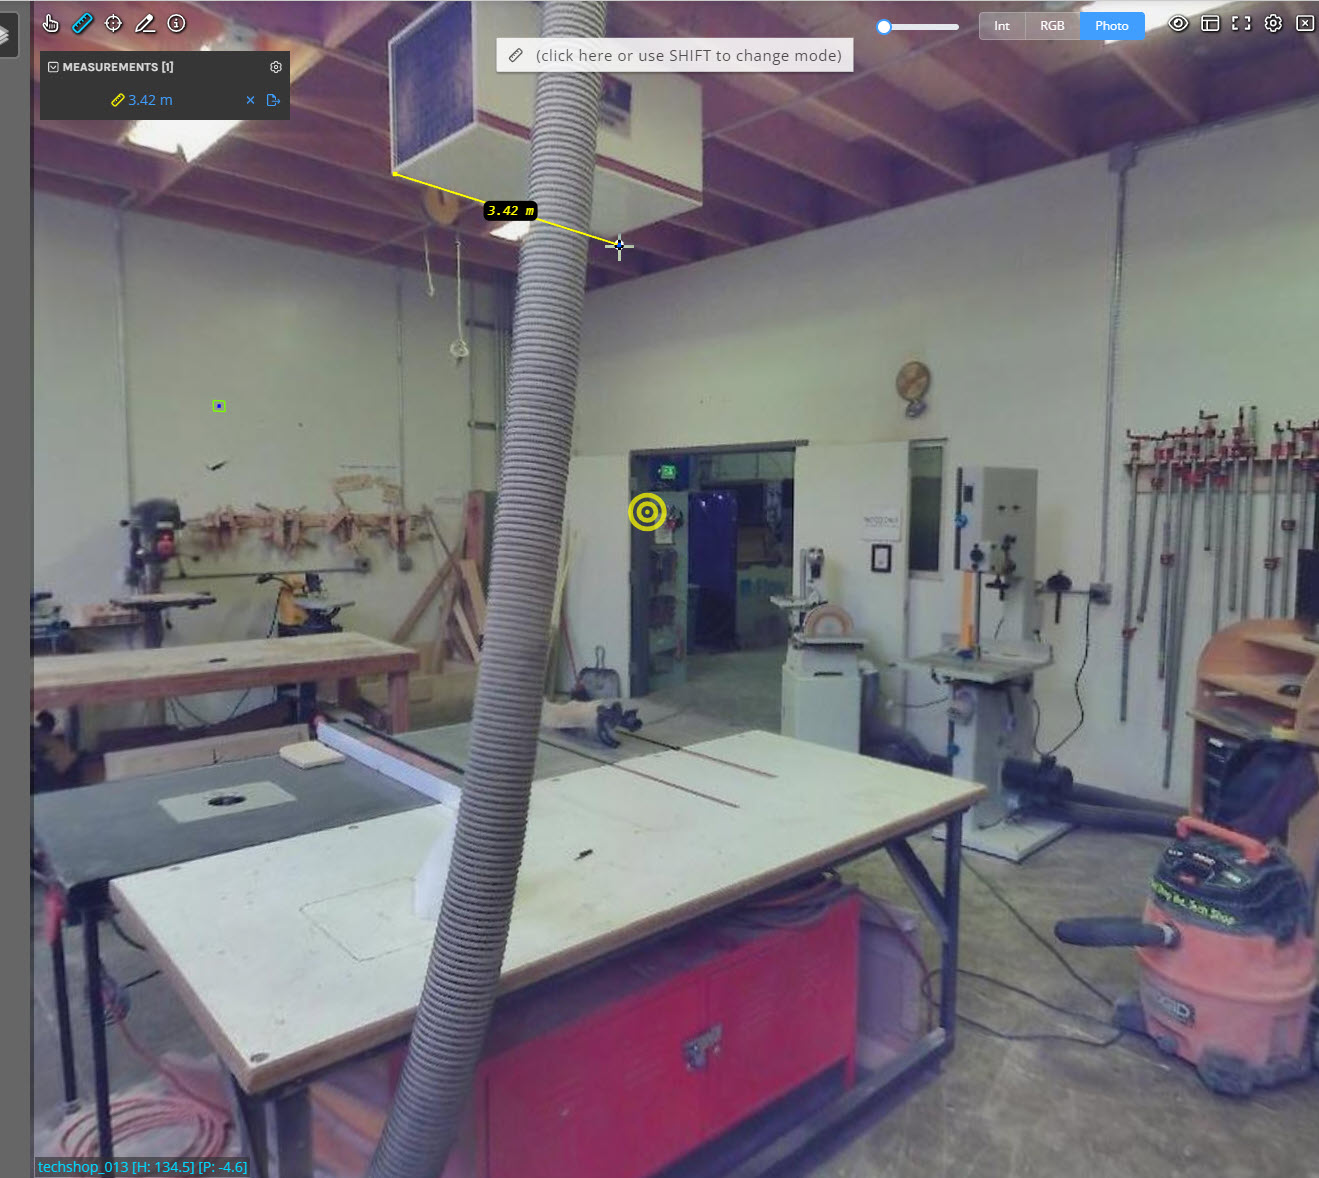
To measure distances in ScanView, activate the measure tool in the upper left of the scan view window (shortcut key: SHIFT + m).
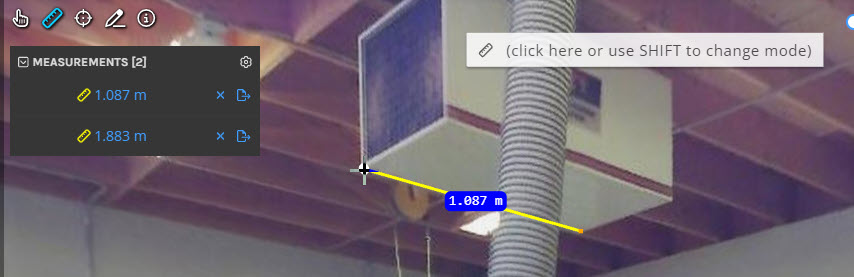
With the tool active, click anywhere in the scan (except areas that do not have depth information - your cursor will change to indicate that depth data is not available if you click in these areas) to start a new measurement. A rubber-banding line will appear linking the initial position to your cursor's current location and an approximate distance between the endpoints will be displayed in orange. Complete the measurement by clicking on another location in the scan, and the distance will update to a final, more precise value.
You can abort the current measurement by pressing ESCAPE and deactivate the measure tool by pressing ESCAPE a second time.
The distance measurement tool has 3 modes:
- 3D Distance mode (default) - unconstrained 3D distance between the 2 picked points.
- Horizontal mode - measures the horizontal distance between the 2 picked points.
- Vertical/Height mode - measures the vertical distance between the 2 picked points.
You can cycle through these modes using the SHIFT key, or by adjusting the mode from the options panel (click the Cog icon on the measurements panel to access). The current mode is displayed in the upper middle of the view while the measurement tool is active.
TIP: Taking measurements from a coloured scan can sometimes be deceptive, as the photo information may not exactly match the information from the laser scan. The laser scan may have picked up objects during the scan that were not in exactly the same position when the photo data was collected, or the photo may not have been perfectly aligned with the scan during post-processing in some cases (this will depend on how the scan was processed before uploading to Pointerra).
To be sure of using the correct depth data, we recommend using the intensity data when measuring, or at least cross-checking your measurements with the intensity data (or in the 3D point cloud) to confirm the positional accuracy.
Editing measurements
To edit an existing measurement hover over one of its end points while the measurement tool is active. To interact with the selected end point, click and drag it with the mouse. While dragging, you can move the end point to a new location or change the measurement's mode by pressing SHIFT while holding the end point.
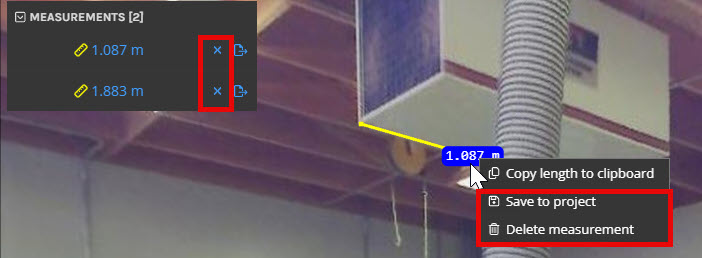
Saving and deleting measurements
Below the measurement tool icon in the upper left of the scan view is a collapsible list of all measurements in the current scan. From here you can delete (using the x button) or save measurements to the project so that they will appear when reloading the point cloud. You can also right click on a measurement and select Delete Measurement or Save to project from the context menu.
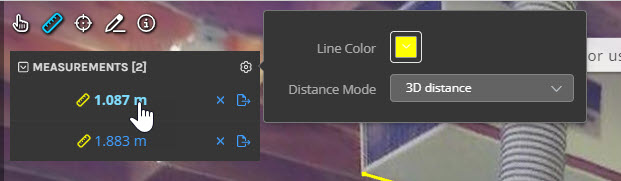
Adjusting measure tool properties
 Adjusting measure tool properties
To adjust the properties of measurements, select the gear icon next to the measurements list below the measurement tool. from this menu, the line colour can be adjusted and the distance mode changed. Note that these settings are global and will apply to all future measurements.
You can show or hide all measurements using the visibility options in the upper right of the scan view (shortcut key: m).