Adding an image to a point of interest
If you wish to associate an image/photo with a location in the point cloud, you can create a point of interest and then upload your image as part of the POI data. POIs that have images associated with them will be displayed with a camera marker in the 3D viewing window.

Uploading an image
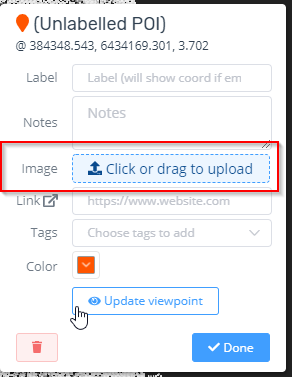
Either add a new POI, or select an existing POI and open the POI edit dialog. Here you will see that one of the fields is an image field.

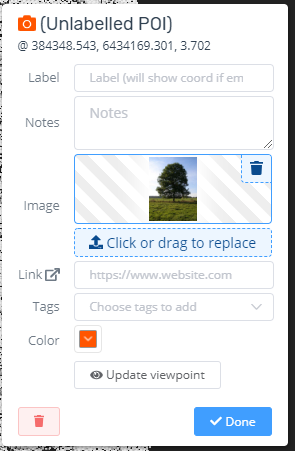
Click the upload button (or drag an image file from Windows Explorer on to the button) and select the image to upload. Once the image has loaded, you will see a thumbnail preview of the content in the Image field.

If you click the Done button, the image will be permanently saved to the database and available as a property of the POI in the future. Note that it might take a few seconds to save very large images.
Viewing the image
From the POI properties viewing dialog, or the edit dialog, click on the thumbnail image to launch the full screen image viewer. When finished, press Escape, or click the close button at the top-right of the image viewing window.
You can use the image controls at the bottom of the image viewer to perform tasks such as rotating the image, viewing at 1:1 scale, etc.
