How to run Poles and Wires analytics
Note: Poles and Wires Analytics are not enabled by default for all customers. Please lodge a support request if the below options are not available and you would like trial access.
Overview
The Pointerra Poles and Wires analytics can be used to extract the power poles and wires from an unclassified point cloud.
The results includes:
Poles - graphics showing base and top position (lean, height)
-
Wires - the catenary wires that span between the poles
Attachment points of wires to poles
Service wires - building power wires that run from the poles to the buildings.
Down guys
Cross Arms
Lights
Companion Poles
Circuit Assignment
Pole and Wire Attribution
Clearance info
Pole Leans
Encroachments
Strike Trees
The analytics also generates a classified point cloud that includes classes for:
Ground
Buildings
Power Poles
Transmission wires
Vegetation
Vegetation encroachment
Noise
The optimal workflow is to run a first stage of the analytics, then use the integrated web browser based tools to QA/Edit the results. Then finally export the results in the required format and also auto generate a classified point cloud.
Process
-
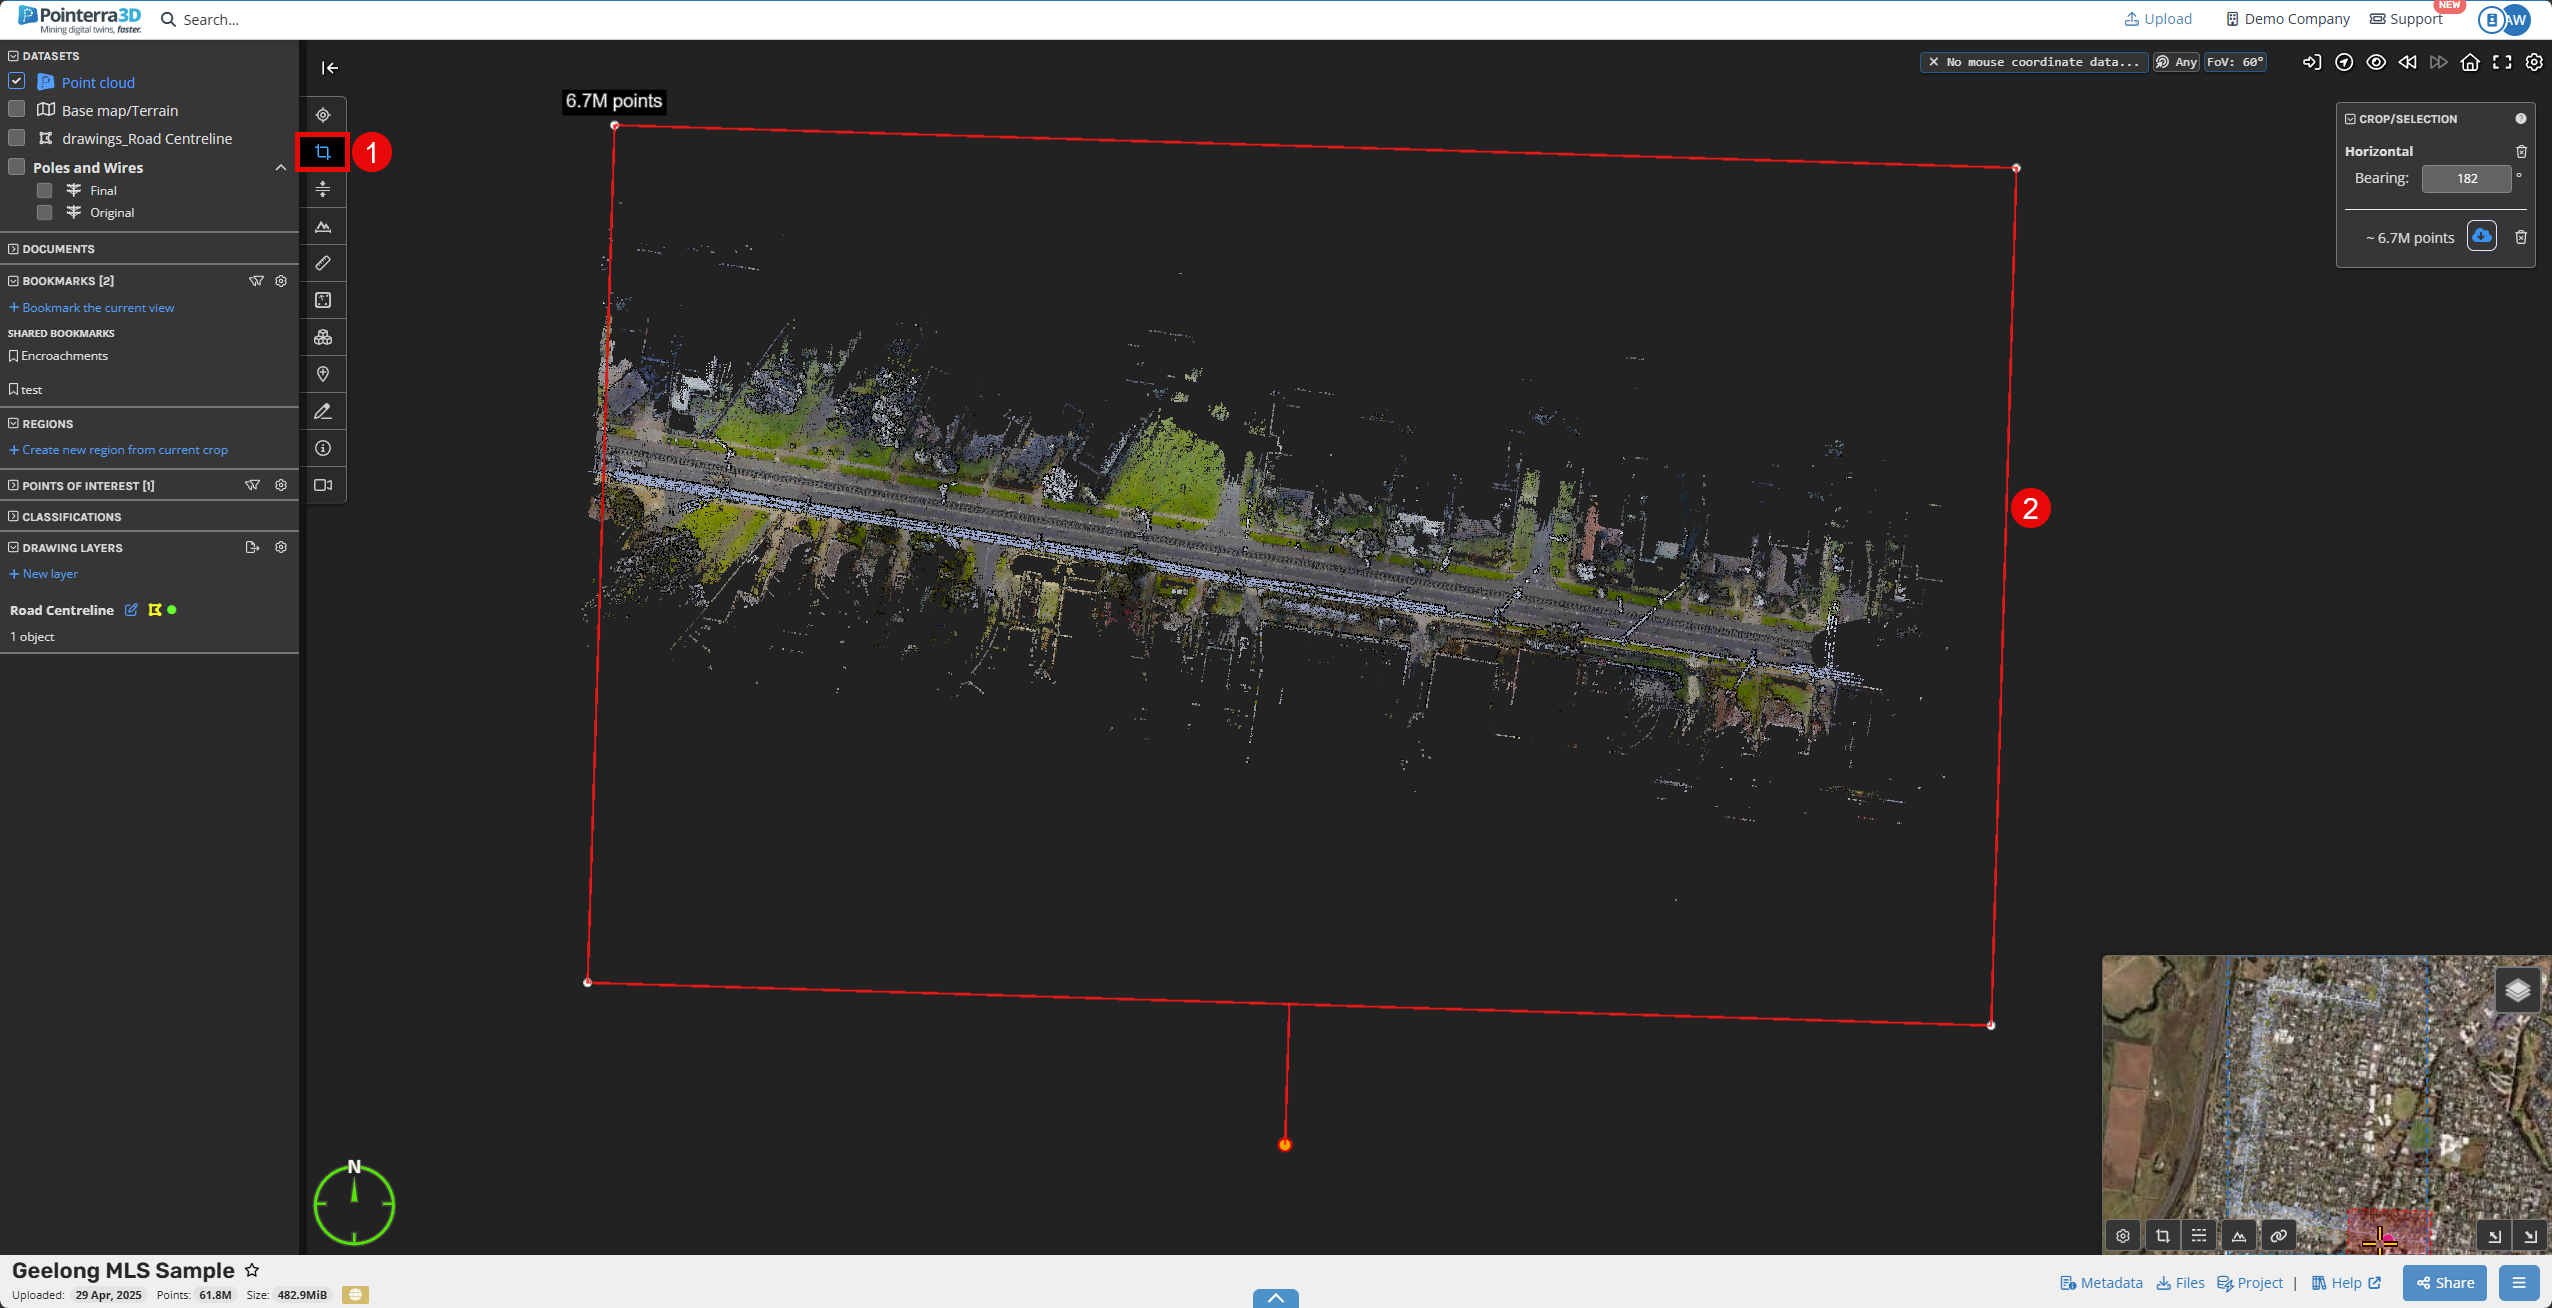
The analytics can be run on the full point cloud or a subset. To run on a subset of the overall point cloud apply a rectangle clip to retain only the point cloud of interest before continuing:
Select rectangle clip from the toolbar (1)
Define the clipping extents in the point cloud viewer (2)
Note this will run feature extraction to the extents of the clip but create classifications across the entire point cloud.
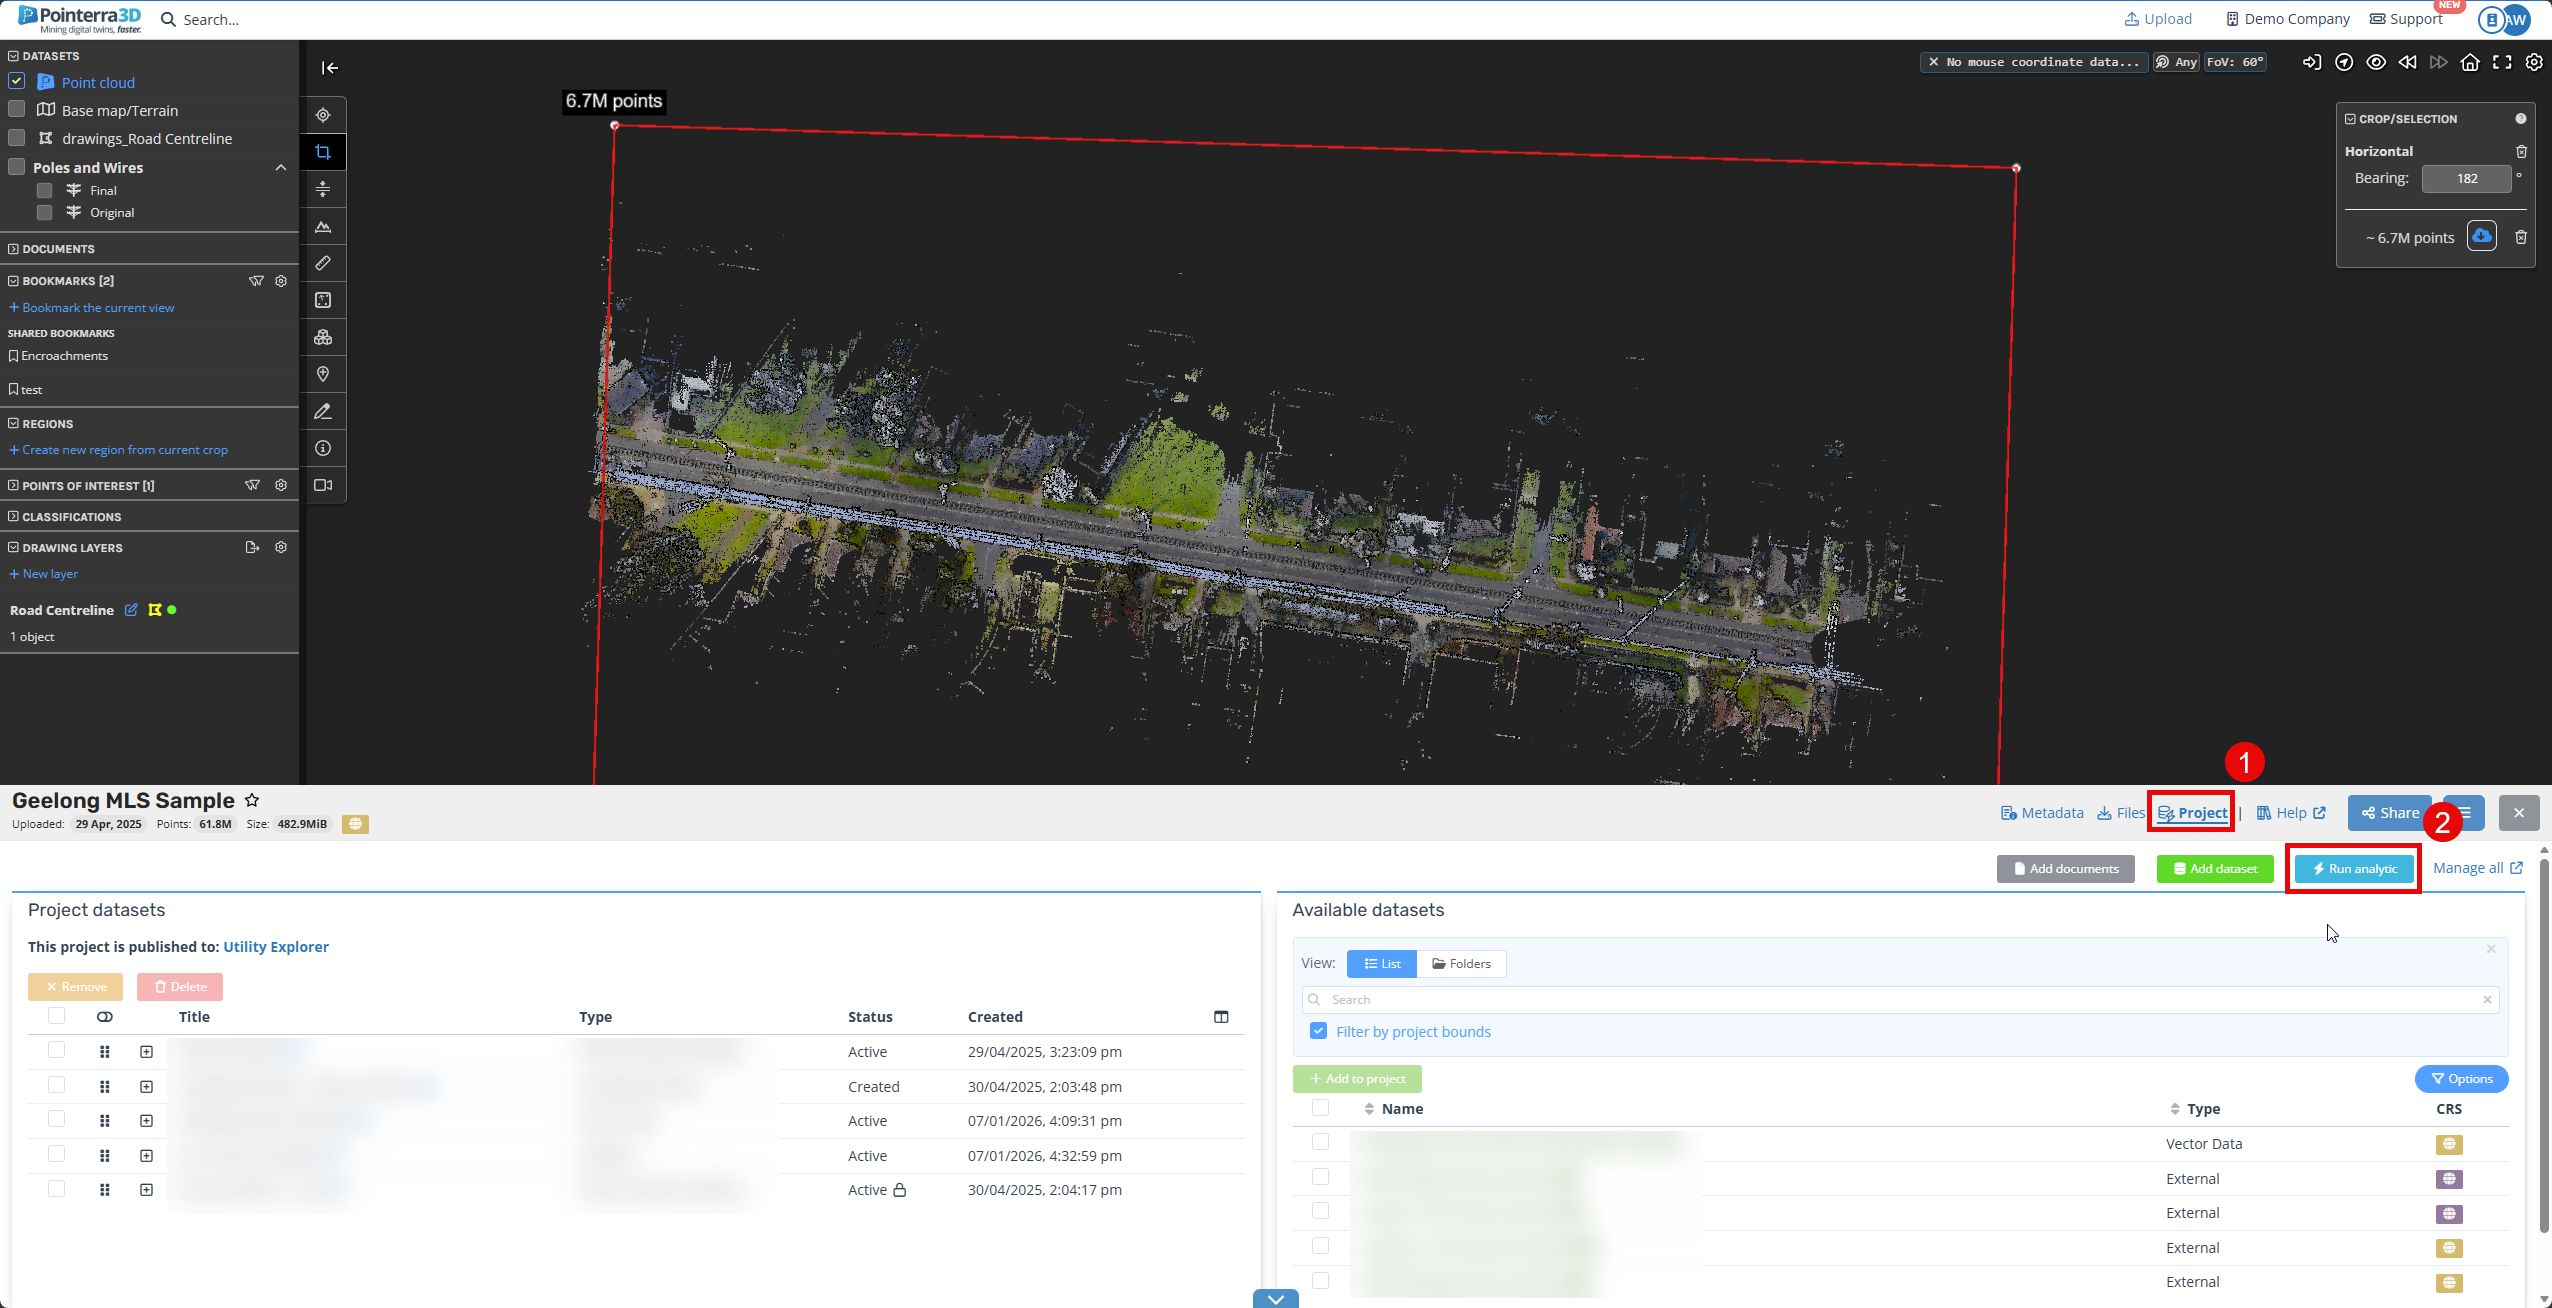
From here the 'Datasets' tab on the bottom of the 3D viewer (1)
Click "Create new dataset" (2)
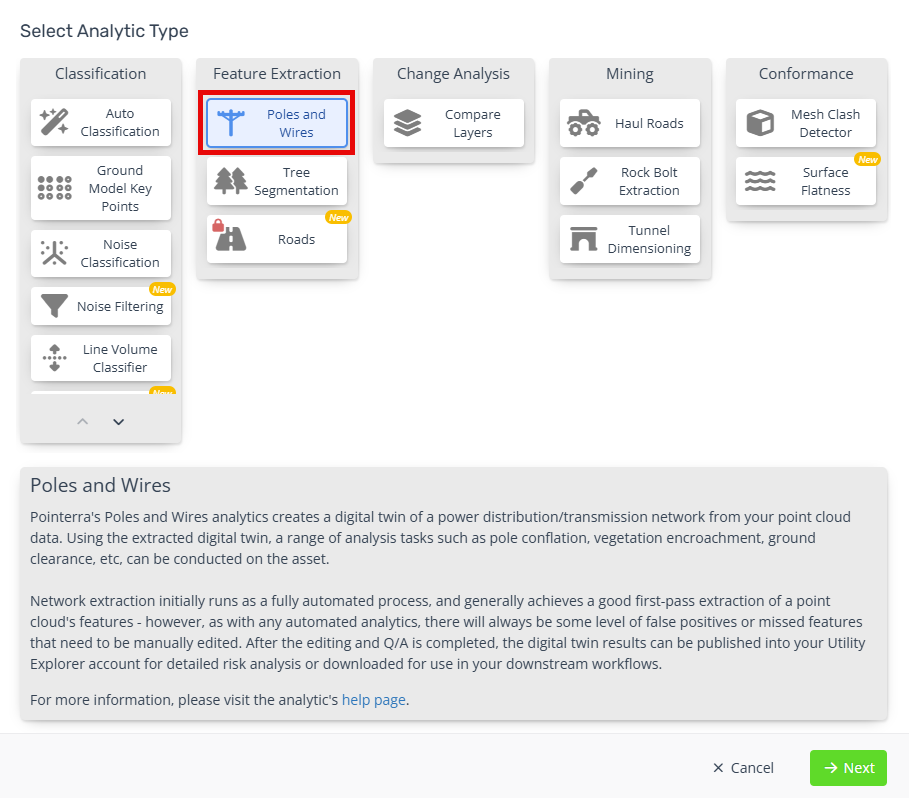
Select "Poles and Wires" from the Feature Extraction category.
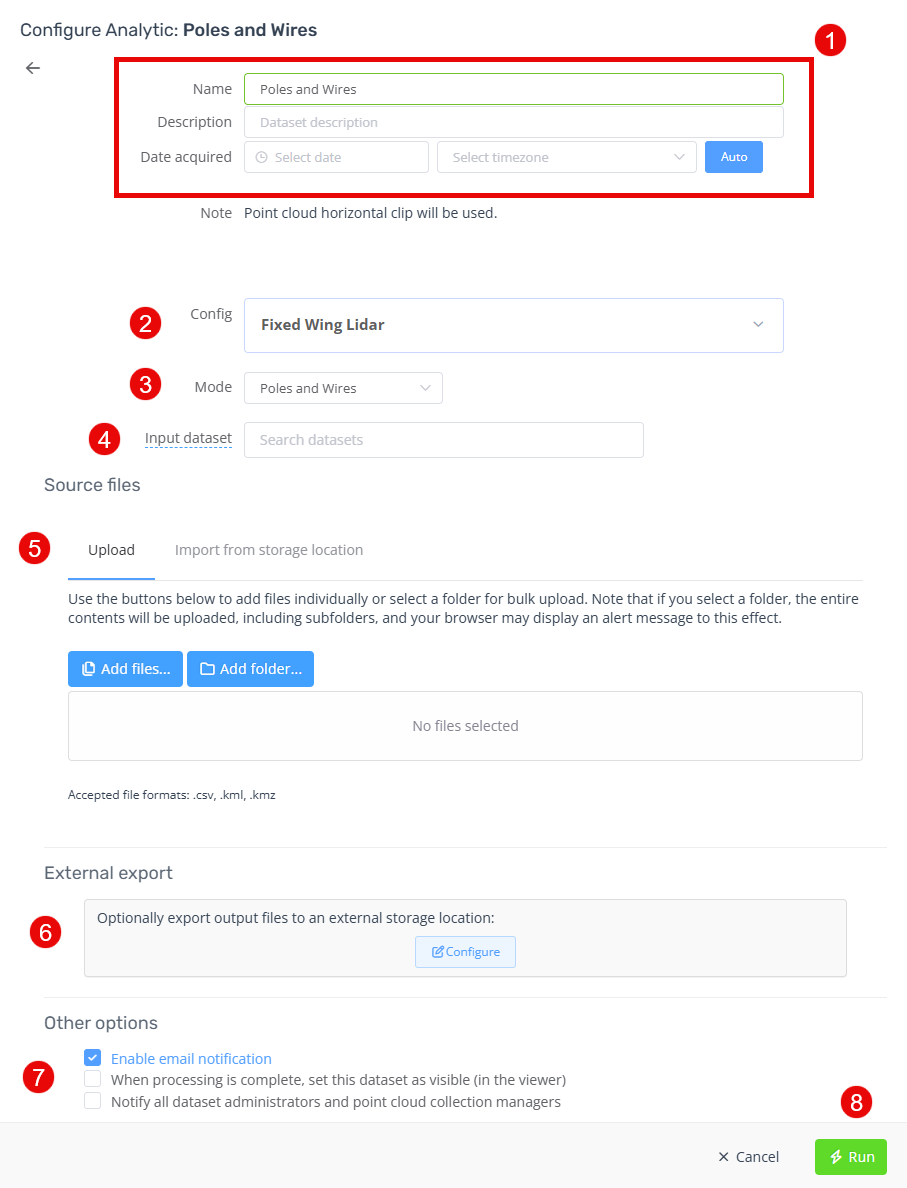
Provide details on the dataset's 'Properties', such as name, description, date acquired. (1)
Choose the desired config, which will be based on the type of lidar data you are running. (2)
Choose the desired Mode, whether you want full P+W with Classification, P+W with pole diameters, Classification only or manually create an empty P+W. (3)
Optionally choose a previous P+W dataset that you want to use those instead (4)
Optionally upload a CSV/KML or ple locations to assist with identifying poles. (5)
Optionally choose an external storage location to send the results to. (6)
Select any other options. (7)
Click "Create" to run the analytics. (You will receive an email when the analytics are finished) (8)
NOTE: For help editing the P&W analytics, see the following guide on How to QA/Edit the Poles and Wires output