Creating video flythroughs
Use the Video Recorder Tool to create a camera path and then record a video flythrough from the path that you have defined.
To use the Video Recorder tool, select the tool from the tool palette
Please note that the video recorder tool is not available through guest sharelinks, unless the guest has a Pointerra account.
Creating a flight path with keyframes
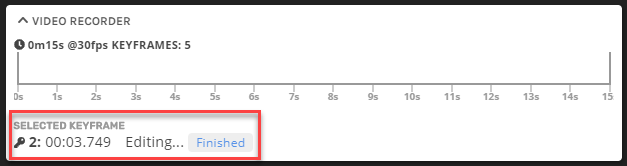
The flight path is defined by a set of keyframes and the time interval between each keyframe. When you first open the Video Recorder Tool, you will see the tool dialog appear in the viewer window.

To create your first keyframe, setup the desired starting view for your keyframe (this will be the first frame of the final video that you create) and press the N Key. Then move to the position for the next keyframe - the video will interpolate the camera path between your keyframes based on the spline function that you choose (more on this later) to create a smooth flight path through all of you keyframes. Once you have at least 2 keyframes created, you will see the timeline appear (if you zoom out in the 3D window, you will also see a 3D representation of the flight path).

By default, you video will run for 15 seconds - this can be changed in the options (click on the "cog" to view options).
Previewing the flight path
You can preview your flight path at any time by clicking on the blue "play" button. This will show you how the flight path will look when interpolated between all of the keyframes. Note that the point cloud data may not fully update as the path is animating - in the final render, it will ensure that all points are loaded for each frame of the video.
Editing keyframes
If you need to change some of the keyframes, you can move the keyframe times to make transition between keyframes shorter/longer, or you can update the camera view for the keyframes.
Changing the keyframe time
To update the time interval between each keyframe, drag the keyframe markers on the timeline to change the amount of time it takes to animate between the keyframes. Note that you cannot move the first or last keyframe. Moving the markers along the timeline will result in the camera velocity changing as it animates between the keyframes. This allows you to slow down or speed up the video between keyframes.
Changing the camera view for a keyframe
To change the actual view for a keyframe, you can either:
Click on the camera model corresponding to the keyframe in the 3D view
Click on the keyframe on the timeline, and then select the edit mode
SHIFT click a keyframe on the timeline to go straight into edit mode.
In edit mode, the camera will be locked at the keyframe's 3D location and you will be able to use your mouse to adjust the view. Click the Finished button on the timeline (or press Escape) to finish editing.
Recording your video
Once you are satisfied with the flight path, click to the red Record button to generate the video file. This will perform a frame-by-frame recording, ensuring that the point cloud is fully resolved before capturing each frame of the video. We recommend that you leave the browser tab in the foreground to ensure the best recording performance and quality.
When the recording is done, a save dialog will be displayed.
Additional options and help
There is more detailed help available in the tool. Click on the options cog icon to show other options and access the help dialog,