Assigning attributes (circuit type) to span wires
As part of the Poles and Wires editing process, you have the ability to tag each wire with an attribute - typically this is used to assign a circuit type to the wires. The assignment of the circuit type can then be used in a number of downstream analytics processes, including:
Color of the wire in the viewer and possible display filtering based on the assigned wire type
Assignment of a defined feature class/code to points along the wire, based on the assigned circuit type
Determine if the wires is included in encroachment stages, and which strategy is used for the encroachment analysis for the wire
Inclusion of the value in other outputs, such as SHP or KML files
Another key benefit of assigning circuit types to wires is that this allows the edit tool to do automatic validation across spans. When all wires in a span are assigned circuit types, the edit tool will attempt to auto-assign (based on spatial adjacency tests) all matching wires on adjacent spans. After the tool has been run, spans that had their circuits updated will be temporarily displayed in purple and all others in red. This can speed up the QA process significantly, by using the wire information to auto-check spans for you.
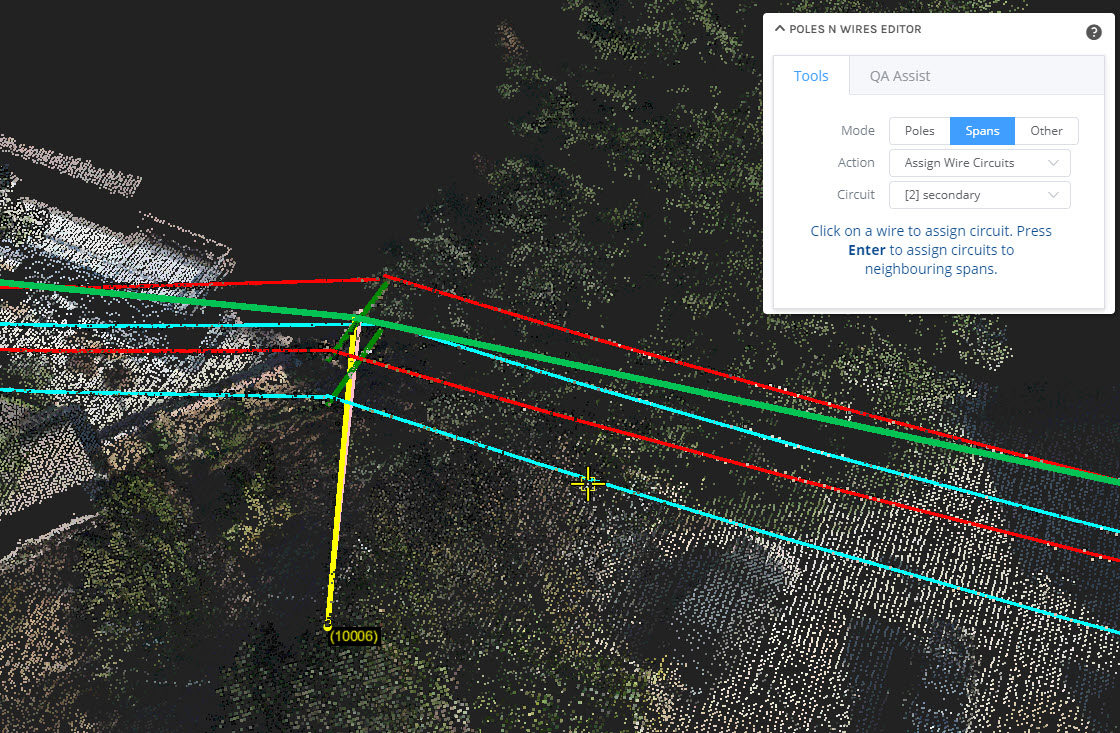
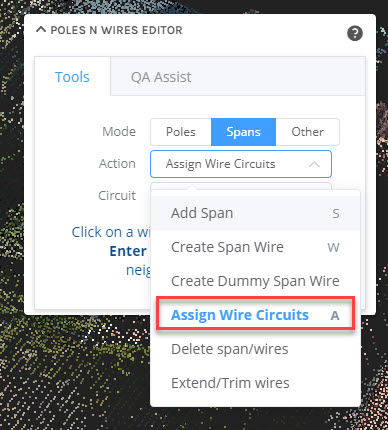
Using the Assign Wire Circuits tool
The Assign Wire Circuits Tool can be found within the Span editing mode. You can also use the keyboard shortcut SHIFT+A to change to this tool.
When active, the tool displays a list of possible circuit types (these have been pre-configured as part of your company metadata). The tool will automatically assign a shortcut key to each circuit type, based on their order in the configuration. When the tool is active, you can quickly change the circuit to be assigned by pressing the corresponding key (e.g. press 1 for primary) on the keyboard.
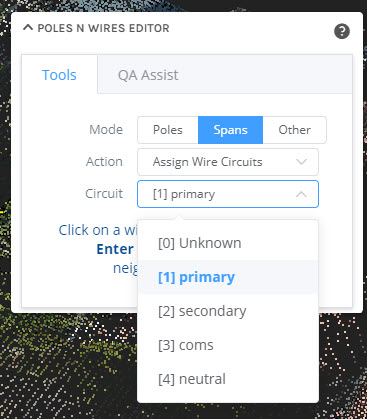
To assign the circuit type for a wire, selected the active circuit type from the Circuit dropdown (or use the corresponding keyboard shortcut) and then click on a wire to assign the circuit. The wire will immediately change colour to the configured colour of the circuit type (e.g. Primary wires will display as red by default). Note that wires that have no circuit assigned will display as pink in the viewer.
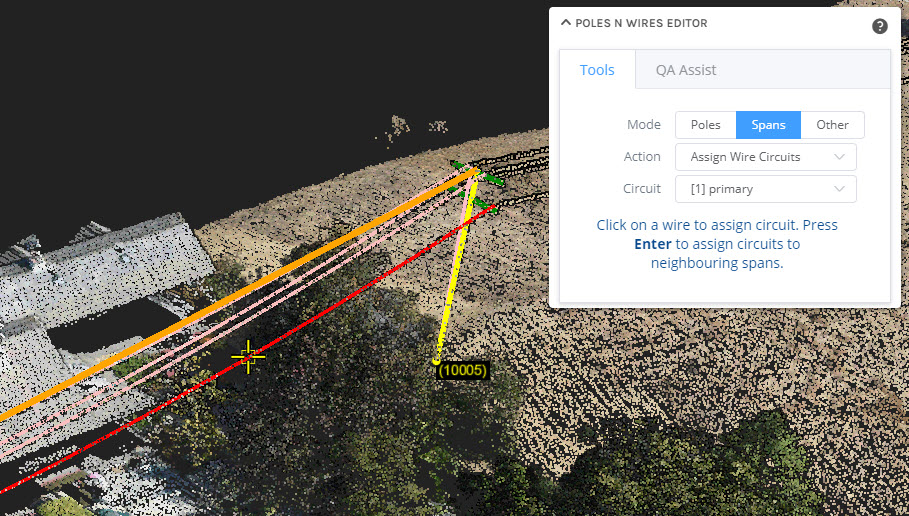
Auto-assigning circuit type adjacent spans
Once you have assigned at least one wire for a span, as shown below:
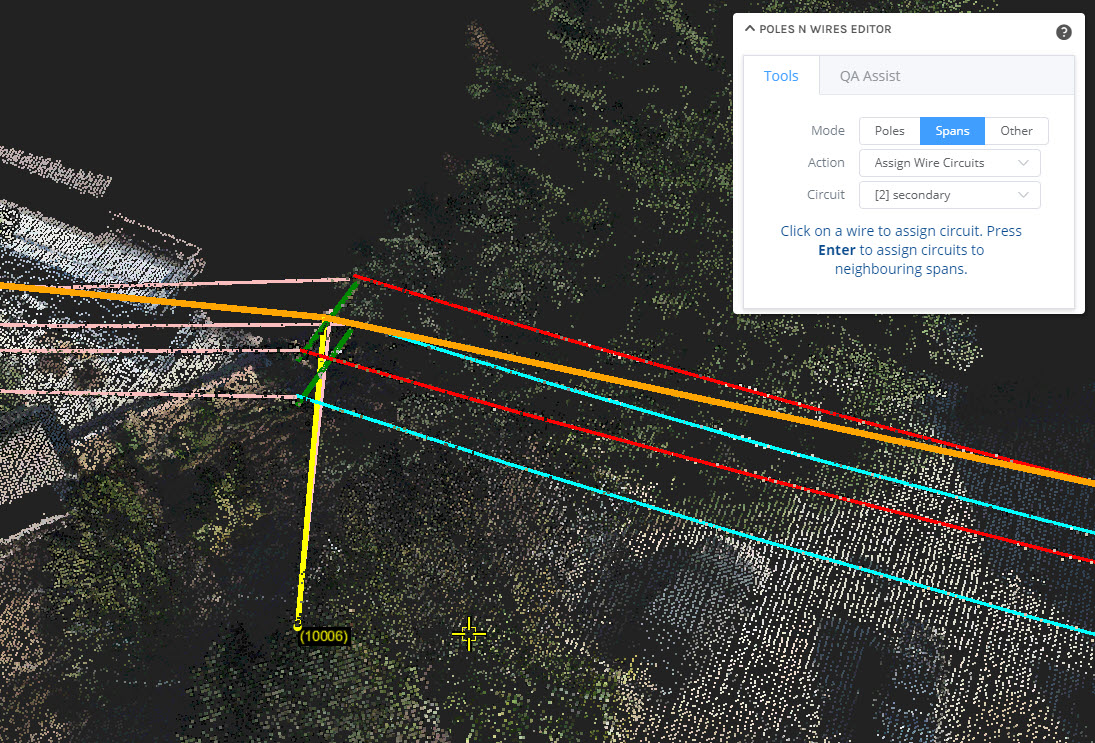
pressing the Enter key will request the tool to propagate the assigned circuit definitions as far as possible along connected spans.
If all the wires you assigned in the first span can be matched closely to wires in adjacent spans, then circuit types will be automatically assigned to the adjacent span and the process will continue with the next adjacent span until there is a mis-match. This allows you to very rapidly auto-check/QA a group of spans.
Note in the image below, which shows the view after pressing ENTER on the keyboard, that the connected span has the wires assigned.