Reliability viewing mode
Reliability viewing mode is the most distinctive of the three viewing modes. Its main purpose is to help identify problems, faults or damage on poles, through analyzing the photos that are linked to each pole (You cannot access the 3D viewer in reliability viewing mode). From this, you can report and share these findings with others.
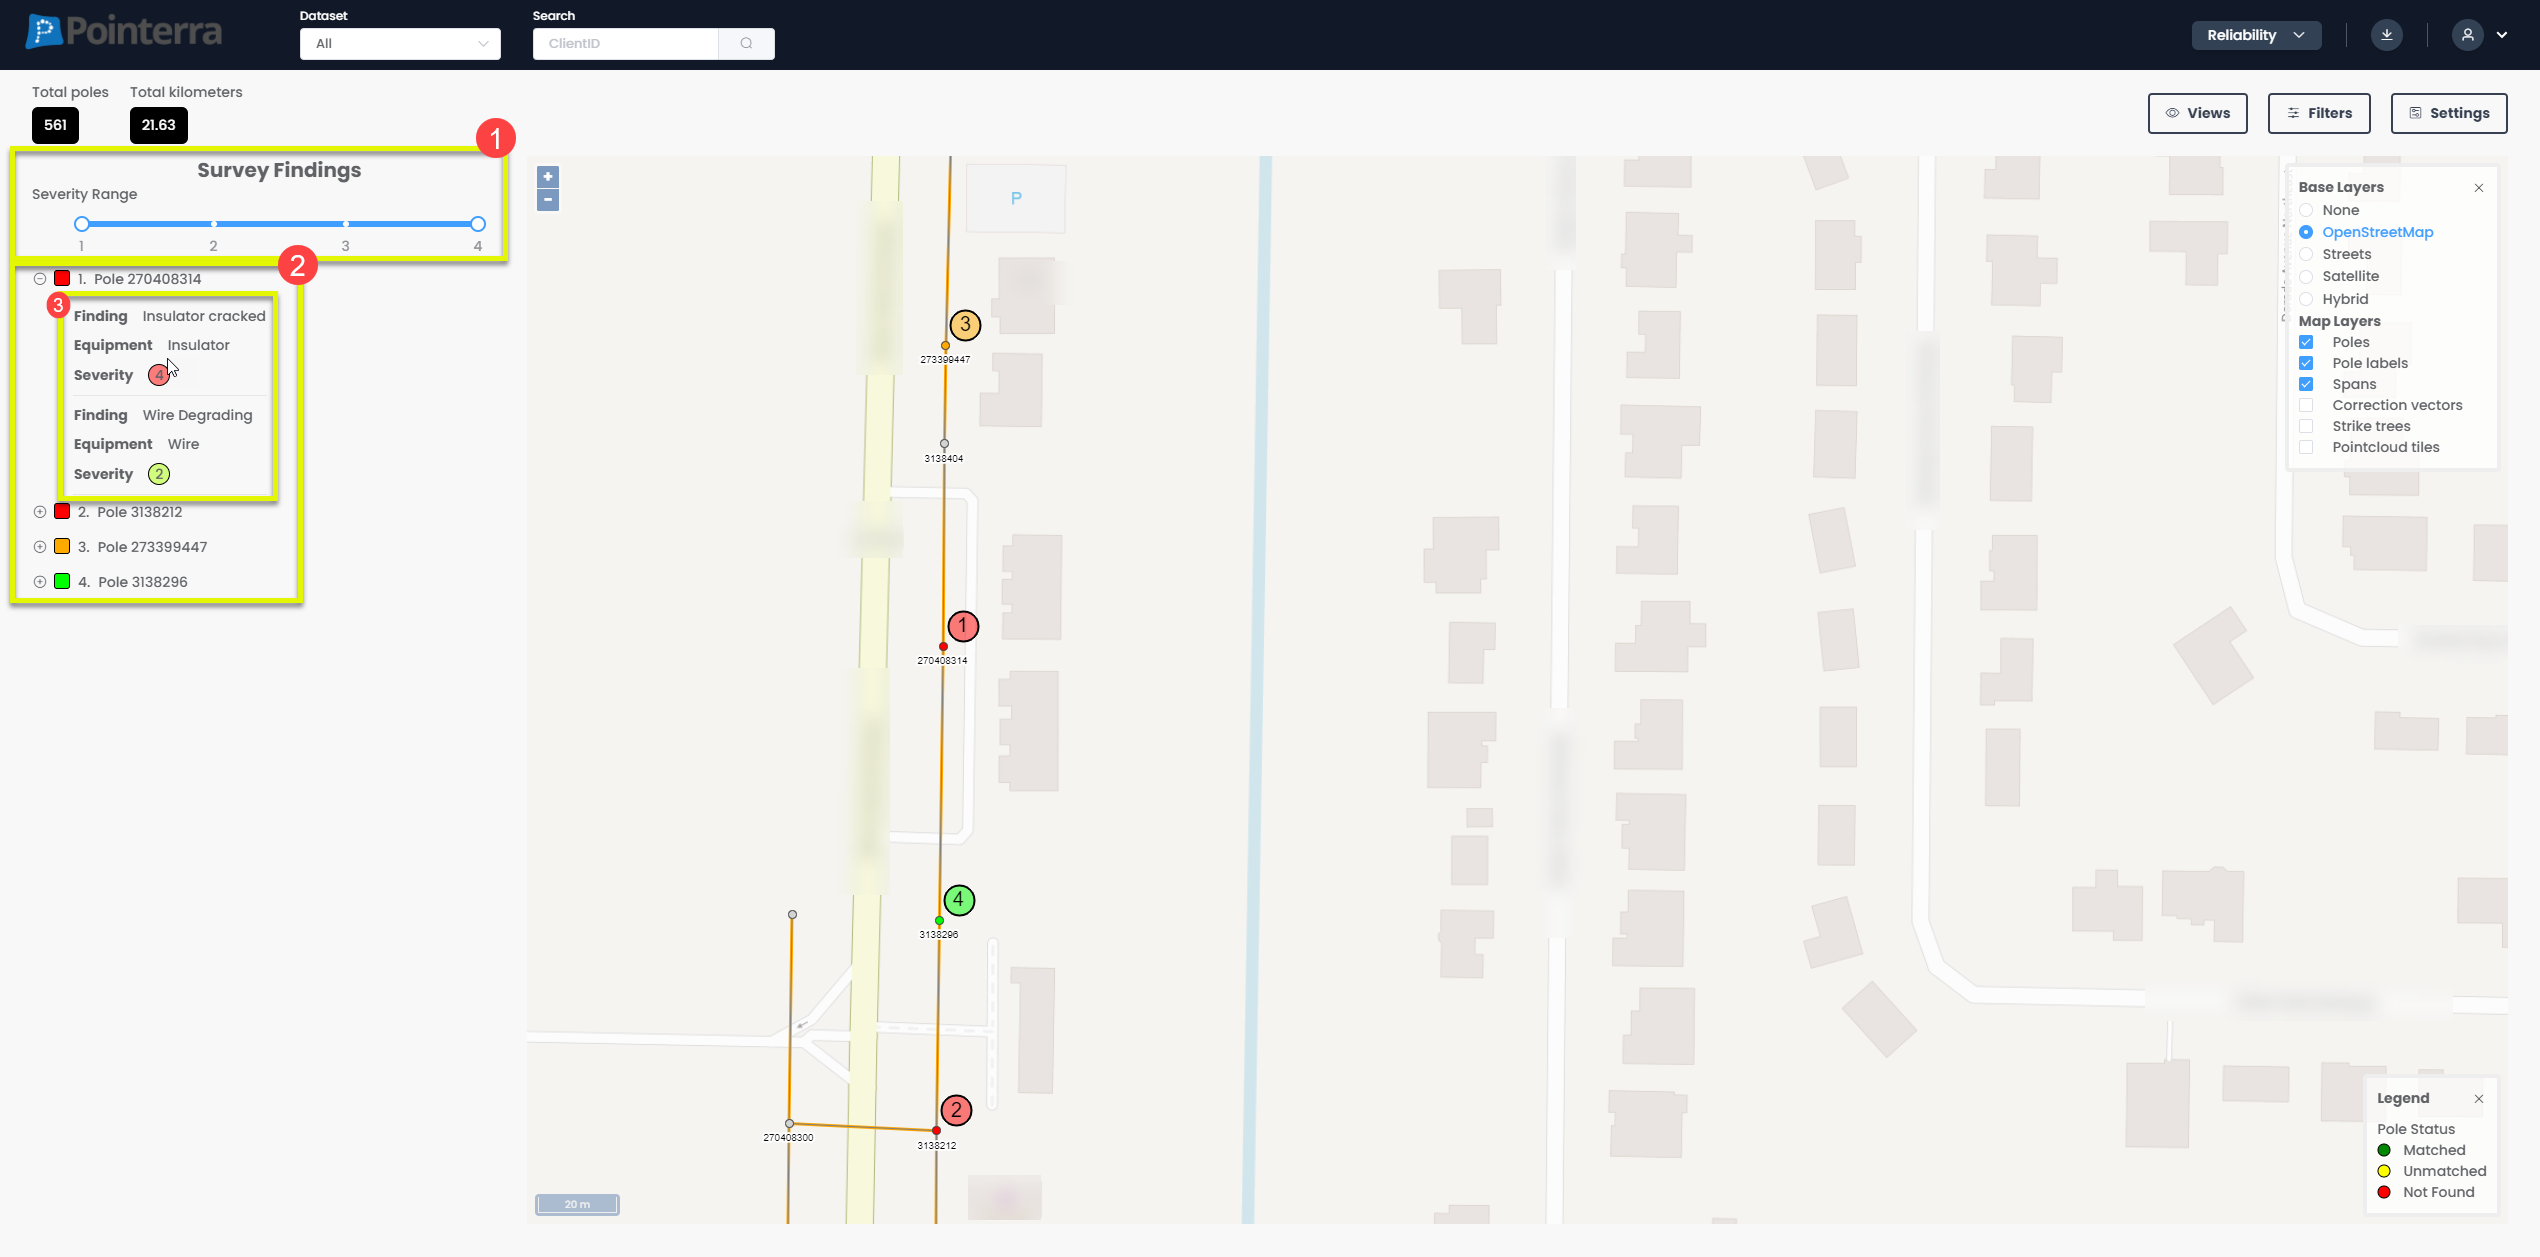
When in Reliability viewing mode the main changes to the map view are that all poles are color coded to represent the severity of a finding/issue related to that pole. There is also a "Survey Findings" interface that appears on the left hand side of the page
This interface helps filter through existing findings, by being able to adjust the severity range that you are looking for (1).
When you have selected the severity range, the interface will show poles that fit within those parameters and list them in descending order of severity. From this, you can select a listed pole and the 2D viewer will move to it on the map (2).
You can also make a specific pole display all of the finding/s linked to that pole (3).
NOTE: If there are multiple findings associated with one pole, the most severe finding will be the color that is represented on the pole.
To find information on a single pole and its associated photos select the desired pole in 2D viewer
Photos and Status in Reliability View Mode
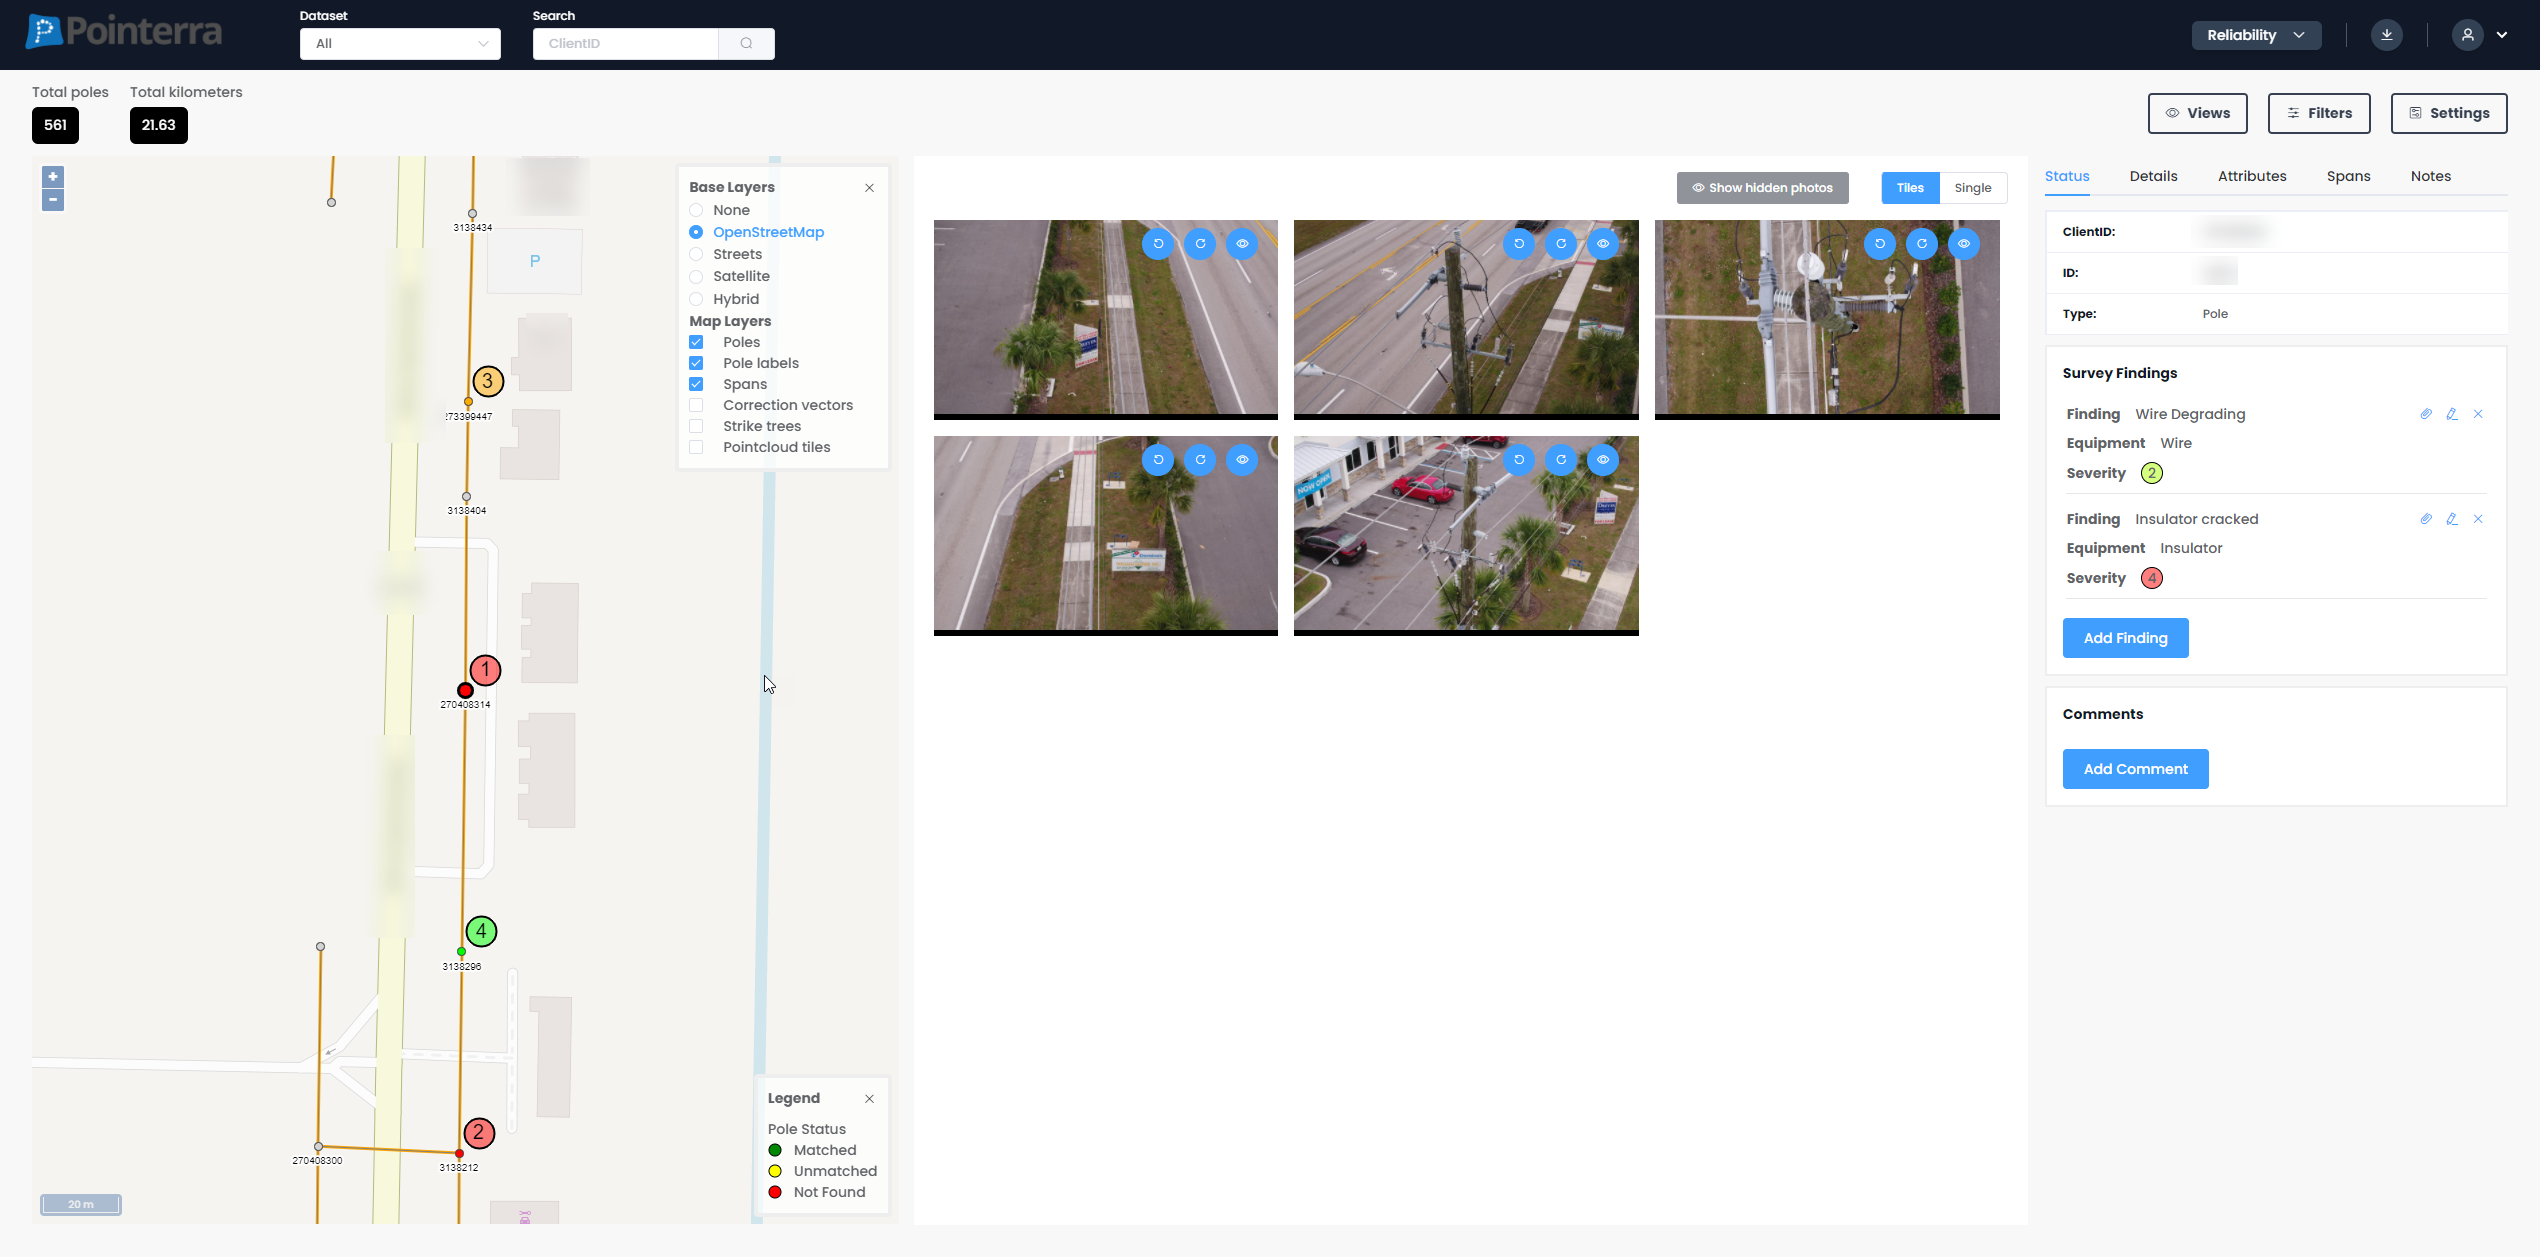
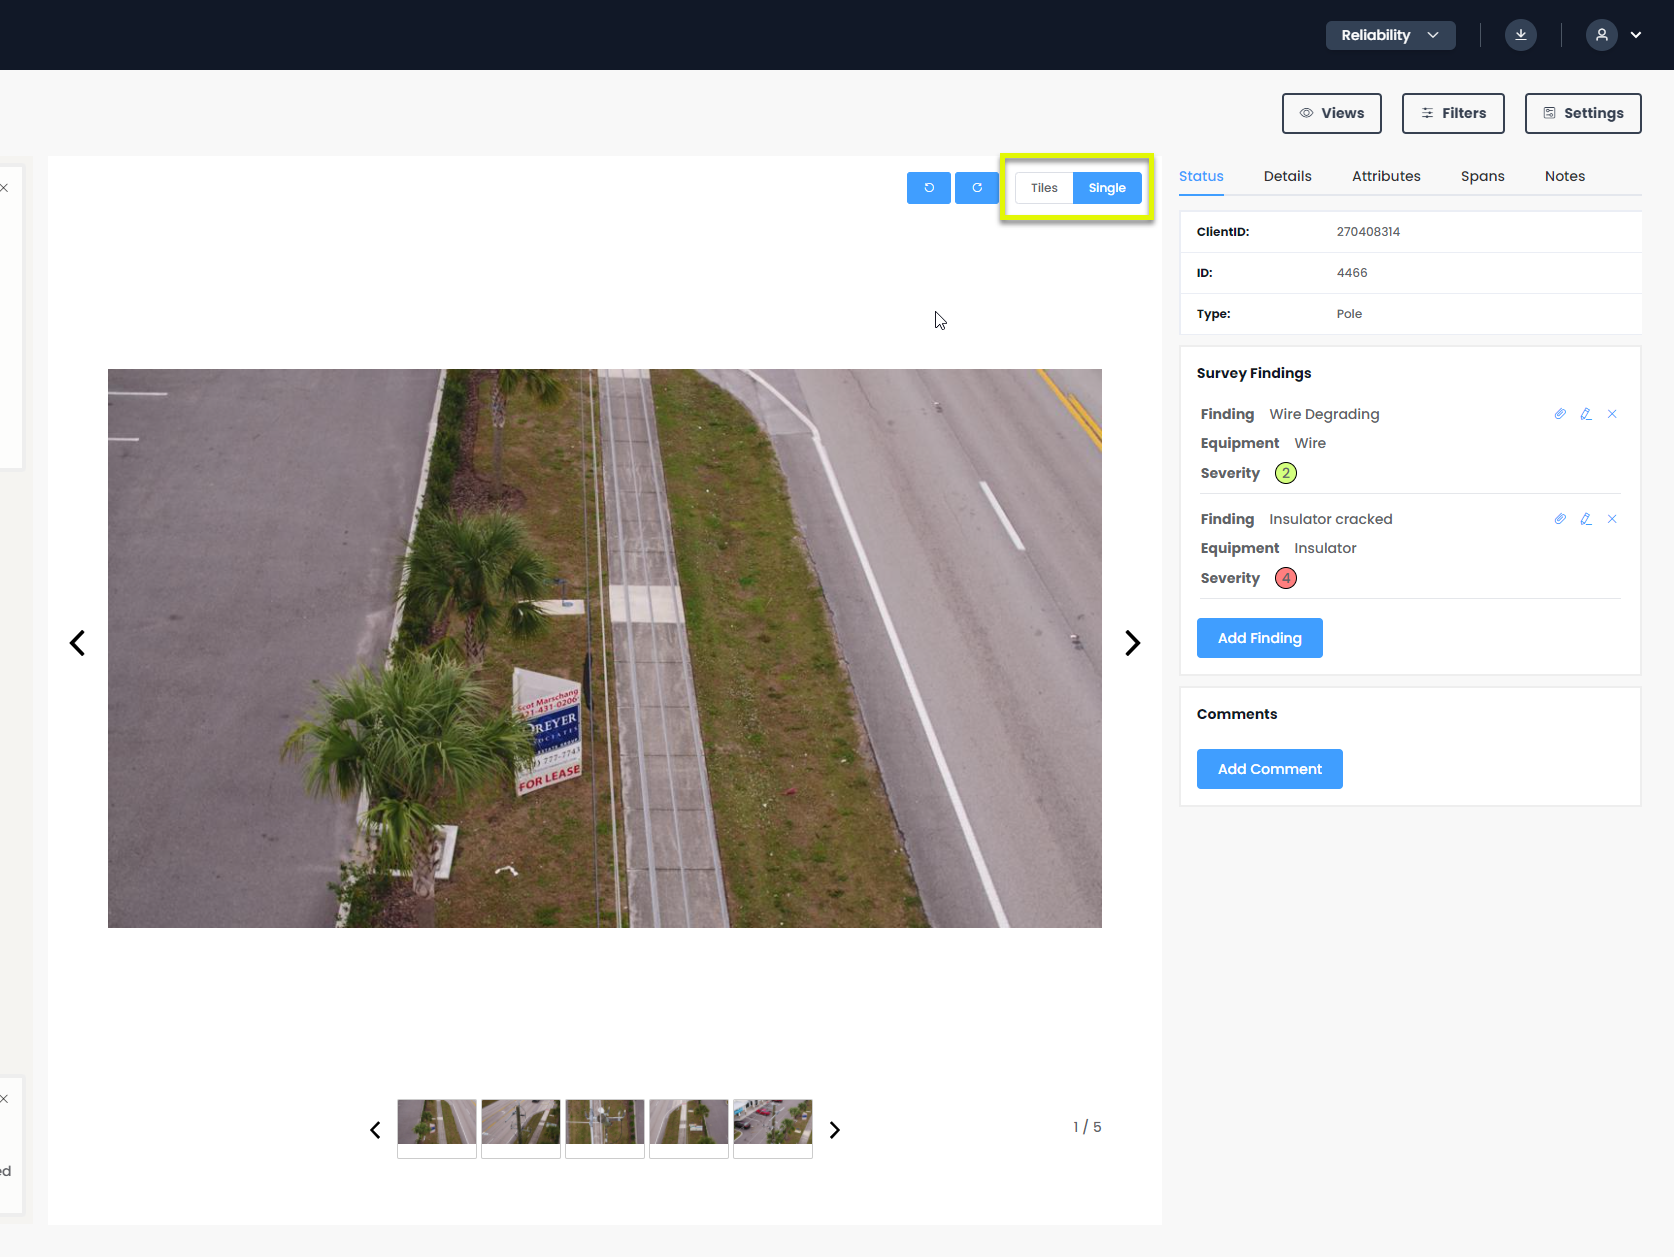
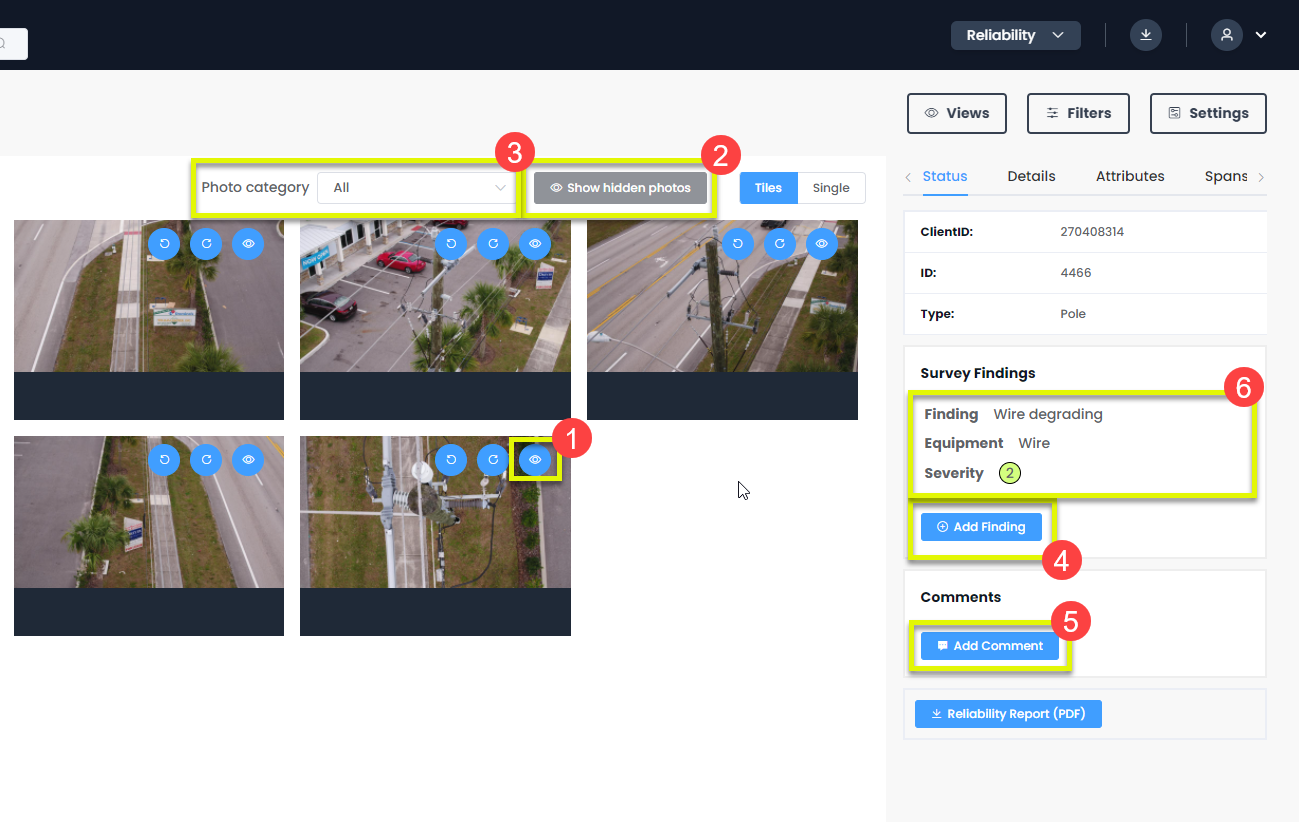
When in the reliability viewing mode, the photos tab gets a separate interface where the photos can be presented in either a single or tiled format. The switch is highlighted in the screenshot below
With this interface you can:
Select specific photos to become 'hidden' using the eye icon (when in tiled mode) (1)
Toggle whether to show the hidden photos (when in tiled mode) (2).
Select the types of photos you want to view (3)
You can add new findings to a pole (4)
Add new comments to a pole (5)
To edit or delete findings, first select the finding (6) and then the options will appear.
Findings and comments on poles
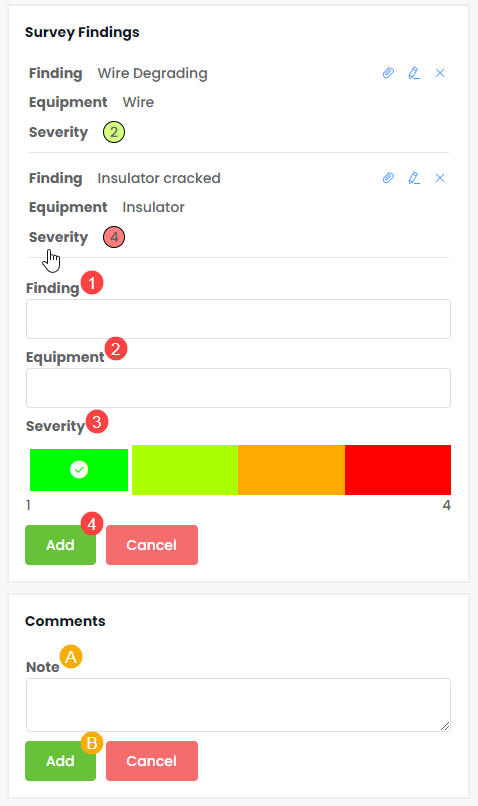
To add a new finding to a pole:
Firstly, describe the issue/problem of the finding (1)
Then state the equipment the finding is associated with (2)
Then rank its severity (3)
and finally add it to the pole. (4)
NOTE: When adding a finding to a pole, you can zoom in on the specific parts of a photo and these views will be saved with the finding, meaning next time someone views the photos of a finding it displayed the same zoomed in view
To add a new comment to a pole:
Firstly write down the comment (A)
then add it (B)
When adding a finding you can also add annotations to desired photos, in order to highlight the problem. To do this:
Begin adding a new finding to a pole (1)
Then select the edit button (2)
And add the necessary annotations to specific photos. (3)
You can also change the color of these annotations (4)
NOTE: The annotations will only appear on photos when selecting the finding that it was created for.

Linking photos to findings
To link findings directly to specific photos of a pole, select the paper clip icon (1) and then select the photos that you would like to link (2), finally where the paper clip was, there will now be a tick to save the photos you have selected.
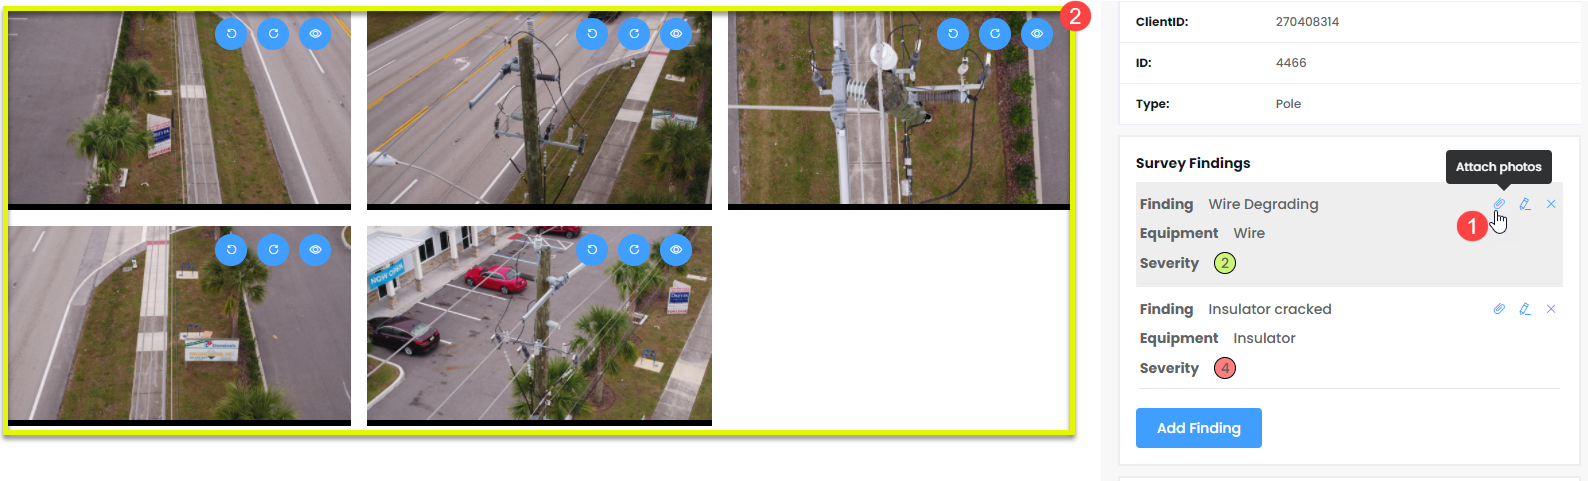
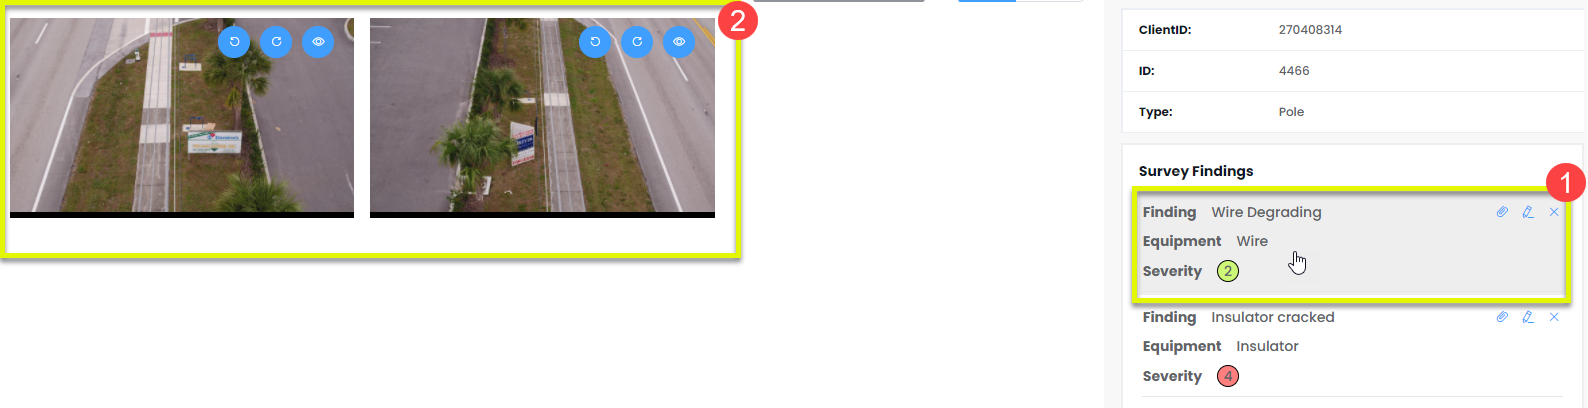
Finally, if you wanted to view the photos that have been linked to a specific finding, just select the finding on the right hand side interface (1) and the linked photos will be displayed on the left hand side (2)
NOTE: When a finding is selected it will be a darker shade, even when you are not hovering over the finding