Multi-user Classification editing
The classification tool natively supports concurrent multi-user editing. All edits that are made (irrespective of which user) are applied in strict time order (using the UTC timestamp of when the edit was saved), so that all users see a consistent state of the point cloud classification whenever they save changes. However, it is generally desirable to have users working in different areas on the data to avoid potential confusion. By using the multi-user region manager, you can coordinate many users editing a point cloud, by allowing each user to work on a different region.
The basic workflow for multi-user editing is:
- Define a set of regions (admin user)
- Each edit user selects a region to work on and makes the required changes.
- When the edits for a region are complete, the user marks the region as complete. The user can then select another region if required to continue editing.
- When all regions are marked as complete, perform a Finish region edits so that users can no longer select regions to work on (admin user)
- Combine all the edits that have been made into a new classification version on the point cloud (admin user)
Note that as described above, where regions overlap (or if users edit points outside of their region), the time-order of changes is used to resolve ambiguities. Each time a user saves, either by clicking the save button or via auto-saving, all edits made by other users will be applied to the current session. In this way, users will see other edits being made in near real time and there will be a consistent view across all users of the current state of the edit sessions.
Defining the regions
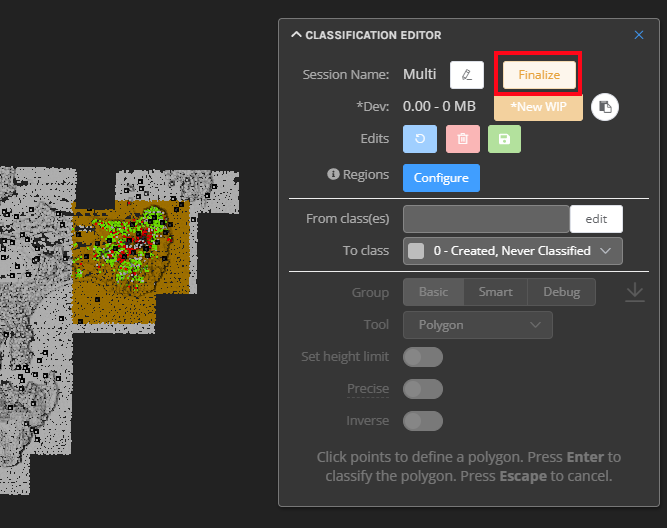
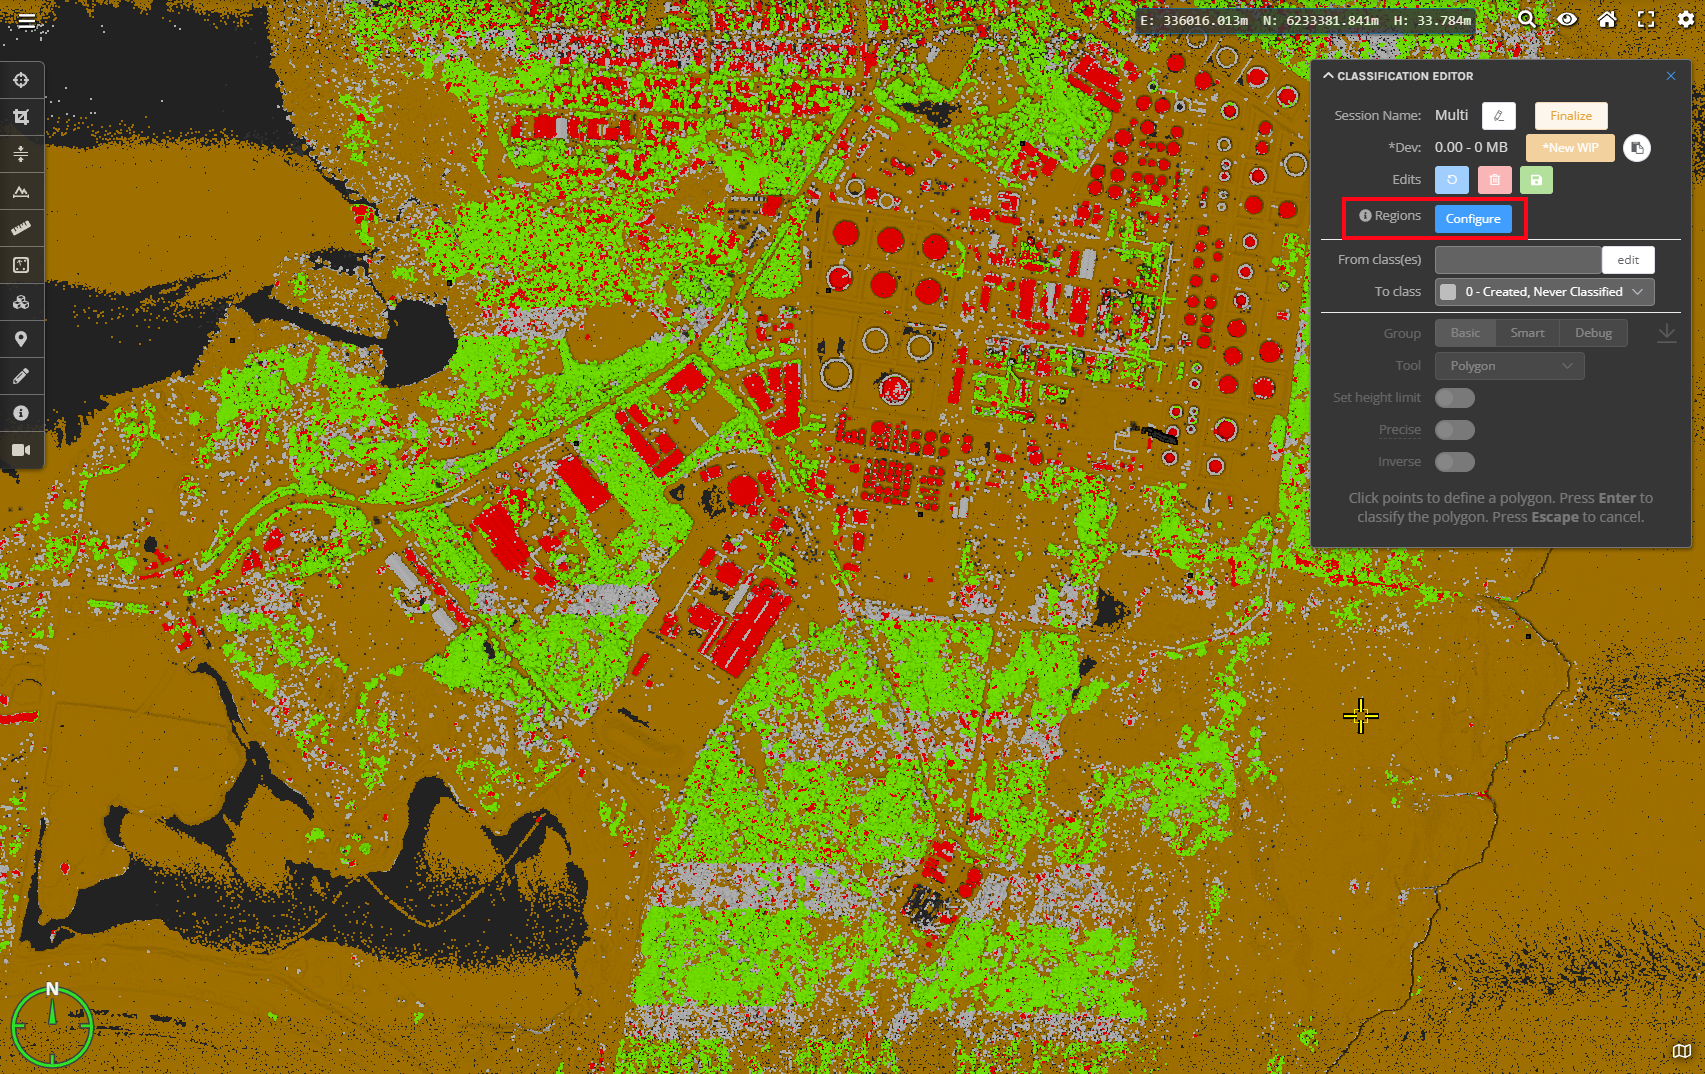
To define the regions, an admin users can choose ‘Configure’ in the Regions section of the Classification Editor (note that if you are just doing classification editing with a single user, there is no need to create regions).
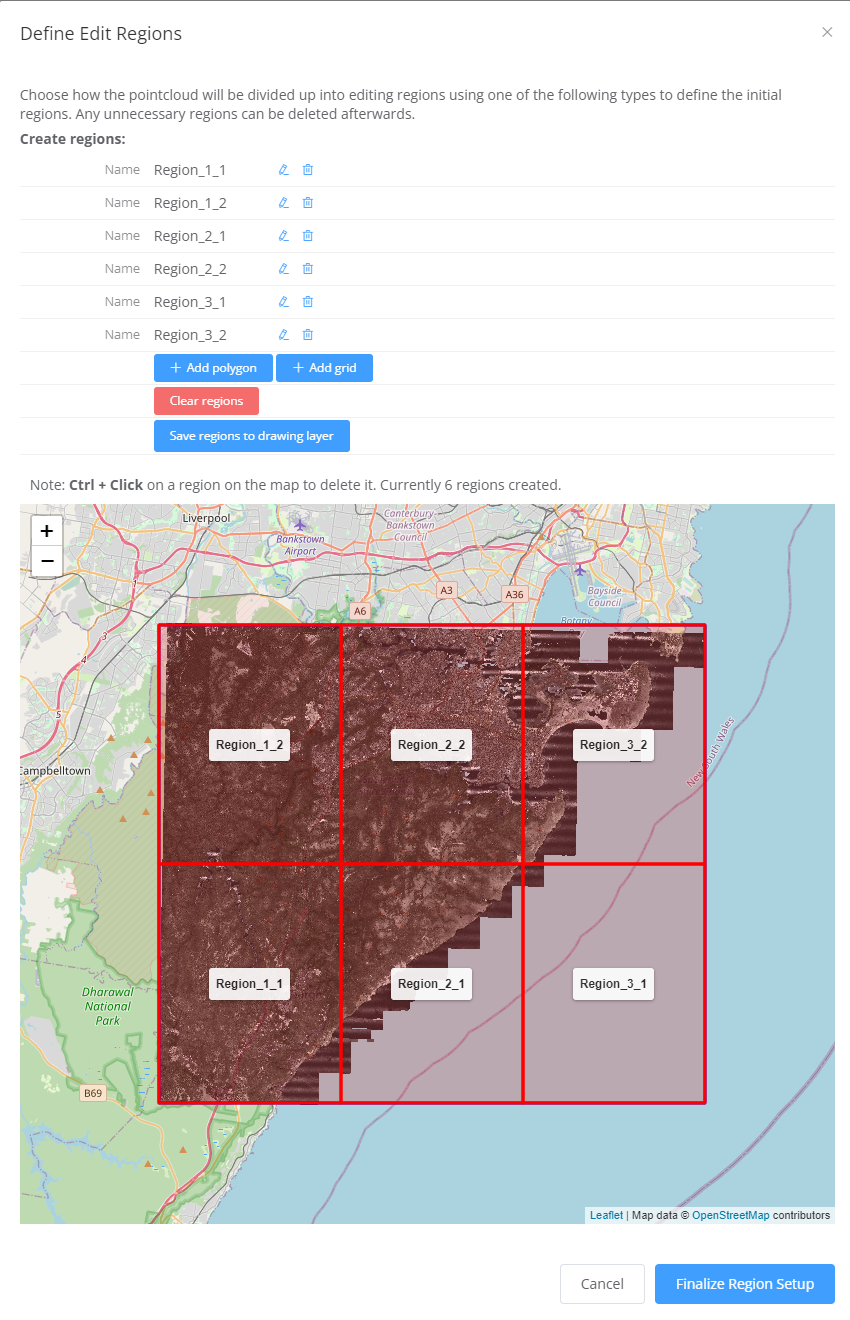
Regions can either be created via a regular grid or polygon shapes, or a combination of both.
Using a grid
Click the ‘+ Add grid’ button and configure the desired number of X and Y cells. You will see a preview of the grid as adjust the rows and columns.
Using polygons
Click the ‘+ Add polygon’ button and draw your first region, repeat until all regions have been created. Regions can be disjoint or overlapping if desired.
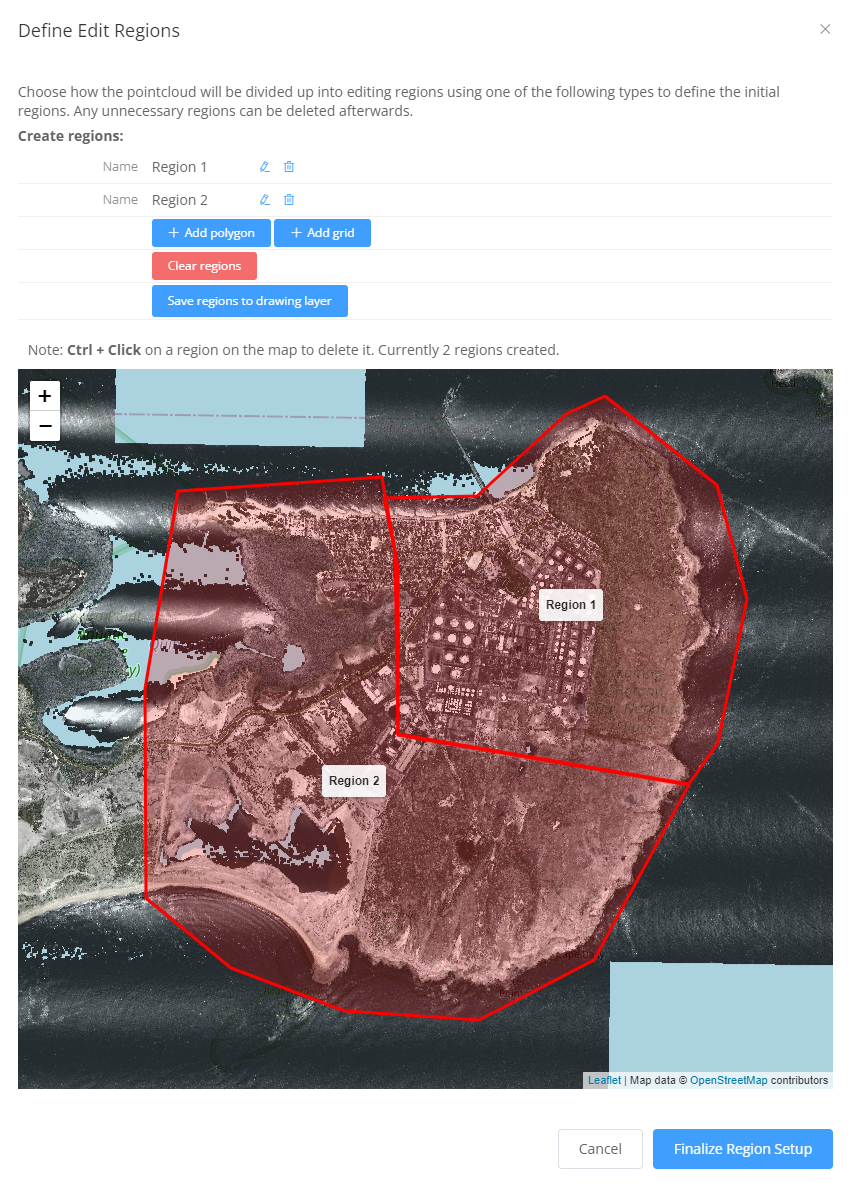
Click ‘Finalise Region Setup’ when completed to allow users to select and work on the defined regions.
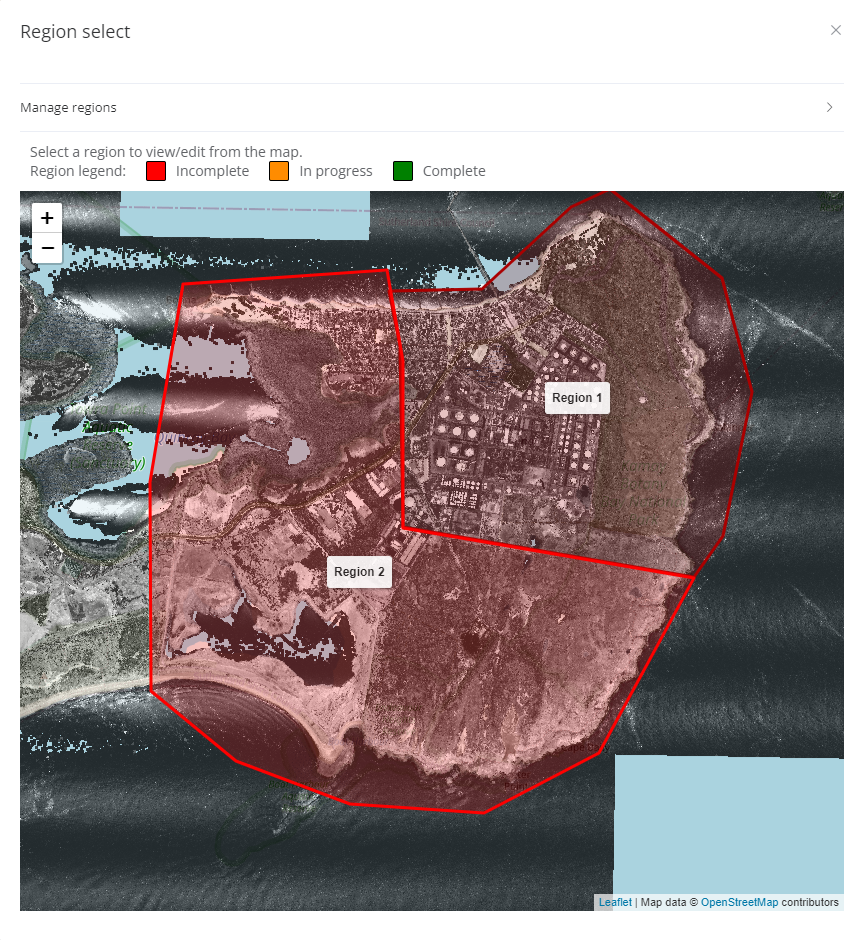
Selecting a region to edit
Click the ‘Choose/manage’ button and click on a region. You can now start editing classifications for the chosen region.

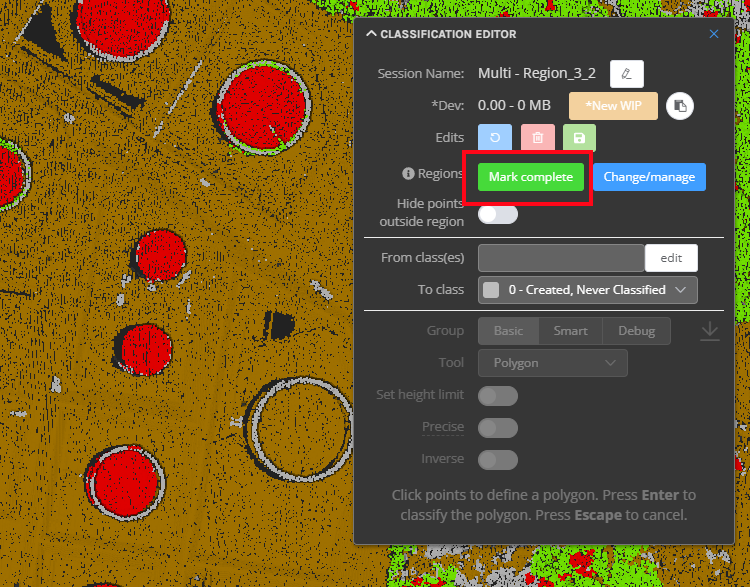
Marking a region as complete
Once you have finished making edits to the region, you should mark it as complete so that the status is updated in the workflow and to show that it is ready to merge into the final result. To do this, click the Mark complete button. Note that you can change your mind and continue editing by clicking the Mark incomplete button that appears after you have set the status to complete.
Finishing region editing
When all regions have been marked as complete (or you have decided to finish regardless) then an admin user should select Choose/manage, and then click on manage regions and click the Finish regions button as shown below.

Creating a new classification version
Once all edits are completed and there are no more edits planned, the admin user should click the Finalize button to create a new classification version that will be available for the point cloud. The new classification version will take all of the individual edits and create the final classification value for every point in the point cloud.