Editing Tree Detection Analytics
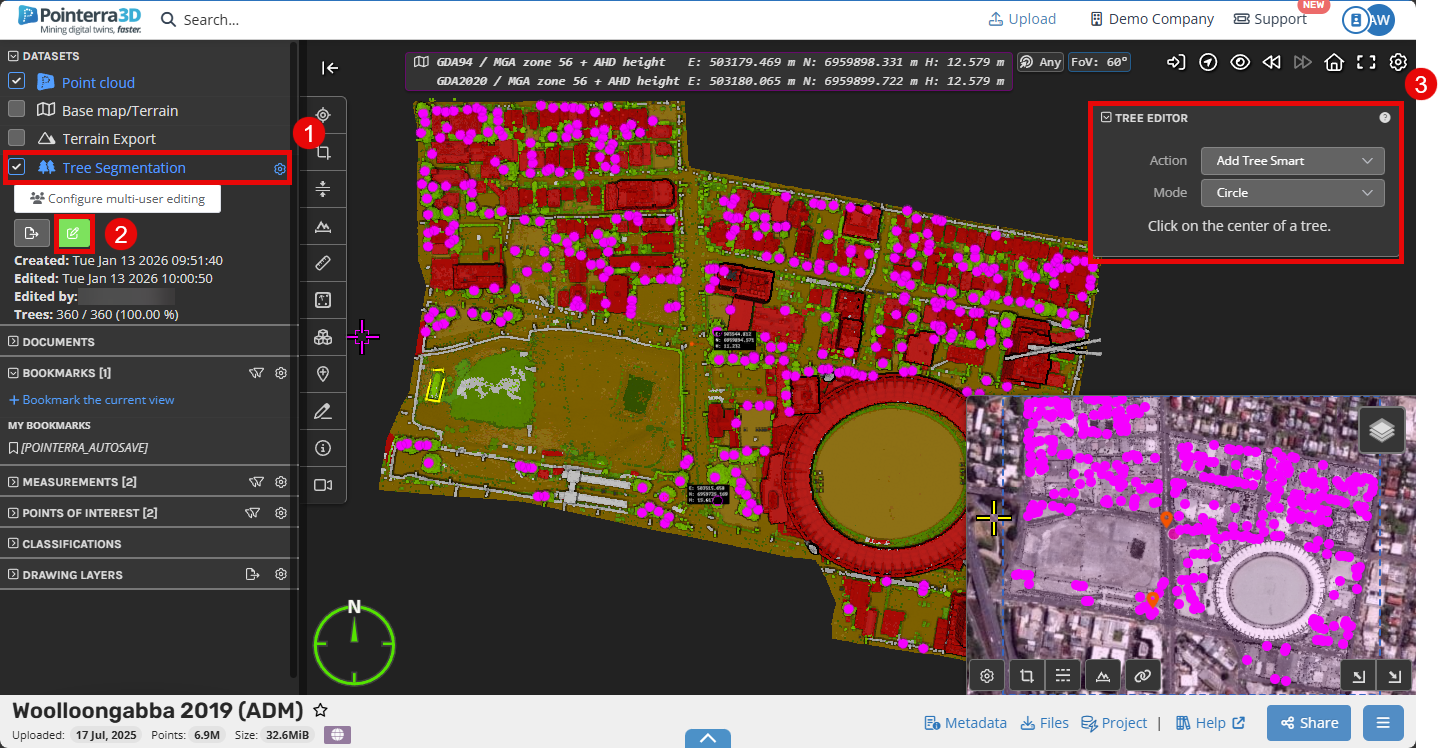
Although the tree detection analytics generally achieve a high accuracy of identifying and visualizing trees in a point cloud. There may be some instances where editing and quality assurance is required to ensure the information the analytics is providing is truly complete. To begin the editing of the tree detection analytics first ensure your point cloud has run and completed the tree detection analytics and display the tree on the 3D viewer (1), and then select the edit tree button (2) for the edit tool popup to appear on the right-hand side of the viewer (3)
The main use for editing a tree detection analytic is to add trees that may have been missed by our analytic. There are many tools that can help in adding new detected trees to the point cloud as well as tools that assist in editing already identified ones.
Tree Detection Editing Tools
Add Tree Smart
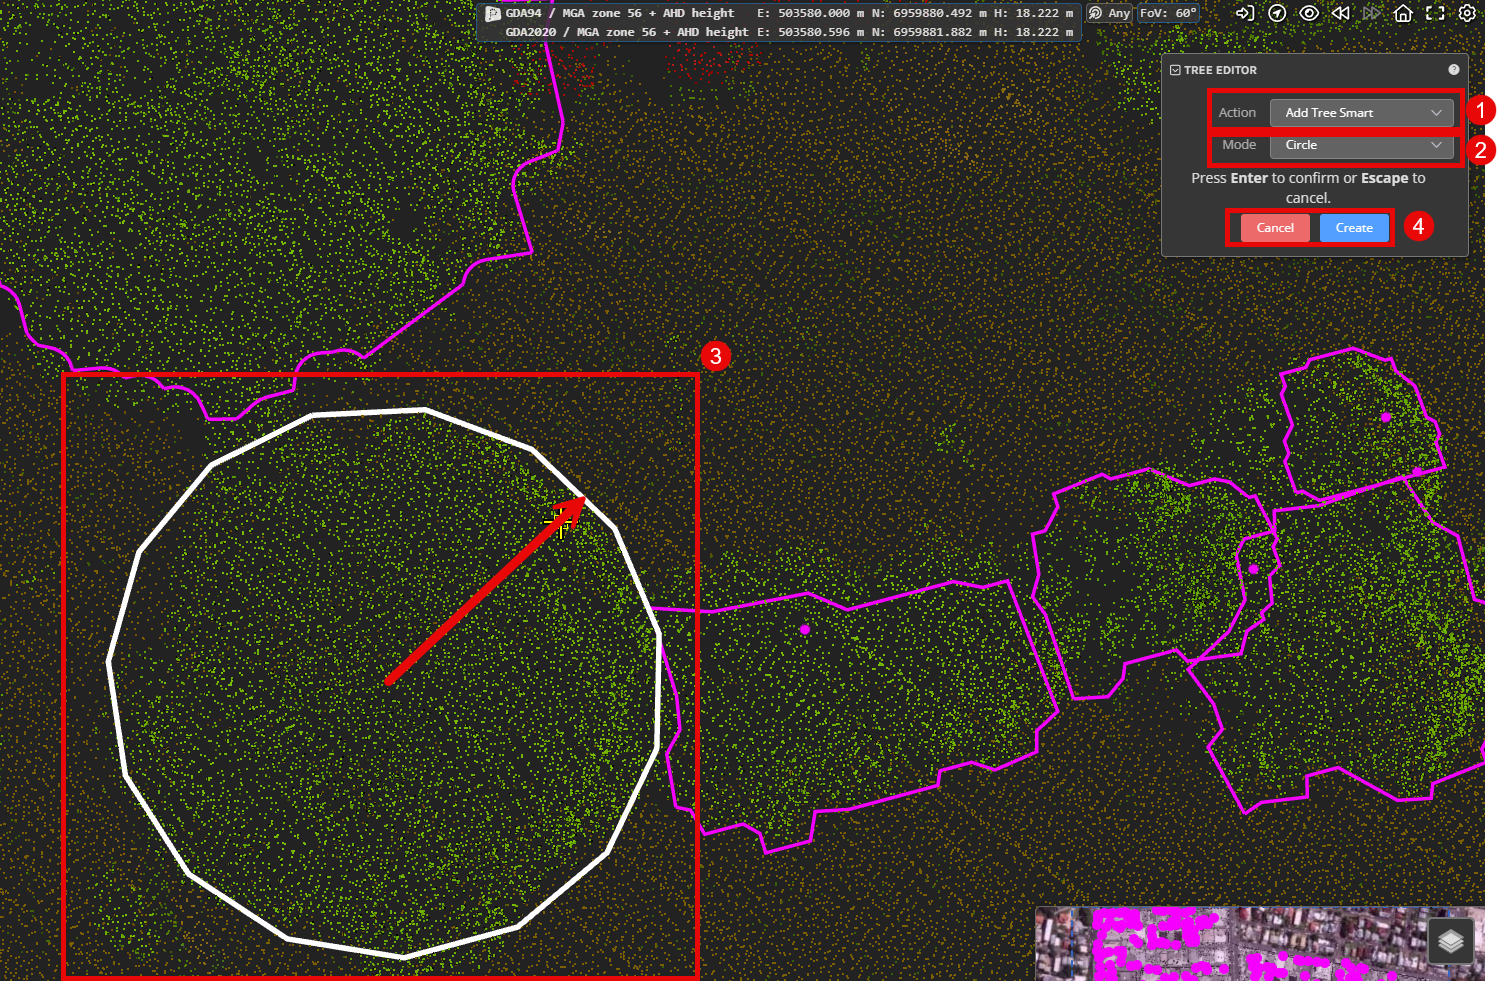
This tool will normally be the most used when needing to edit tree detection analytics. It provides a simple way to identify the tree that you want to add and then runs this selected area back through our analytics to then add it as a tree. To use this tool, firstly select the add tree smart tool in the 'action' sub-menu (1), then select the mode to use to highlight the unidentified tree (2). Then use one of the area selection modes (explained further down) to highlight the area of the unidentified tree points (3). From here just confirm (or press enter) (4) and then the tree detection analytic will run and add the tree to the point cloud.
Add Tree
This version of the 'Add Tree' tool doesn't run the selected area back through the tree detection analytics, it just uses the area selection that the editor has provided and treats all the points within this area as the tree. This version of adding a tree is not as accurate and can mistakenly add incorrect points/trees. We recommend that for adding trees, the smart add tree tool is used.
Area Selection Modes
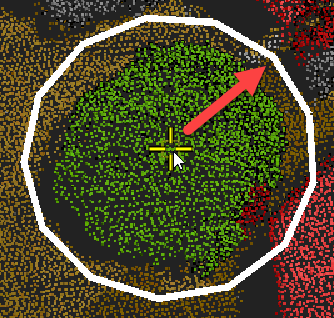
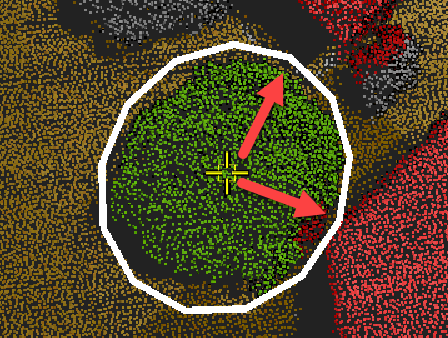
For the 'Circle' mode, you just select a point in the center of the tree and stretch the circle so that all the points of the tree are within the circle, as shown below. 'Circle (below only) mode does the same thing however assumes that your point is the very highest point of the tree and therefore only will look at the other points below the selected one (whilst also staying within the area encompassed by the circle).
Whilst 'Ellipses' mode gets you to select a point in the center of the tree and then click two points to define the two axis of the ellipses and thus create the ellipses.
Merge Trees
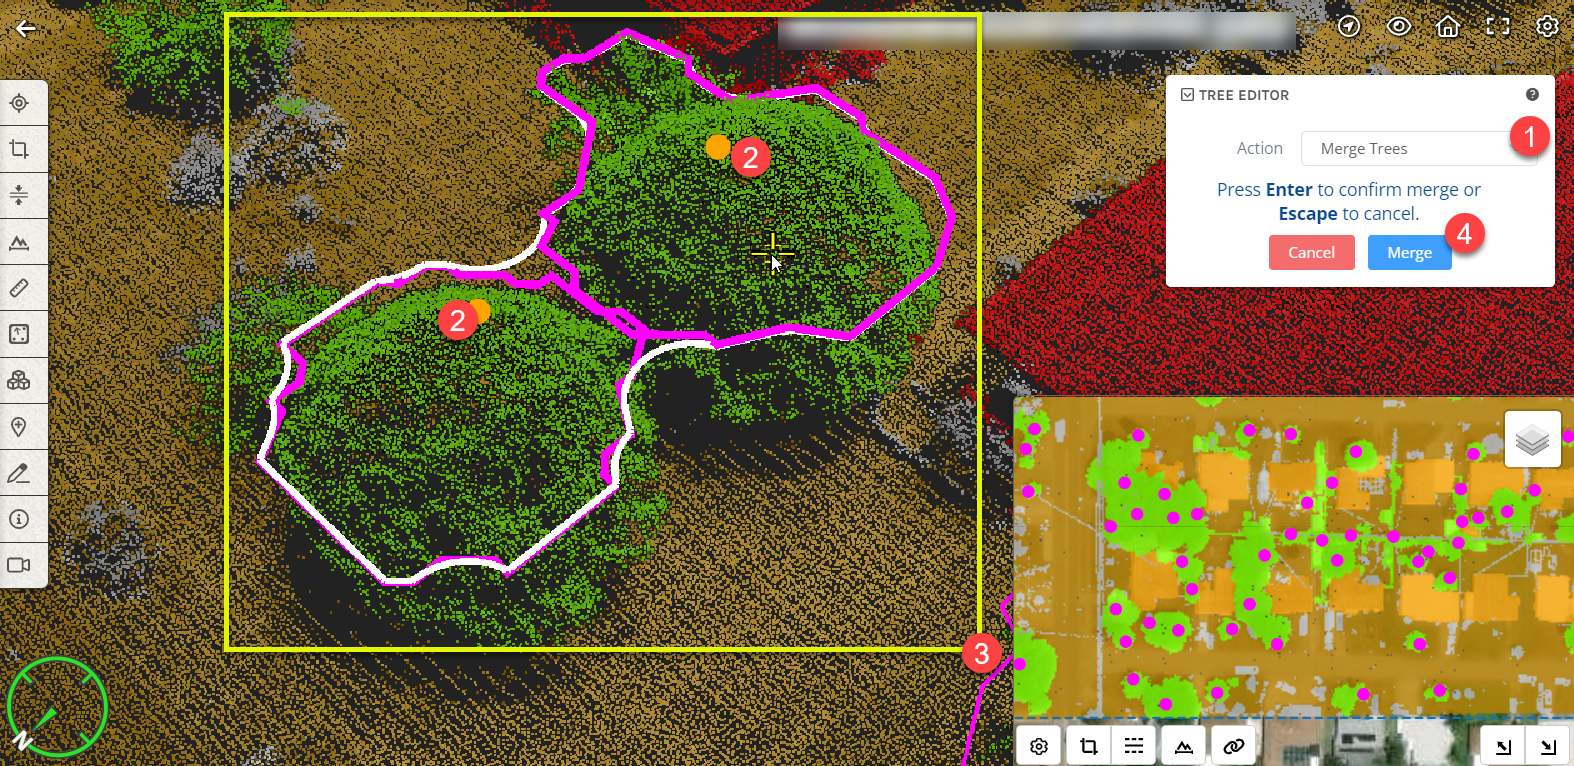
The merge trees tool allows the editor to correct the tree analytics if a single tree has been split and identified as two separate trees, it can also allow trees that are overlapping to be merged and treated as a single tree for simplicity's sake. To do this, firstly select the 'merge trees' action (1), then select the trees that you want to merge together (2), then as you select the multiple trees, a white outline will appear, showing the new tree feature (3), finally click the 'merge' button or press enter to finalize the merging of the trees (4).
Split Trees
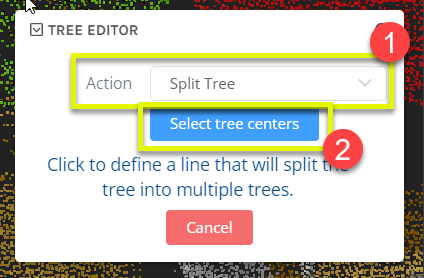
To split a tree feature, firstly select the split tree tool (1), then there are two methods to split the tree. The first option by default is to separate the trees by drawing a line between the trees. The second option is to select the center of the two trees you are splitting, to use this method, click the 'select tree centers' (2). The tree editor pop-up below explains the splitting tree method that is currently selected.
Add Trunk
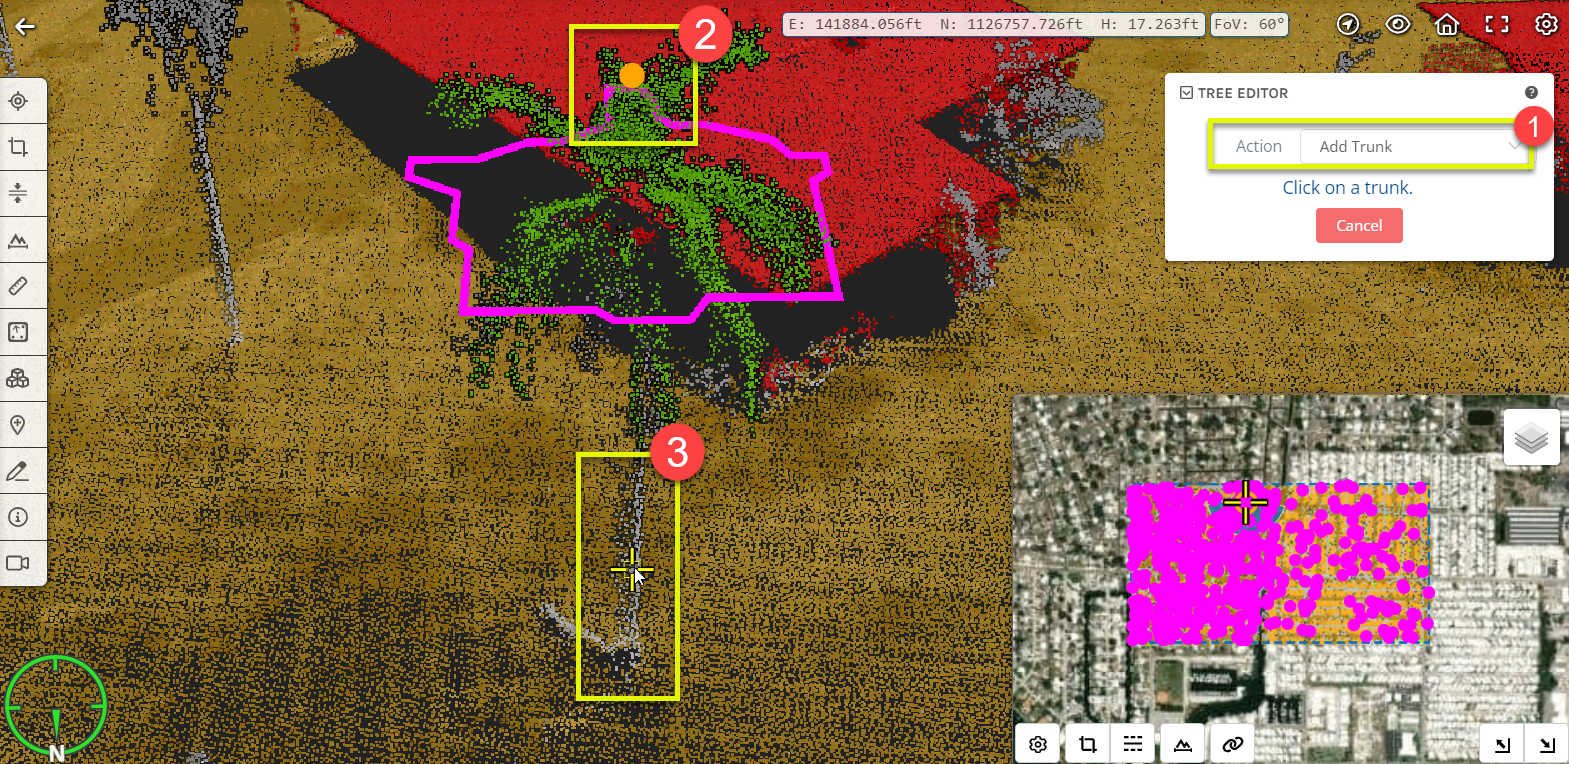
To add a trunk to a tree feature, firstly select the add trunk tool (1), then select the tree that you want to add the trunk to (2), then finally select the points of the trunk (3) and Pointerra will automatically create a trunk feature for the tree.
Edit Attribute Schemas
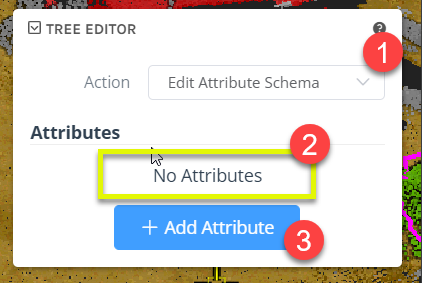
Attribute schemas are useful to categorize and organize trees in a point cloud. To create them, firstly change the action to 'Edit Attribute Schema' (1), then the popup will provide an area that shows all the currently created attributes (2) and a button to create another attribute (3). When you create an attribute you can change the name, type of data and default value given when giving a tree that attribute
Edit Tree Attributes
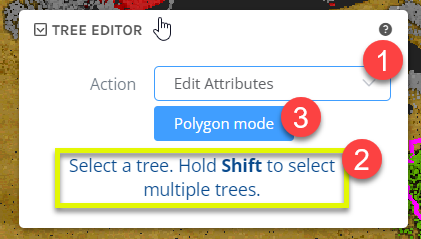
To edit a tree's attributes first select the action in the tree editor pop-up (1), then select the desired tree by clicking on it. You can also select multiple trees by using shift click (2) and selecting several trees or using the polygon mode and drawing a polygon around the desired trees. (3)
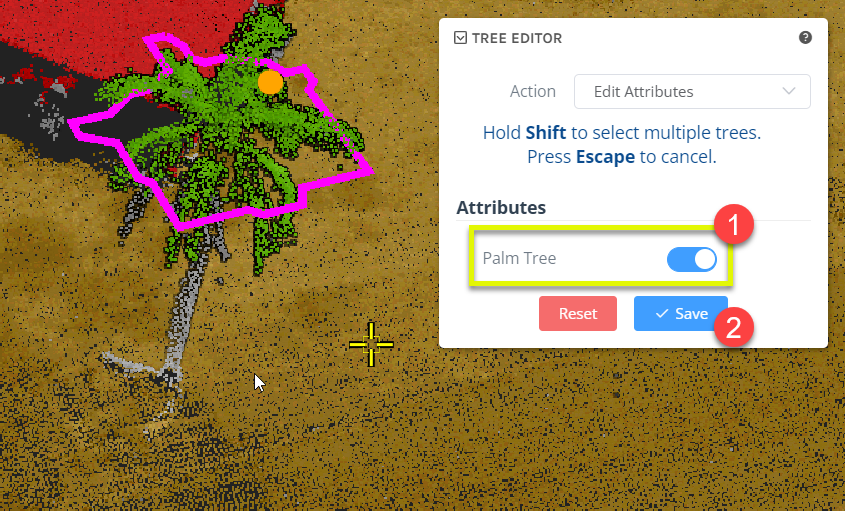
After selecting the desired trees, adjust the attributes as desired (1) and then save those changes below (2)
Checker
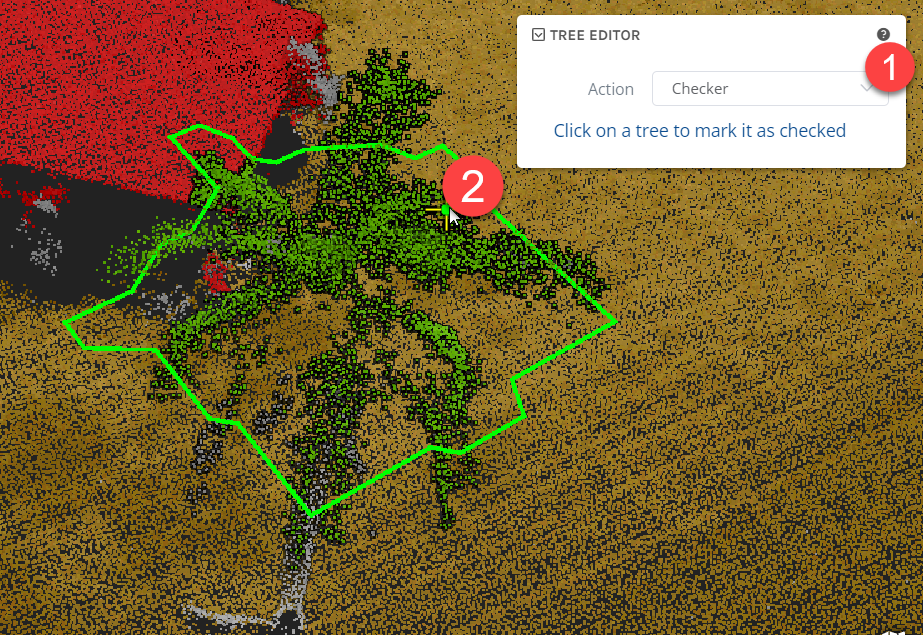
The checker tool is helpful for Q&A and keeping track of the editing process. When you select the 'Checker' tool (1), all you need to do is just click a tree feature (2) and then that tree feature is outlined in a different color. This is very useful to keep track of editing progress.