Compare Point Cloud Layers
Identifying 3 dimensional change between 2 point clouds collected at different time periods due to man-made or natural causes is available via the Compare Layers analytic (for analytics subscription customers).
Users must first merge 2 or more separate point cloud projects by following this guide - Merging Point Clouds.
The merged point clouds must be coincident (have overlap with each other and be in identical coordinate systems) in order for this analytic to run successfully.
Running the Analytic
- Load the merged point cloud project.
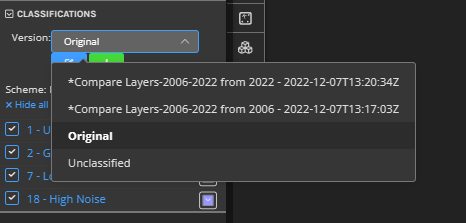
- Ensure the classification version you intend to run this analytic from is active in the Viewer. Select the desired Classification Version from the Classifications list.
- Navigate to the Project tab and select the blue Run analytic button.
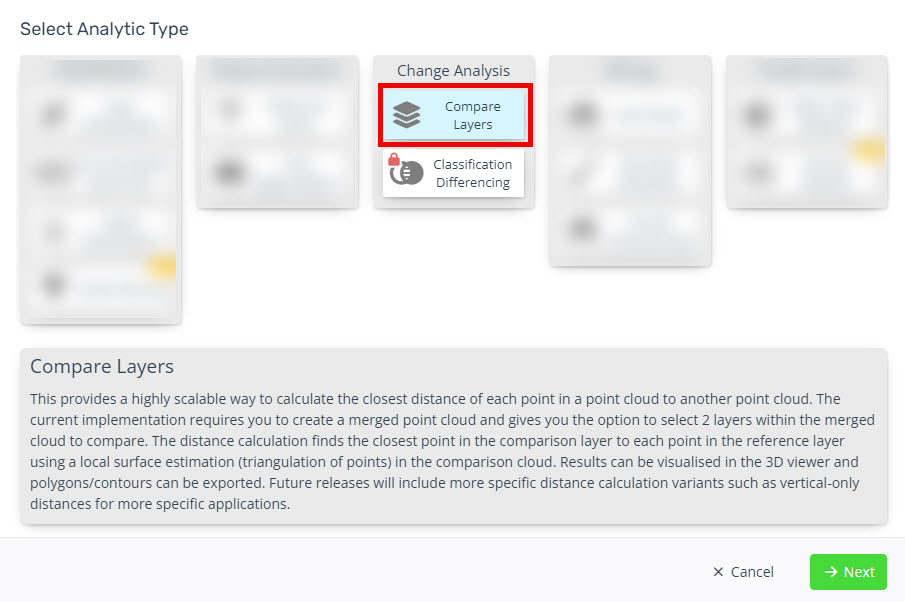
- Select the Compare Layers in the Change Analysis section.
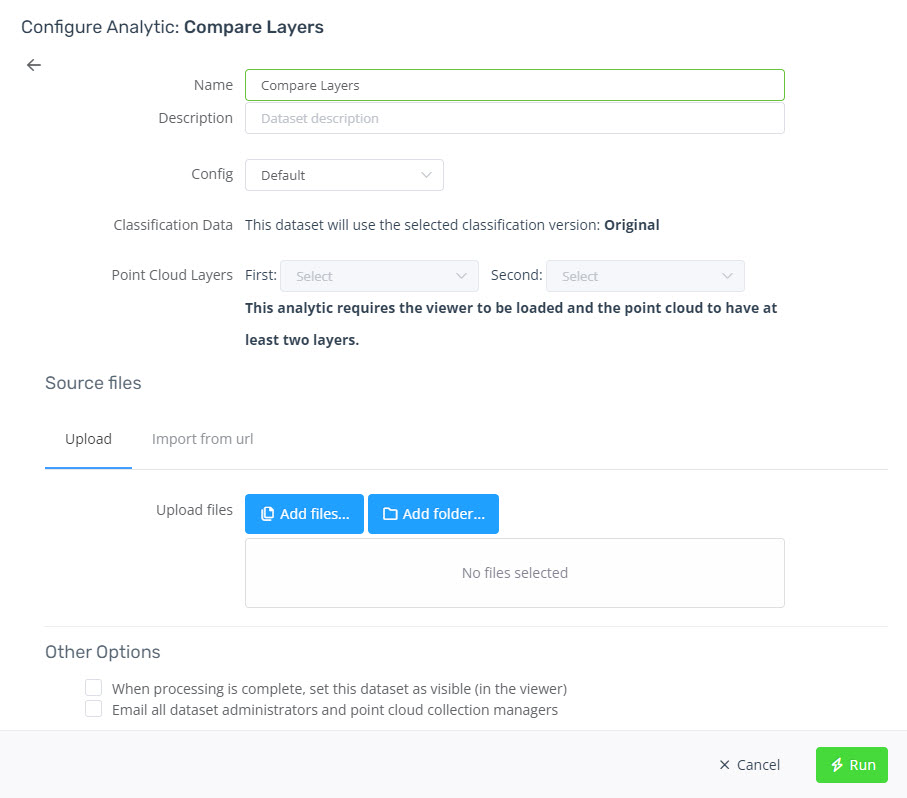
- Select Config: in most cases for our customers this will only be the Default option which is to search a maximum 3D radius of 10m and present change in 1m intervals (this is configurable in consultation with the Pointerra team).
- Choose the First and Second point cloud layers to Compare.
- Select Run to start the analytics.
- Once the analytic is complete the User will receive an email to advise they can now visualize the result.

Visualizing/Interpreting the Results
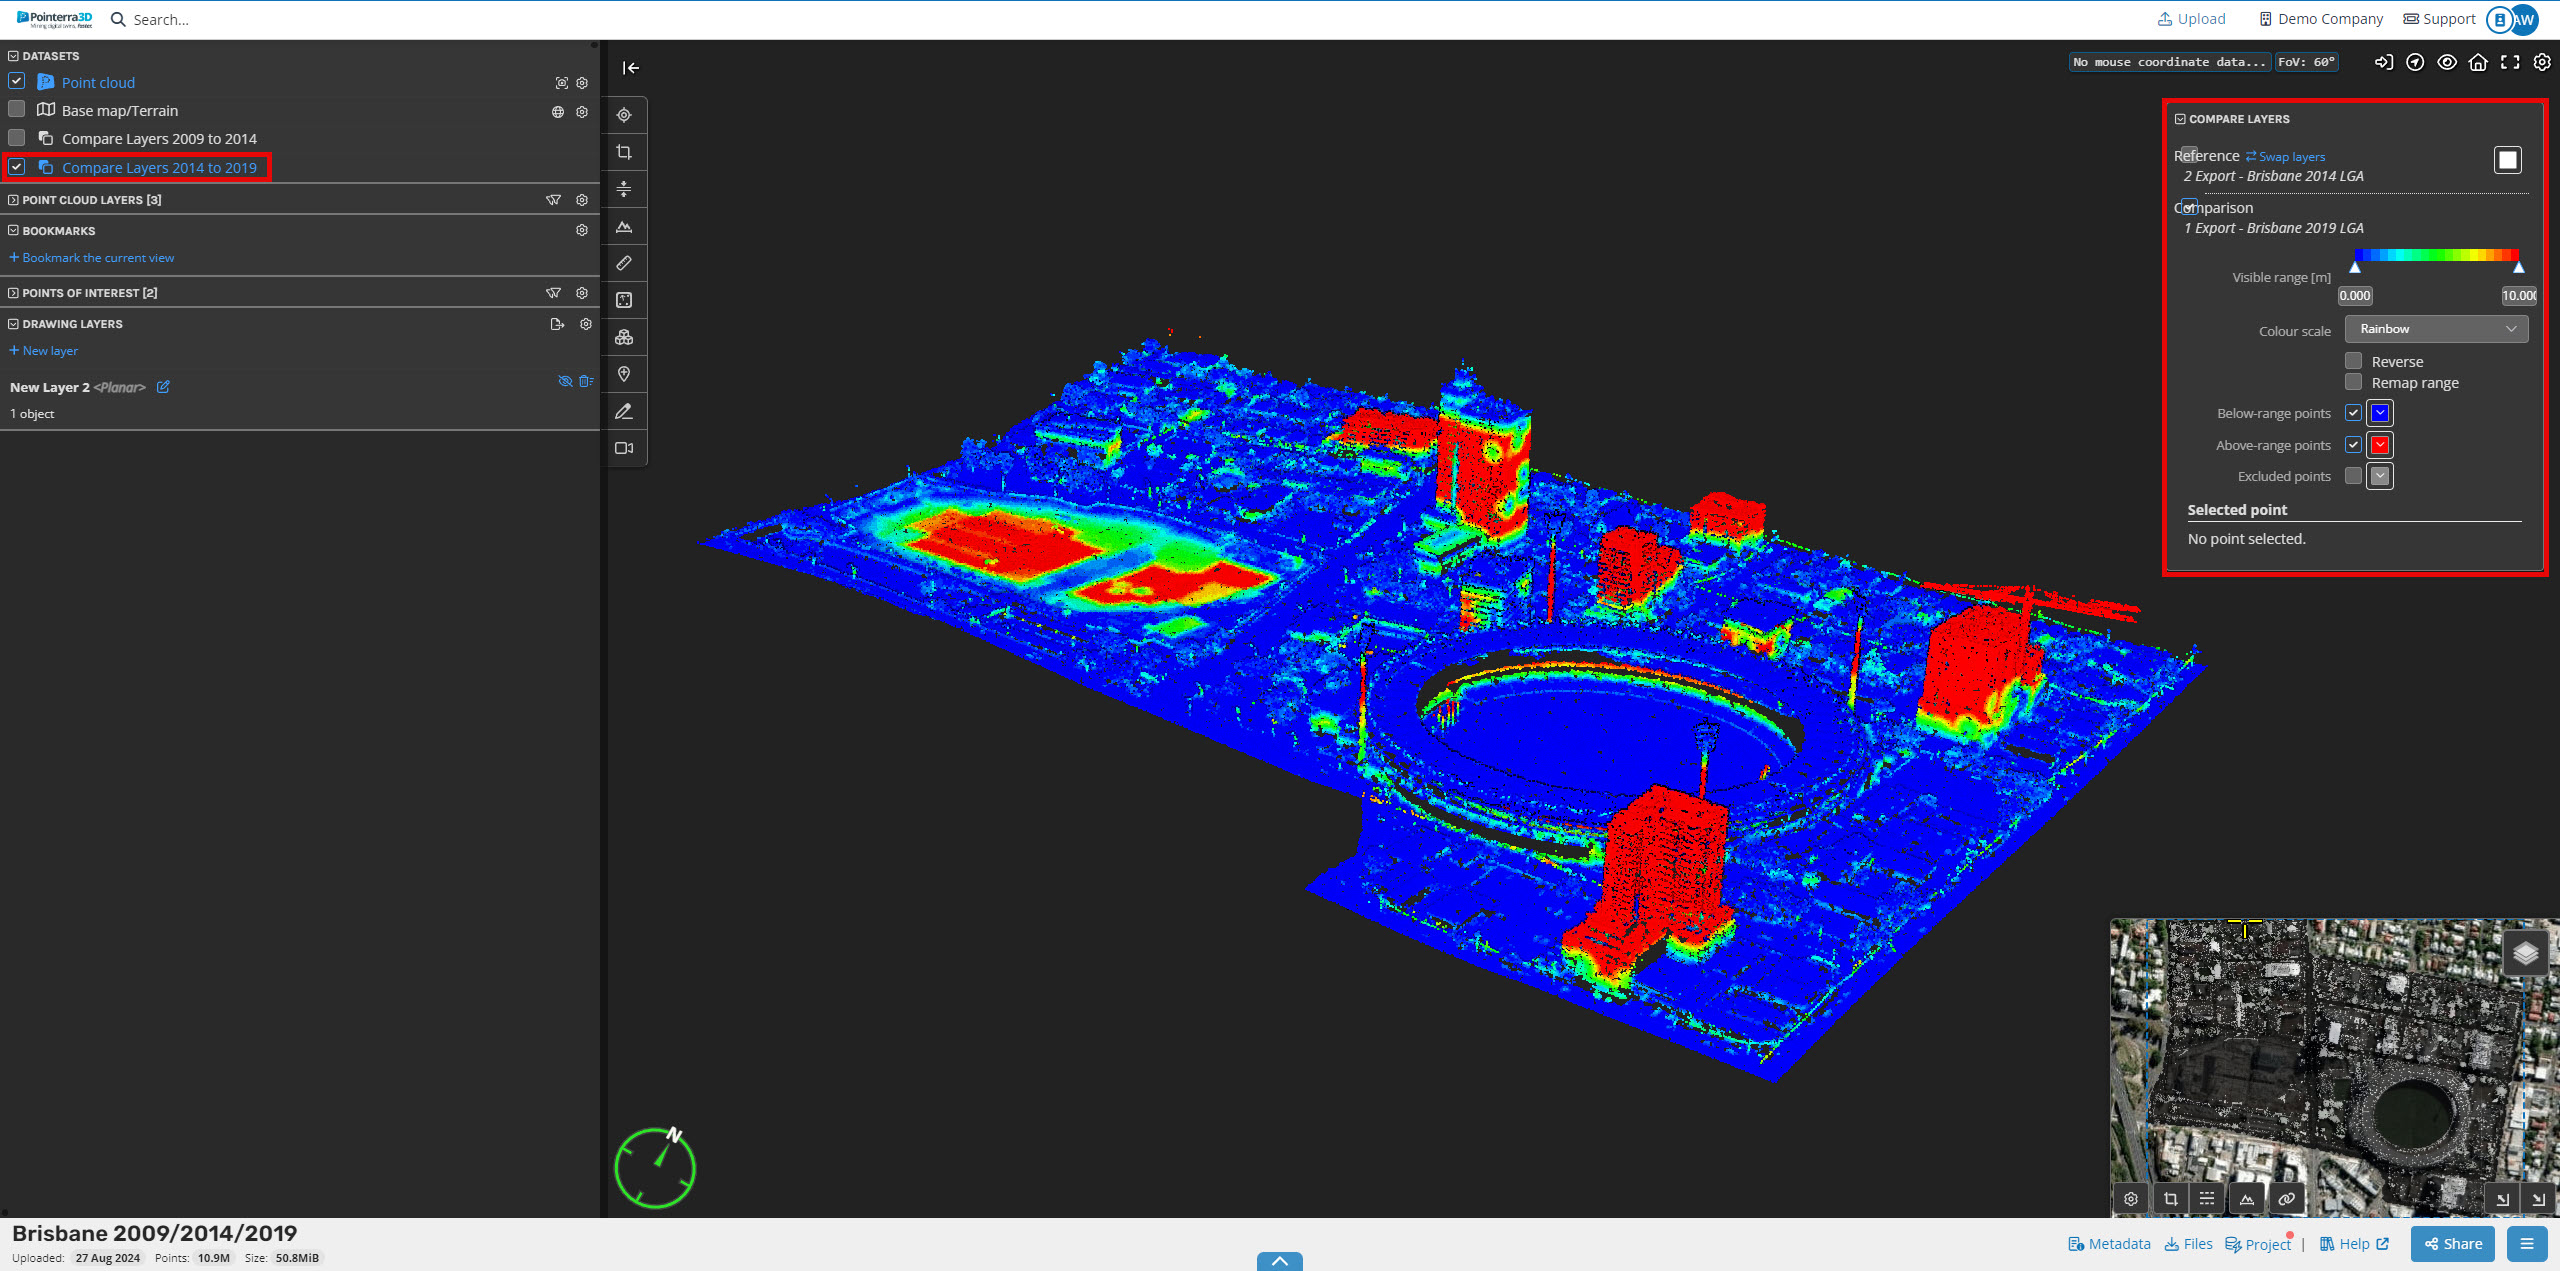
- Once the analytic is complete a new Dataset layer is created in the merged point cloud.
- When the Compare Layers dataset is loaded the point cloud is rendered with the active colour ramp to display the 3D difference between the Reference and Comparison point cloud layers.
- Users can interact with the Compare Layers window on the right-side of the viewer to:
- Swap the layers
- Adjust the visible range (what is visible in the point cloud view) of the 3D change
- Change the Colour Scale for rendering the point cloud change
- Reverse the Colour Scale
- Remap the Colour Scale based on the defined Visible Range
- Toggle on/off the below and above range points (these are points determined to be outside the Visible range (Default of 0-10m)
- Toggle on Excluded Points (these are points that do not overlap in the comparison).