Using the Cropping Tools
Cropping points from the 3D viewer
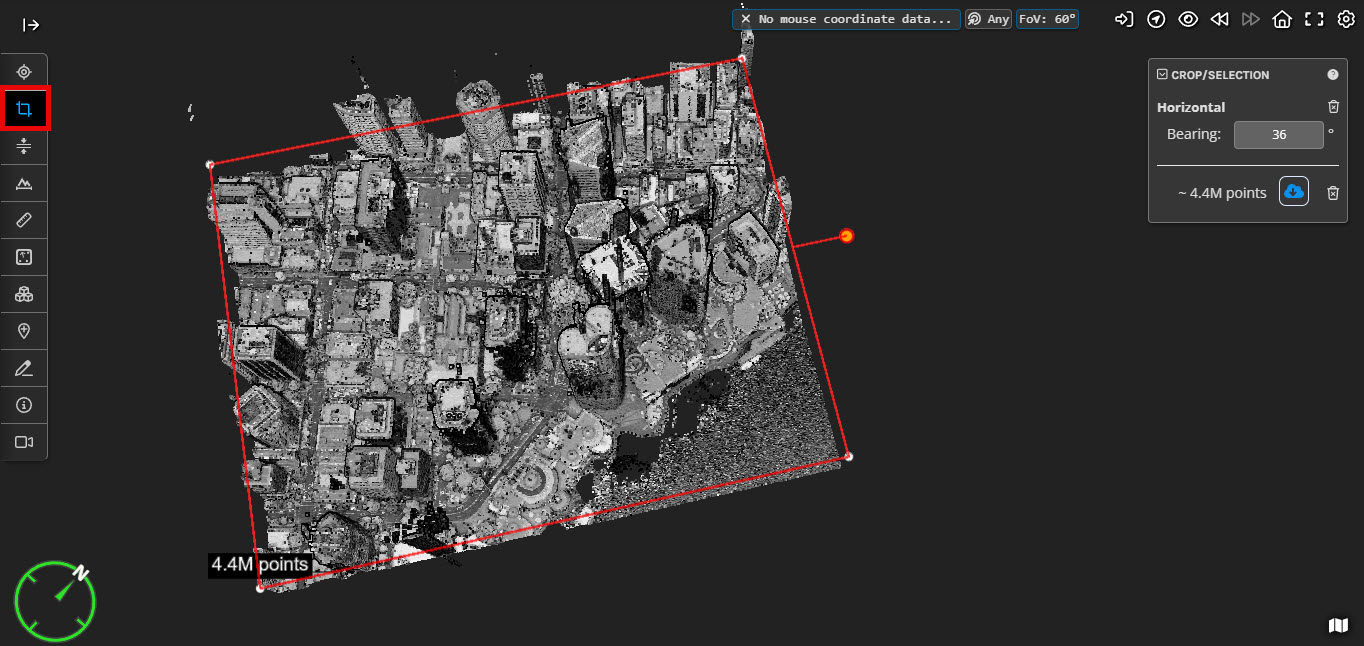
The Horizontal Cropping Tool can be accessed from the tool palette.
The horizontal cropping tool lets you define a rectangular cropping area (in the horizontal/ground plane). Once defined, the viewer will only display the points that lie within the defined cropping area. This tool can be used to cut away parts of the point cloud and focus on a specific area. It is also used as a selection tool for other functions, such as exporting a section of the point cloud.
You define the cropping box by clicking 3 points. Click the first 2 points to define one side of the box, and then drag the "rubber-banded" box to the desired size and click a 3rd time to finish. You will see a bounding box drawn around the selected points, as shown below. An estimate of the number of points you have selected will also be shown.
TIP: As you are defining a box parallel to the horizontal plane, you may find it more intuitive to place the viewer into a top-down view before defining the cropping box.
If you need to modify the cropping box, drag the manipulator handles (the white circles will turn green as you hover over them to indicate that they can be dragged) on the cropping box to adjust the position of the cropping area.
You can deactivate the Horizontal cropping tool by deselecting the tool from the toolbar. This will leave the cropping as you have set it, but return your mouse controls to camera move mode. You can reset (clear) and deactivate the cropping by pressing the Clear Selection button (bin icon in the top right).
Cropping/selecting points from the 2D/overview map
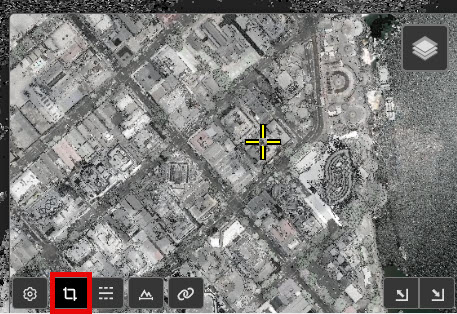
Rectangle Crop tool
The Rectangle crop tool can be used to define a horizontal crop region from the 2D map viewer. Note that you must select the Rectangle crop tool from the map tools palette in the map window (as shown below). This tool only allows you to select a rectangle area that is aligned with the map axes - you can't create a rotated selection as you can in the 3d view.
Once you have activated the tool, select the region on the 2D map by clicking the left mouse button at the first corner position and then dragging the mouse to define a rectangular area. When you have selected the area, release the mouse to confirm your cropped region. The 3D viewer will reflect your selection as normal, only showing points inside the selected region, and will centre the view on the cropped region. You can clear the selection as you would a 3D selection, by clicking the Clear selection button or define a new selection region by reactivating the tool.
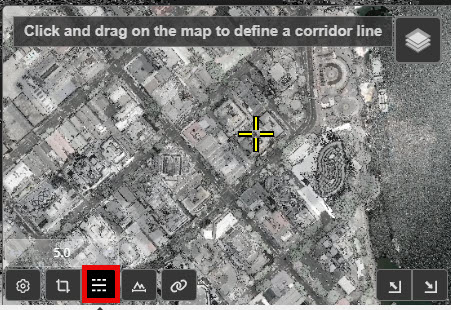
Corridor crop tool
Next to the Rectangle crop tool is the Corridor crop tool. This tool allows you to easily define the cropping region using a line with a prescribed buffer width. It is useful for scenarios where you want to crop out a long thin linear section from the point cloud (e.g. along a transmission line corridor)
Once activated, click and drag your mouse anywhere on the map to define the centerline. When you have created a line, release the mouse and a red box will appear on the map highlighting the cropped region. You can adjust the buffer width (buffer distance from the centerline) using the input field above the map tool palette (this will only be shown while the tool is active) - enter the desired value and press enter, or click in the map window to set the new buffer width value. This will crop the points in the 3D viewer and centre the view on the cropped region. To clear the cropping press the Clear selection button as you would to clear a 3D selection or activate the tool again to define a new corridor.
Creating regions from Cropped areas
When you crop/select a specific area, you will now have an option on the left hand side tab to create a new region (1). Then you can give this region a name and description (2) and save the cropped region to the left hand side tab, under the heading 'region'.
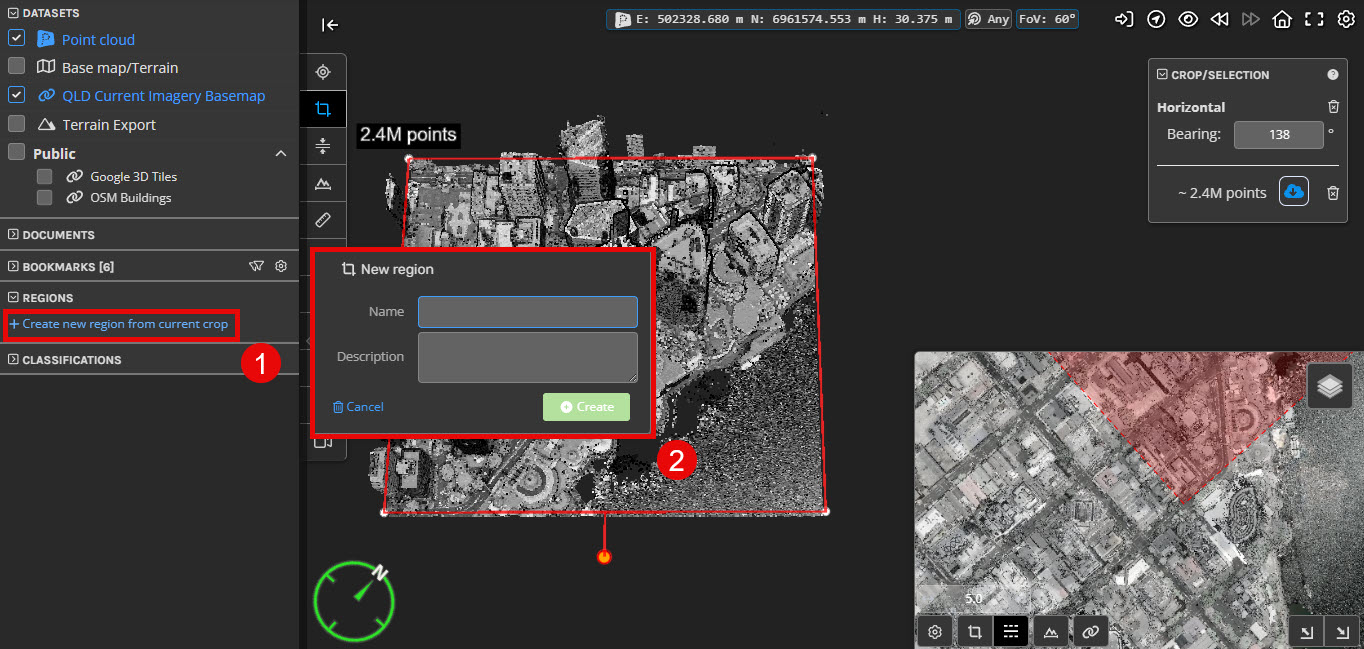
After saving this region, you can select it and only the cropped region will be shown in the viewer, with everything else being hidden.
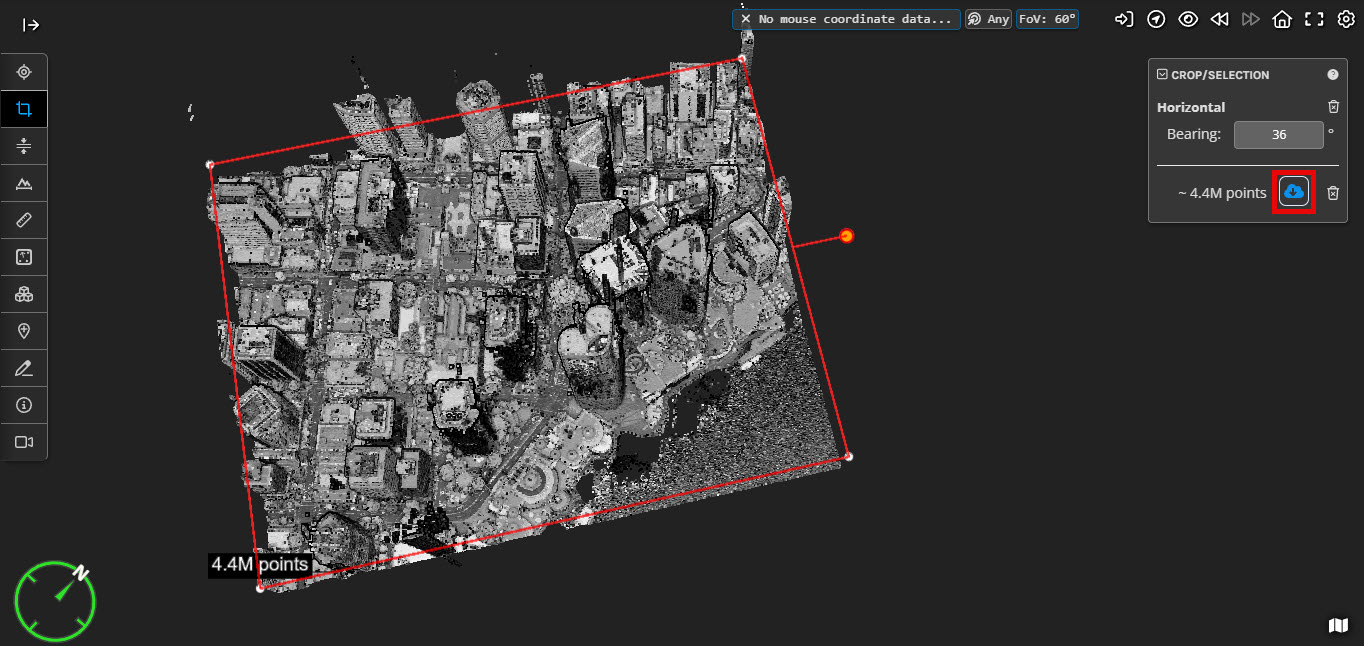
Exporting a Cropped Region
Once you have selected a region of points using any of the crop tools (including the section tool), you have the option to export these points to a file. To do so, press the Export points button and follow the instructions provided or see Exporting Points.