Using the Drawing Tool
You can use the Drawing tool to digitize points, polylines, and other graphical elements using coordinates from the point cloud and other objects in the 3D scene. The tool is primarily aimed at basic workflows that require digitizing simple geometries - it is not intended to be a replacement for a full CAD package. To activate the tool, click the Drawing Tool button from the tool palette as shown below.

When you first activate the tool on a point cloud, a default layer will be created and objects that you create will be added to this layer.
Working with the drawing layers panel
The Drawing tool allows you to group objects into layers. Layers allow you to control the visibility of all objects within the layer and to have style properties that are common to all objects in the layer (e.g. all lines are red, and have a width of 3). The layers are accessed from the Drawing Layers panel in the Left Panel.
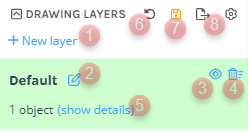
The image above outlines the main functional elements of the drawing layers panel:
-
Create a new layer by clicking the New layer button.
You can create a layer name.
Choose the layer type as being Unconstrained, Fixed Height or Drawing Plane.
If you want to close the polyline, the drawing layer will need to be on a fixed height.
You can edit the name of the layer after it's creation by clicking the edit layer name icon.
Use the visibility icon to show/hide all objects in a layer.
Use the delete layer button to completely remove the layer.
Toggle showing all of the individual objects contained by the layer and be able to delete individual objects from that layer.
Undo any changes to drawings since the last save point.
Save changes made to drawings.
Export the drawing objects.
Hiding and showing drawing layers
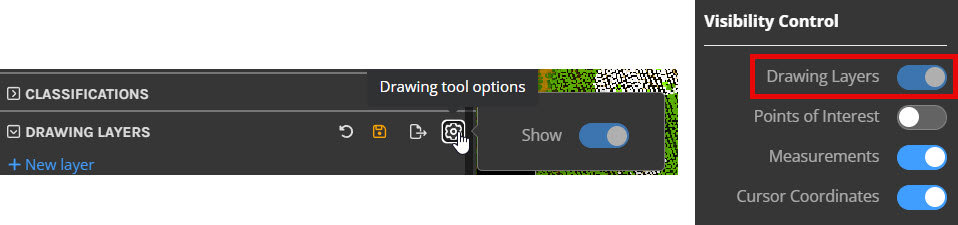
You can control the visibility of all drawing layers by using either the drawing tool options or the viewer's Visibility menu (top right of the 3D viewer window). Simply toggle the Drawing Layers option to show or hide all drawing layers.
If you activate the Drawing tool, then the current layer will always be made visible, irrespective of the global setting for drawing layers display.
Creating and editing drawing objects
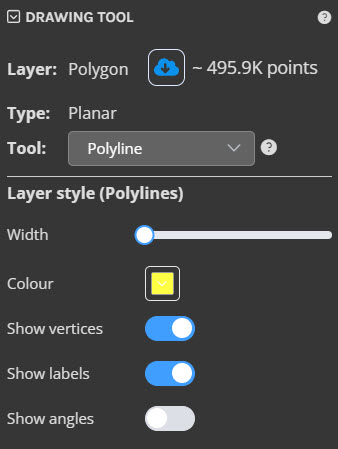
When the Drawing tool is active, the Drawing tool panel will be displayed. From here you can select the type of object you want to create and change the style for all objects in the current layer.
Once you have the tool selected, use the mouse to digitize the objects (e.g. points, or polylines) by clicking on points from the point cloud or other objects in the scene. Use the Help tooltip to display information about how to create and edit objects using the selected tool. Objects may have their own properties that can be edited on a per-object basis - for example, point objects can have a text label, and polyline objects have a closed flag.
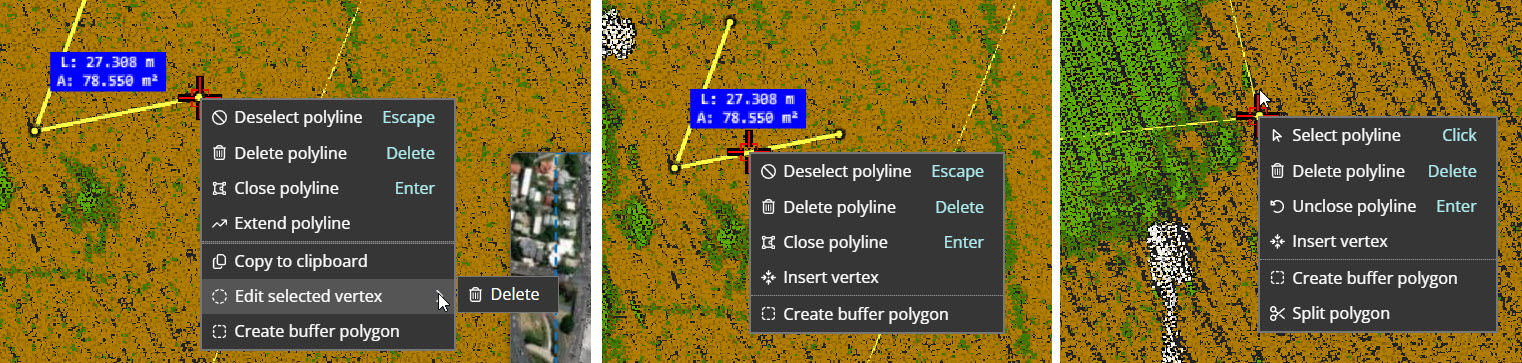
While creating or editing objects, there will also be a number of specific editing options available via the right mouse context menu. These options will vary depending on what has been selected (e.g. a vertex or a line segment) and the type of object being edited. For example, when editing a polyline and right-clicking on a vertex, the following menu will be displayed:
Once you have finished editing the drawing objects, make sure you save your changes before navigating away from the current viewer session. Once changes are saved, then the drawing objects will be available for all users that view the project. If a user has edit permissions for the project, they will also be able to edit existing drawing objects, add new objects to a drawing layer, and create new drawing layers.
Exporting drawing objects
Once you have some objects created, the Export button will become available from the Drawing Layers panel. From this the export panel will be displayed prior to exporting to allow you to configure the information to export
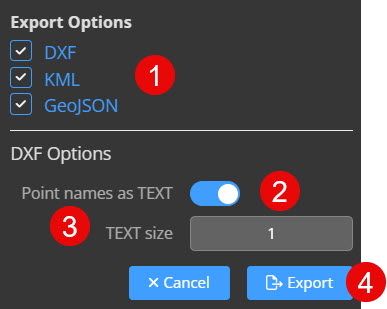
Choose what file types you want to export the drawing objects as.
Choose the point names as text.
Choose the text size.
Click export to and the files will begin to download
Exporting points using a polygon object
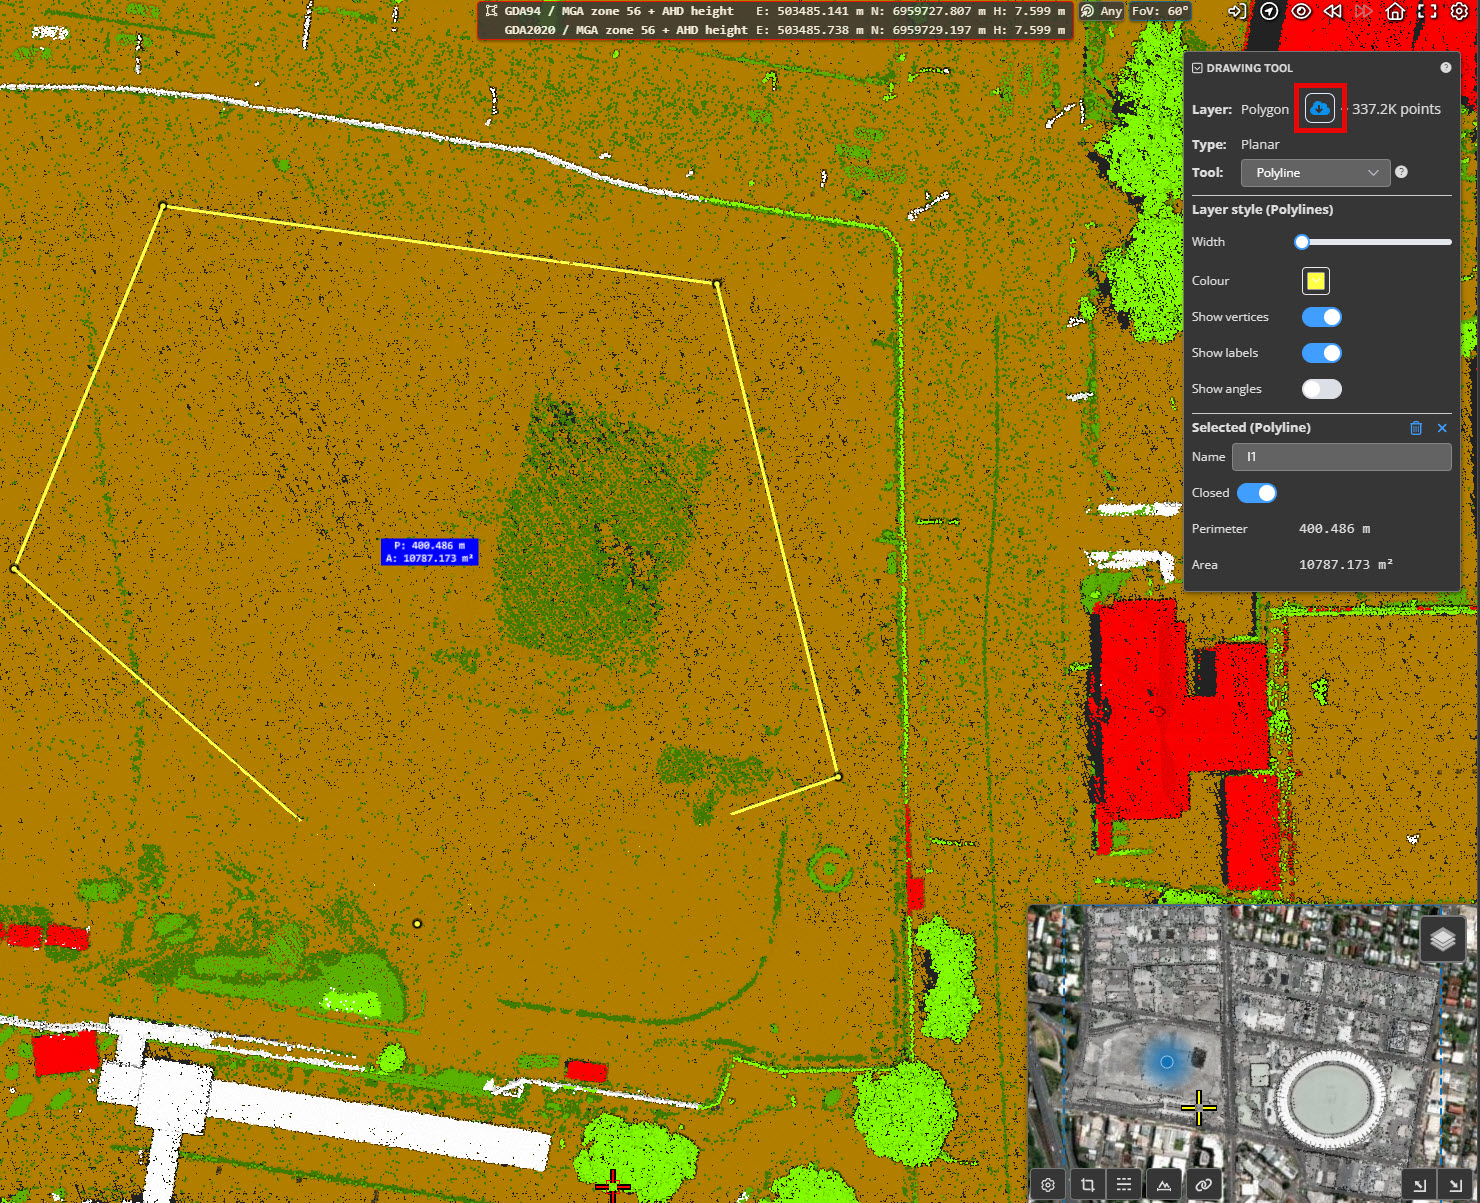
Once a drawing layer has at least one closed polyline object in it, the export button in the drawing layer panel options is enabled. This allows you to export arbitrary regions of points from a point cloud. Simply create a polyline around the points that you wish to export (ensure that it is closed), click the export button and then follow the instructions when prompted or see Exporting Points for more details. If there are multiple closed polylines in the layer, the points within each polyline will be included in the export. In the example below, all the points inside the pool will be exported (within the yellow boundary polyline).
Note: The 2D projection of the boundary polyline (onto the ground) will be used as the extents of the exported area.
Converting a vector dataset to a drawing layer
To convert a vector dataset to a drawing layer, click the dataset options and then click on the Convert to drawing layer.
