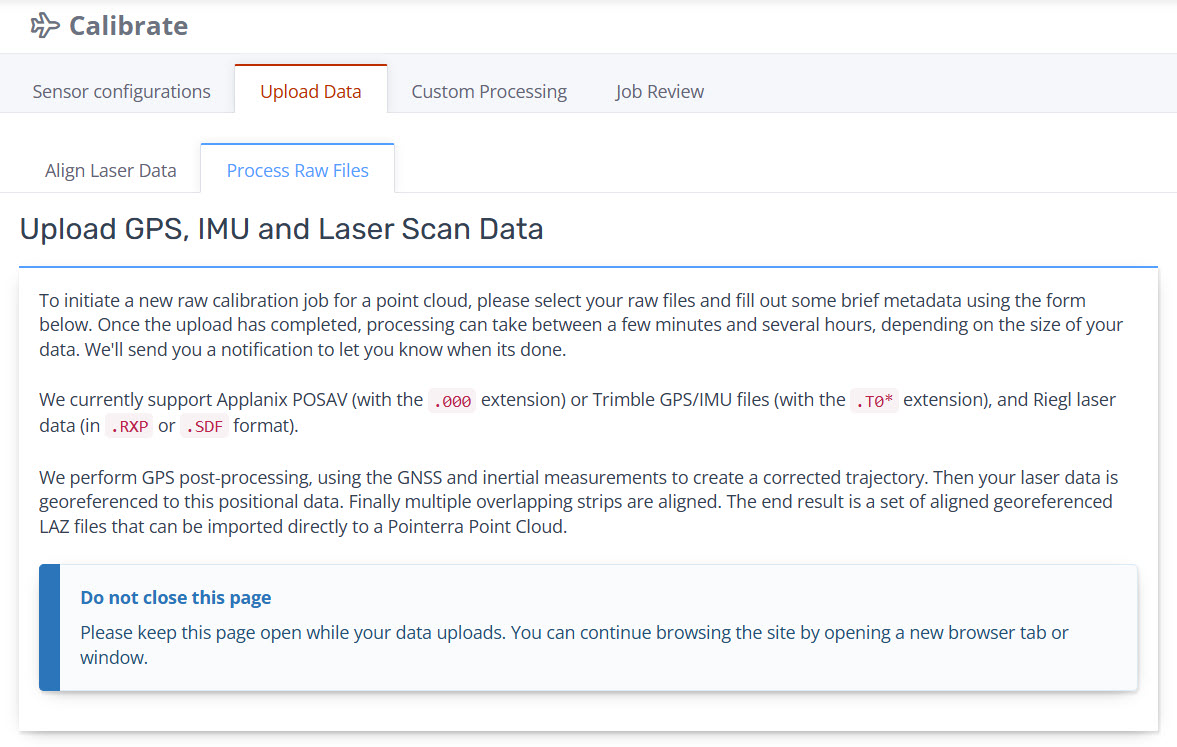
Uploading Raw Sensor Data: Individual Missions
Uploading raw sensor data must be prepared as per the upload page instructions to ensure Pointerra can automatically identify the applicable inputs for each processing stage.
Upload of raw sensor data should contain one single mission (also referred to as Flight) with GPS, Laser and optional Base data all overlapping each other in time coverage.
Preparing the Source Files
-
Create the following folders to contain your source data. The folder names must be lower case.
-
gps - contains one or more of the following formats:
-
Applanix POSAV (.000 extension).
-
Notes:
Make sure the numbers are sequential.
The last file in the sequence will be a smaller size than the first.
-
Trimble APX (.T0* extension)
-
-
laser - contains RXP or SDF file formats. Depending on the source, these can either be one file per scan or a single continuous scan, which can be in one large file or split into smaller files.
-
Notes:
A continuous scan usually comes from a UAV mission where it is not possible to turn off the laser at the turns. Depending on the setup of the system, a single file is created or it is split into smaller RXP files. In the case of the latter, the first file will have the normal extension of *.rxp, while the subsequent files will start with *.rxp_000, followed by *.rxp_001, etc.
The file names before the extension must be the same name.
-
-
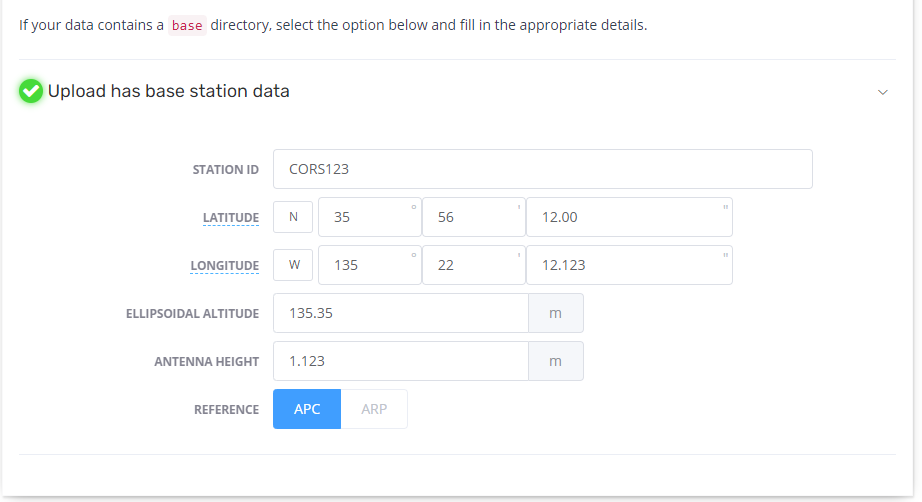
base - (optional) Either contains one Rinex and Ephemeris file with the .**O extension, and optional .**N or .**G files, or the Hatanaka-compressed Rinex file (.crx or .crx.gz).
Note: The Rinex and Ephemeris file extension must be capitalised.
-
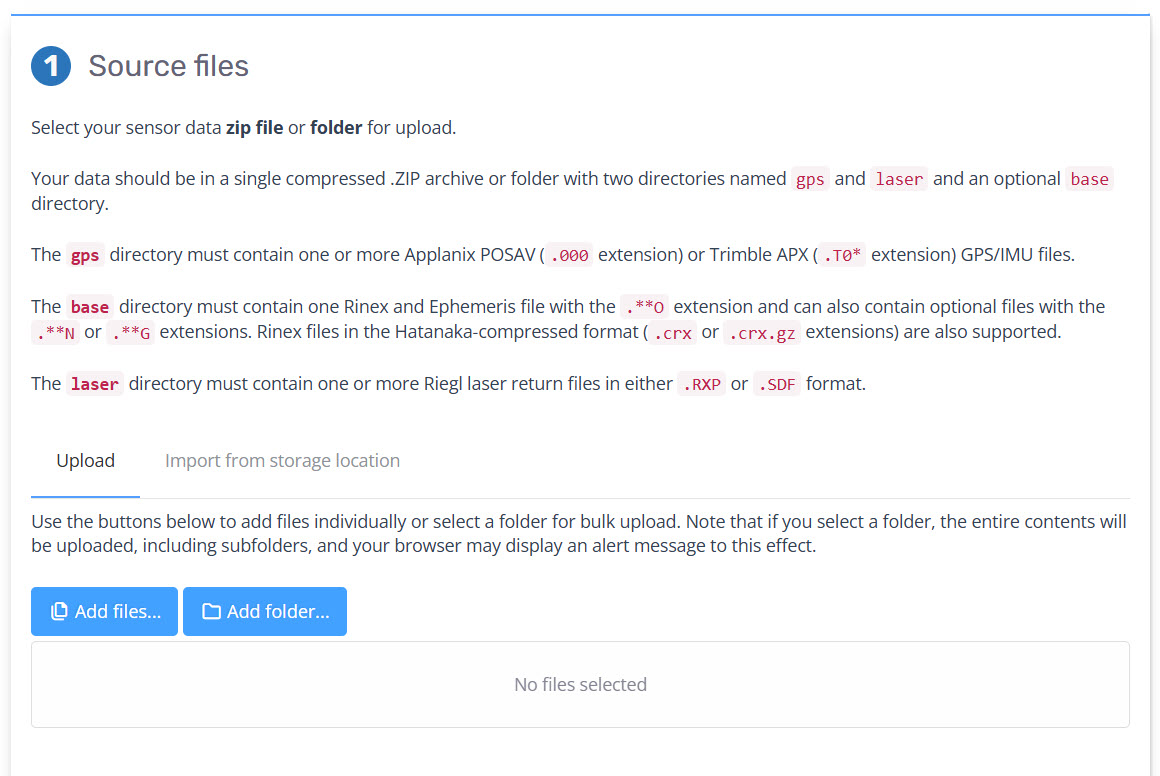
Source Files
Select the 'Add folder' button and add each folder separately. Alternatively all data can be placed in a single zip file.
If the upload contains base station data select the "Upload has base station data" option and enter the appropriate details into all fields.
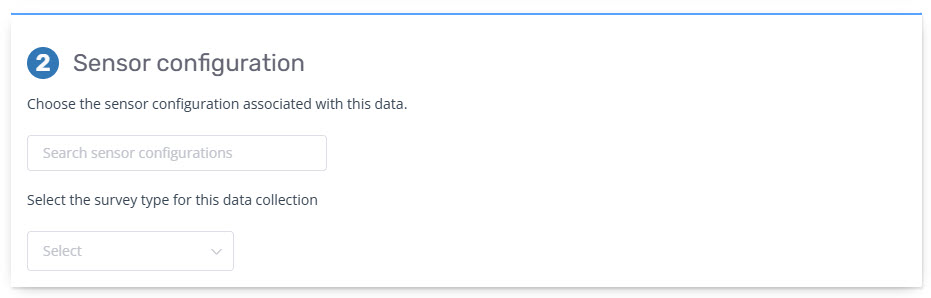
Sensor Configuration
From the drop-down select the pre-entered "Sensor Configuration" that applies to the raw sensor data being uploaded.
-
From the drop-down select the applicable 'Survey Type" for the raw sensor data being uploaded. These options define the parameters utilized in the 'Strip alignment' stage. Options are:
Corridor - for utility or transportation type corridors where overlap between strips is limited.
Block - for block collection where the bulk of strips have significant overlap with adjacent strips (based on the planned strip overlap).
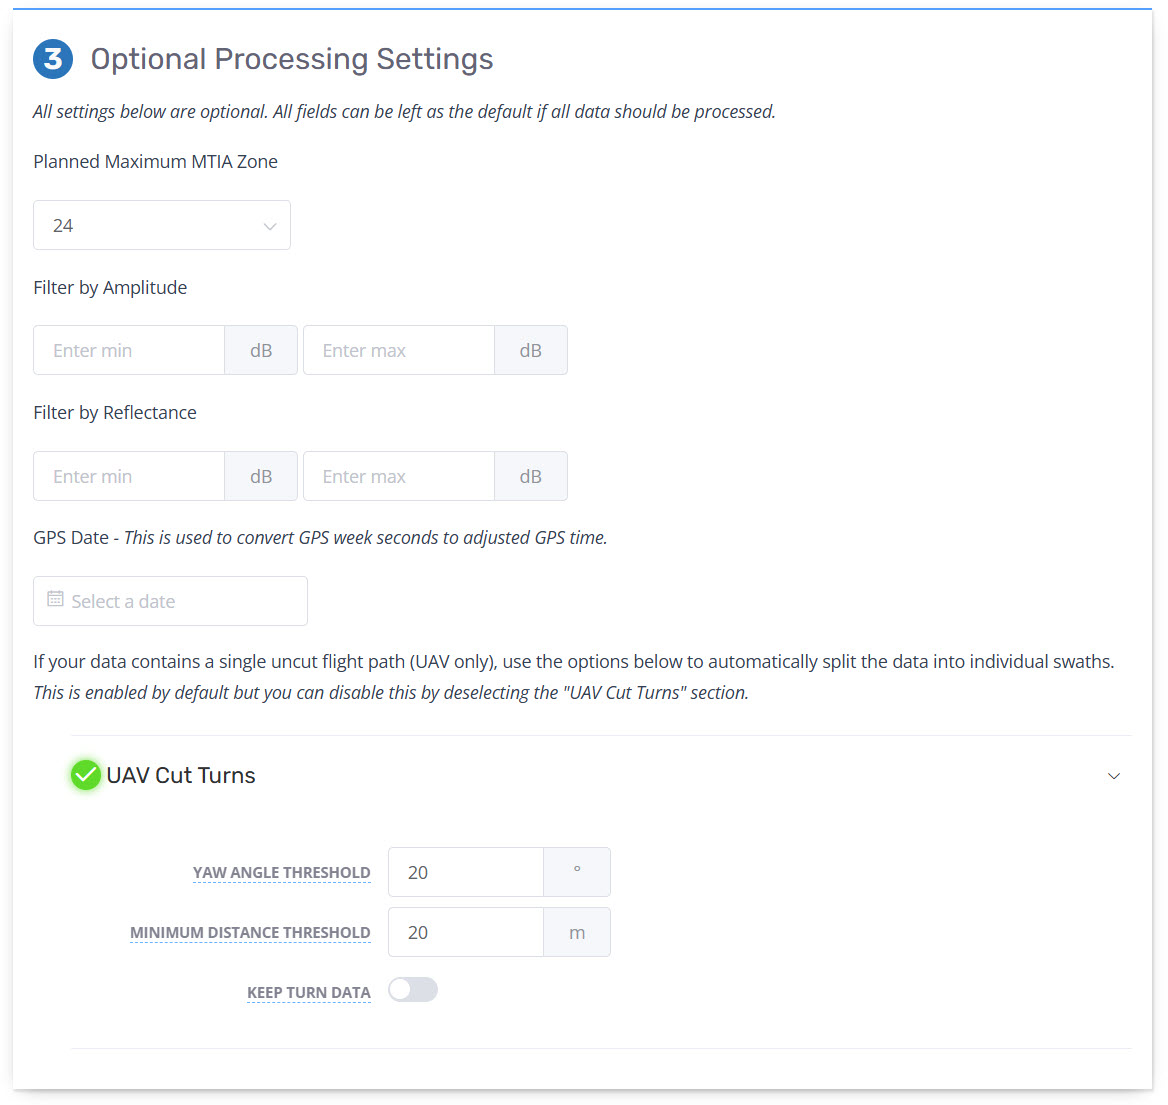
Max MTIA Zone (Optional) - for certain sensors (i.e. Riegl VQ480ii) the planned maximum MTIA zone must be defined at upload. In the first case leave the entered value of '12' as is. The Pointerra team will advise if a specific zone is required to be defined for your sensor for future processing.
Filter by Amplitude (Optional) - Deletes points with raw amplitude outside the min and max settings.
Filter by Reflectance (Optional) - Deletes points with reflectance values outside the min and max settings.
GPS Date (Optional) - Converts GPS week seconds to adjusted GPS time
-
UAV Cut Turns - This is available if the aircraft type is set to UAV in the sensor config. As UAV captures are generally small, the capture from LiDAR sensors remain on as the turns are too short for the system to stop collecting in that short time period. As a result the RXP files will be one continuous capture and not split. These options allow for the lidar data to be cut into strips.
Yaw Angle Threshold - The flight will be cut whenever the aircraft turns with a heading change greater than the number entered. Default is 20 Degrees.
Minimum Distance Threshold - This specifies the minimum distance for a flight line and allows shorter trajectory segments to be dropped. Default is 20 metres. We recommend increasing this to what is expected to be the shortest flight line.
Keep Turn Data - Choose whether to keep or discard data during turns. Please note that keeping this data is likely to cause self-overlap.
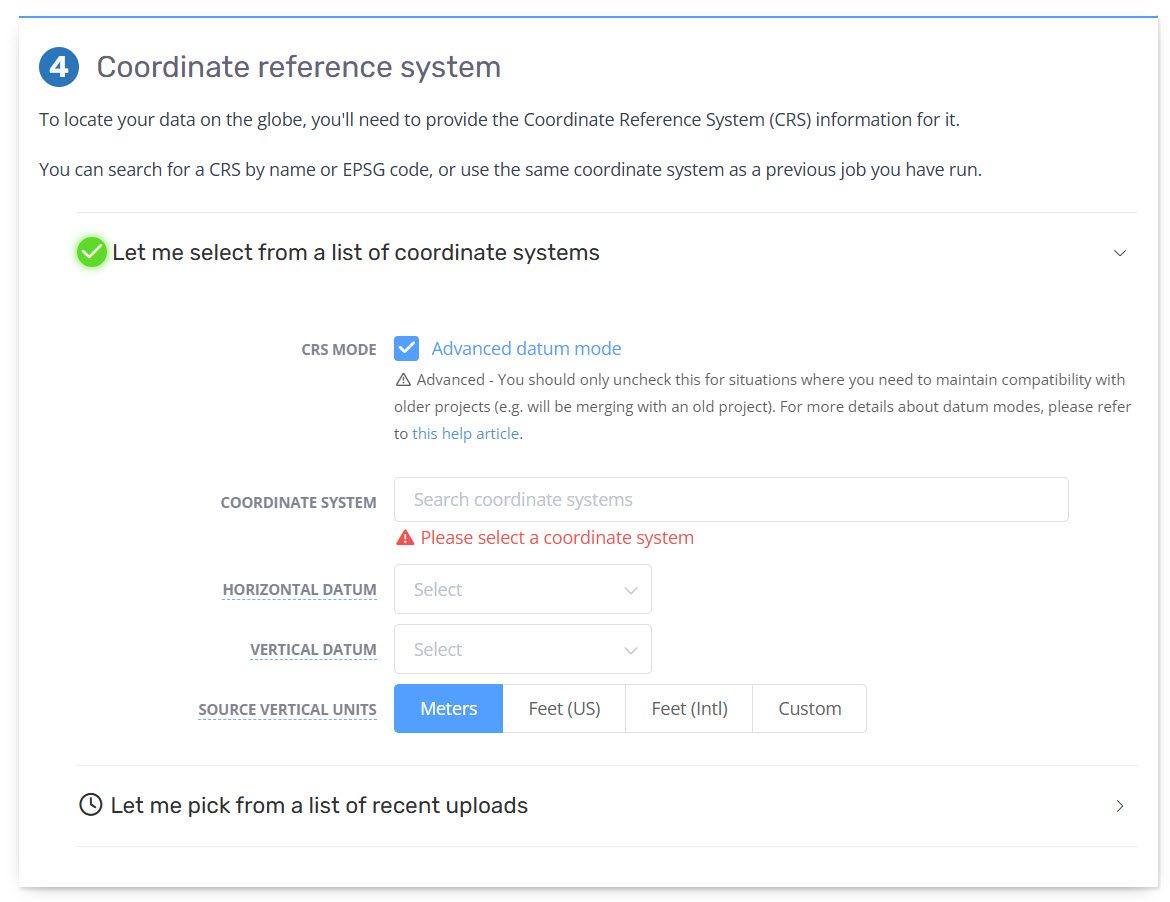
Source coordinate system
-
The selection of accurate coordinate systems is critical for ensuring the final generated point cloud is in the desired coordinate system once it is converted to the Pointerra format and visible in the Viewer.
From the list of options:
CRS Mode - Either enable/disable the Advanced Datum Mode
Source Coordinate System - enter the desired coordinate by name or EPSG code - this is the coordinate system that the point cloud (LAZ format) is generated in. We recommend projected coordinate system.
Horizontal Datum - select from the available options in the drop down based on geographical location - this defines both horizontal datum of the GPS trajectory and the incoming base station data coordinates (it is expected that the coordinates are in the same datum).
Vertical Datum - select from the available options in the drop down based on geographical location - this defines the vertical datum of the generated point cloud either as Ellipsoidal or Orthometric (based on the selected geoid).
Source Vertical Units - select from the available options and should match the 'Source Coordinate System'.
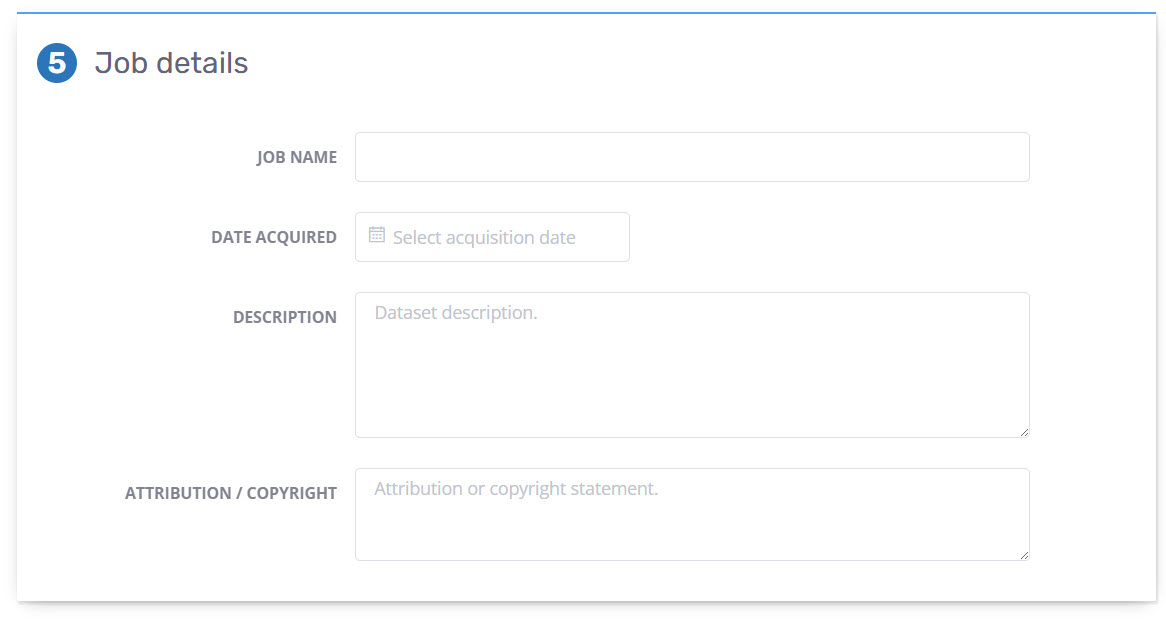
Sensor dataset details
Enter applicable metadata information pertaining to the uploaded raw sensor data.
"Name your new sensor dataset" will flow through to the name of the constructed point cloud in the Viewer.
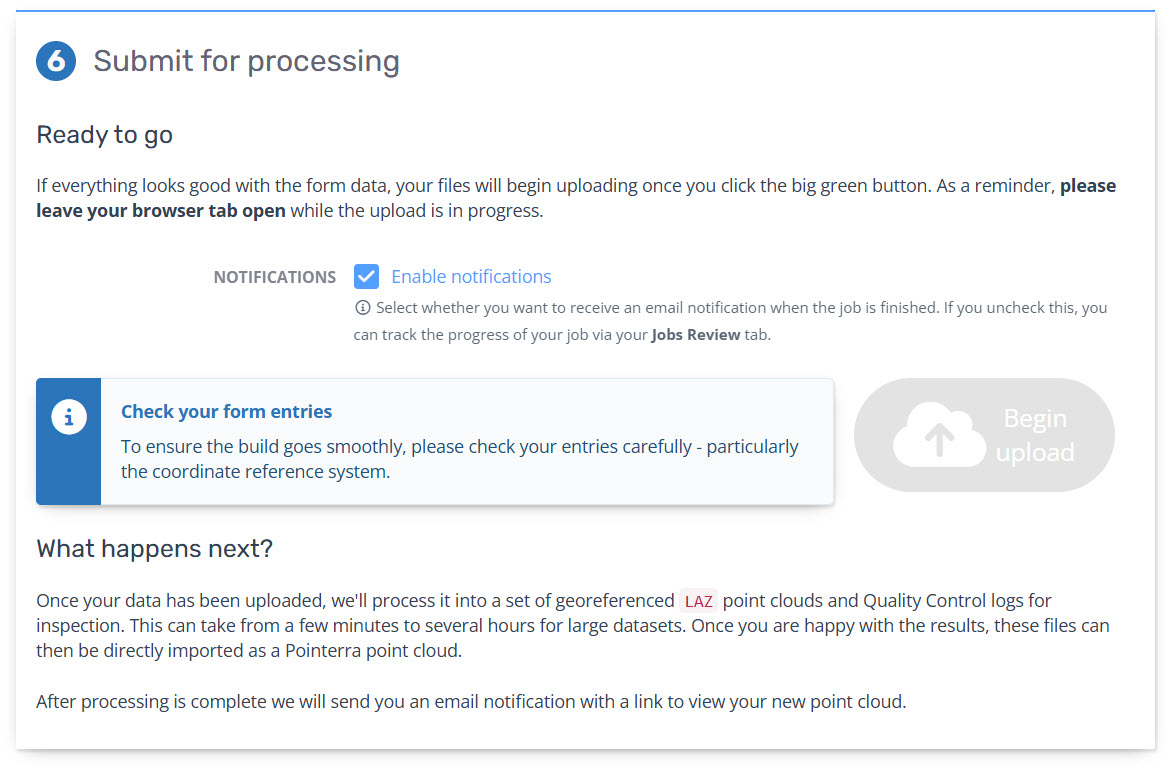
Submit for processing
If all inputs are correct select "Begin upload" to commence the upload.
If left selected an email will be sent to the User uploading the data at completion of upload into Pointerra.
Once upload is complete the page will automatically reload to the "Job Review" page and automatically trigger the processing workflow. See Monitoring Processing status (Individual Mission Jobs)
Locations on the upload page will be flagged if information is missing prior to allowing upload.