Using the Classification Editor
The Pointerra Classification Editor provides specific tools that will greatly assist in the quality assurance and editing of point clouds. Users can perform classification edits either on the original point cloud or after running the Pointerra poles + wires and/or classification analytics.
Note: Classification editing tools are not enabled by default for all customers. Please lodge a support request if the below options are not available and you would like trial access.
Activating the editing process
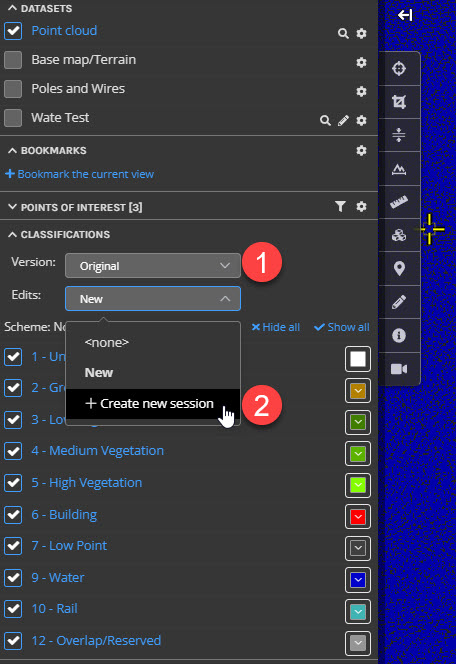
Method 1 - Classification Tab
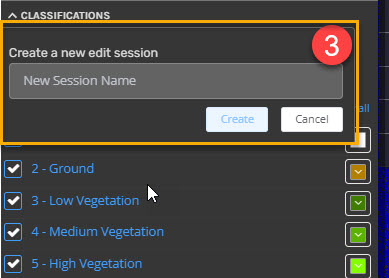
This method is available to both editing original and analytics versions. A separate 'classifications' tab is created on the left-hand side where the classification datasets are organized. Here, you can change between the different classification versions that have been created for that point cloud (1) and you will also have the option to either create a new edit session or choose an existing one (2). If you choose to create a new one, then the “’create a new edit session. Window will appear. Then enter a name for the editing session and create/begin editing (3).
Method 2 – Datasets Tab (Poles + Wires or Classification Analytics)
This method is available for either poles + wires or classification analytics. Look for the classification editor button below the previously run analytic.
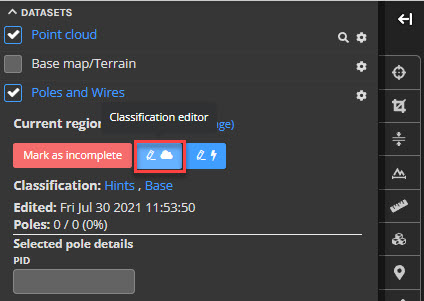
When beginning the editing process, the colours will automatically change the Classification.
Options for classification editing
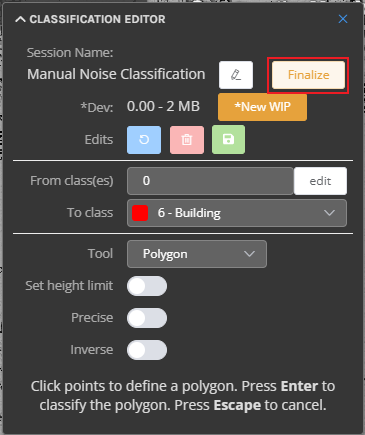
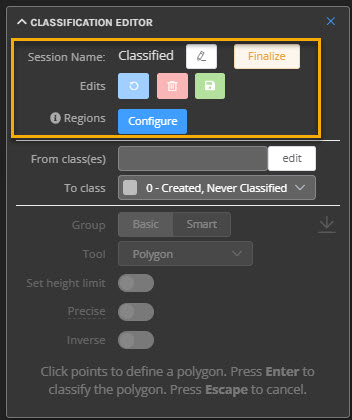
When beginning classification editing, an overlay will appear on the right hand side of the viewer and as well as the editing tools, you are provided with many helpful options relating to the organization of the editing process. The options include:
Renaming the edit session
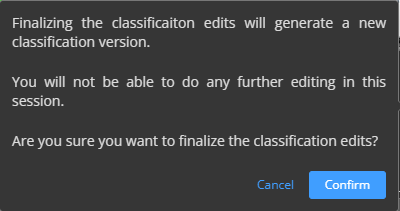
Finalizing the edit session: when you finalize an edit session, it will move those edits to the classification version and that edit session will be closed permanently
-
An undo edit, remove all edits and save options for use whilst editing
Edits will automatically save when switching between classes and/or tool type
Additionally, editing can be performed in the cross section view.
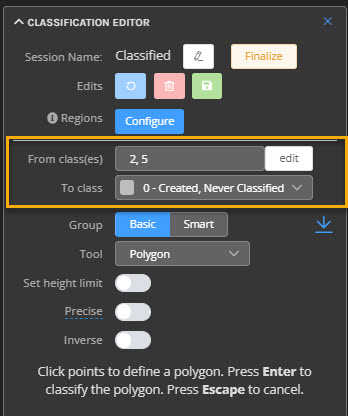
When editing, you are provided with several options to include/exclude specific classifications when editing. This is done through the 'classes' drop down menus. Before using tools ensure to check these options are as desired.
'From class(es)' you will select the classes that can be altered, with options to select all, clear all selections or invert the selections
'To class' will determine what those selected classes will be reclassified to
Using the Basic Editing tools
These basic editing tools change the classifications with heavy direction/input from the editor
Reclassify tool
The reclassify tool converts all points (for the entire point cloud) of the selected class(es) to the other predetermined class. This tool is helpful for when you are needing to globally reclassify points. To use the reclassify tool, just select the reclassify option in the tool drop down menu (1) and then click the 'reclassify' button (2)

Polygon tool
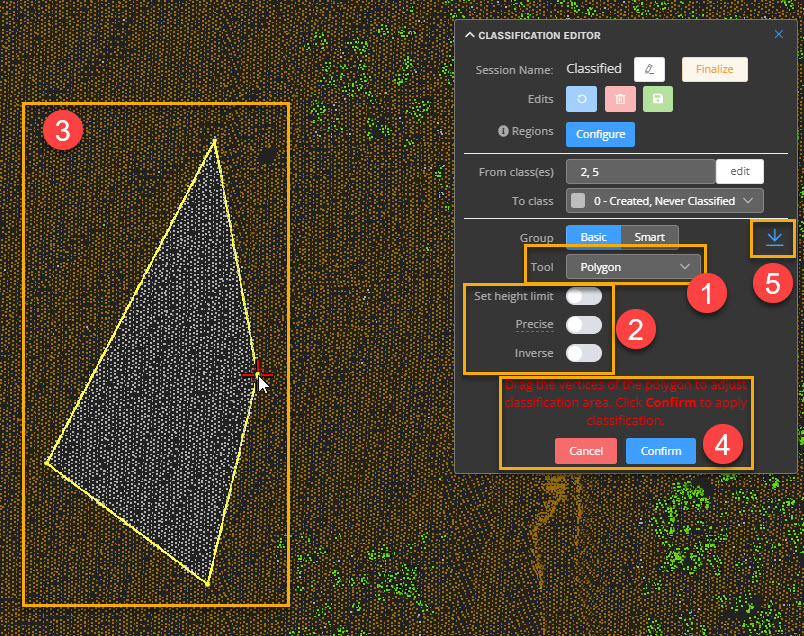
The polygon tool allows for precise and adaptable point selection. To begin using the tool, first select the polygon option from the drop down menu (1) and then toggle the options for height limit, precise polygon boundary and selecting the inverse of the polygon region (2), then draw polygon to classify intended features/points (3), then you can also adjust the polygon by dragging a point of the polygon and confirm to apply the classification (4)
NOTE: You are also able to import datasets/drawing layers that can be used to define the polygon instead of manually drawing it. This can be useful for extremely precise editing/point selection (5)
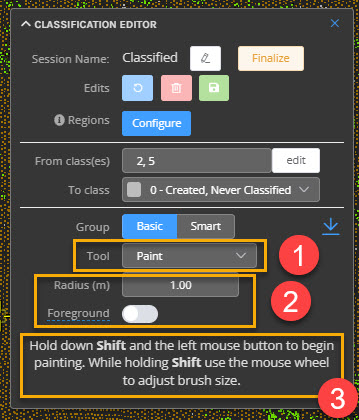
Paint tool
The paint tool allows the editor to quickly reclassify points in an area by hovering over it with the cursor. To begin using the tool, first select the paint option from the drop down menu (1), then adjust the paint radius value as desired and toggle if the tool only changes the points in the foreground (2), then hold down shift and move cursor over points you wish to classify (instructions on bottom of overlay) (3). Note that you can reclassify single points by setting the paint tool radius to 0 - when in this mode, the tool will select and modify individual points without affecting other points.
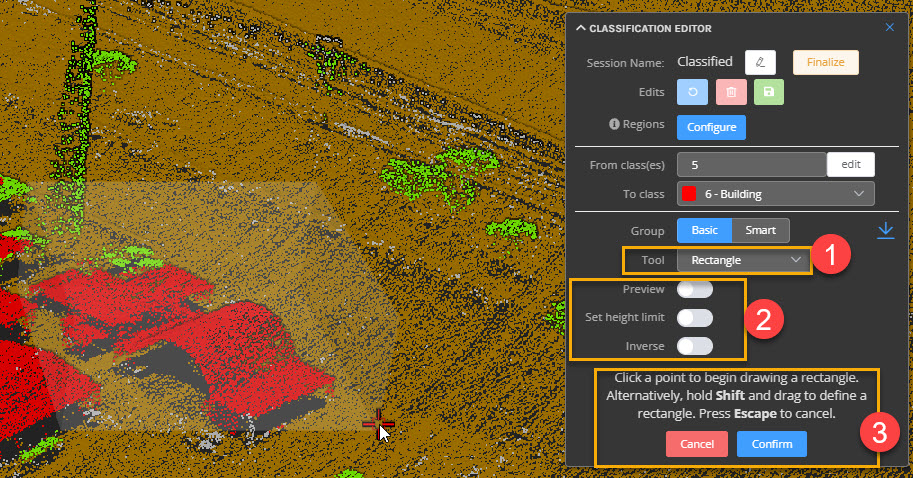
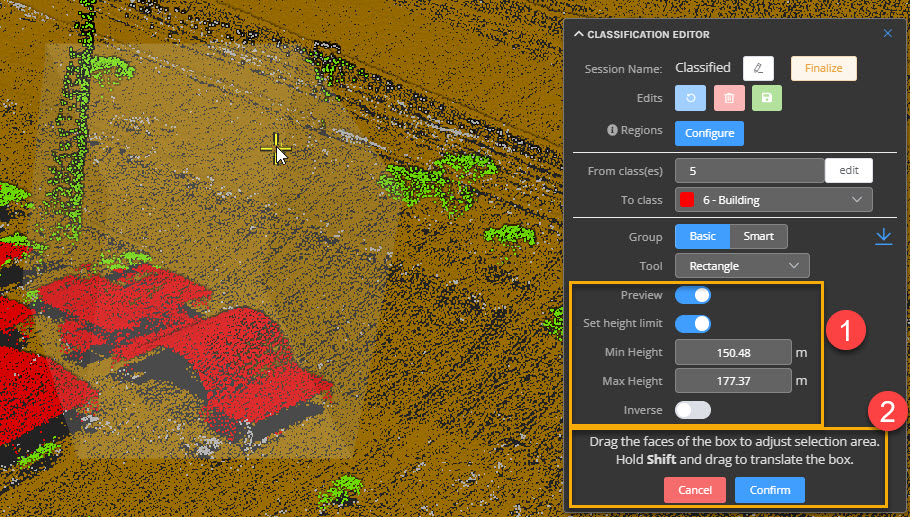
Rectangle tool
The rectangle tool is similar to the polygon tool in select a specified region, however it provides options for selecting a range of elevation and has a robust adjustment system. To begin using the tool, first select the rectangle option from the drop down menu (1), then adjust the rectangle drawing options of preview, height limit and inverse drawing (2), then draw the rectangle to highlight desired points (instructions shown at bottom of the overlay) (3), adjusting the rectangular prism can be done with both the preview (as stated in instructions) and height limit options (4), and finally confirm when satisfied with classified points (5).
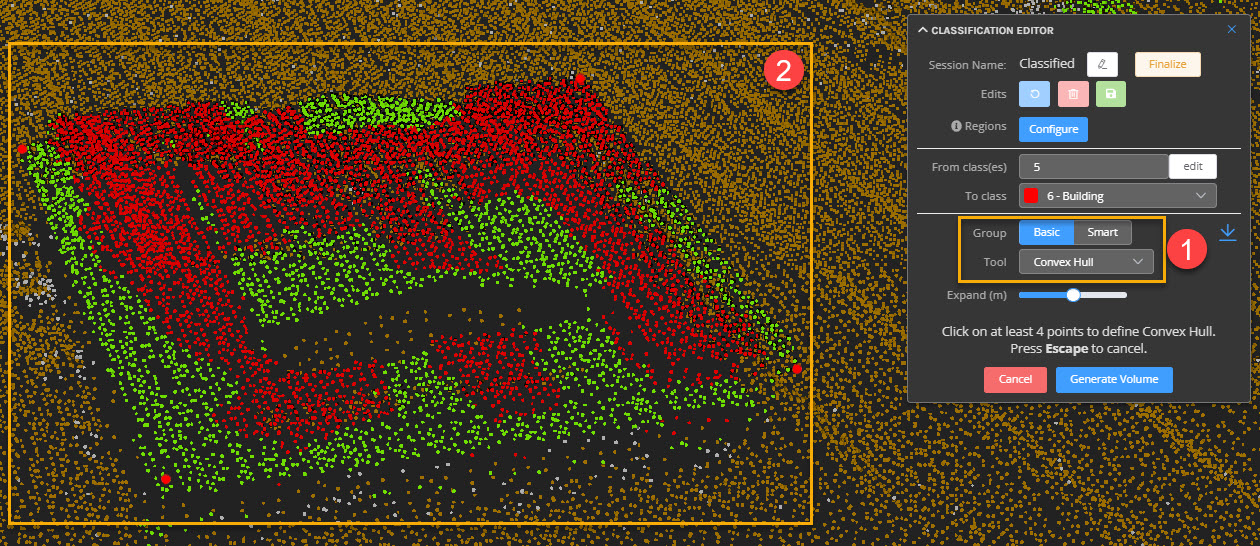
Convex hull tool
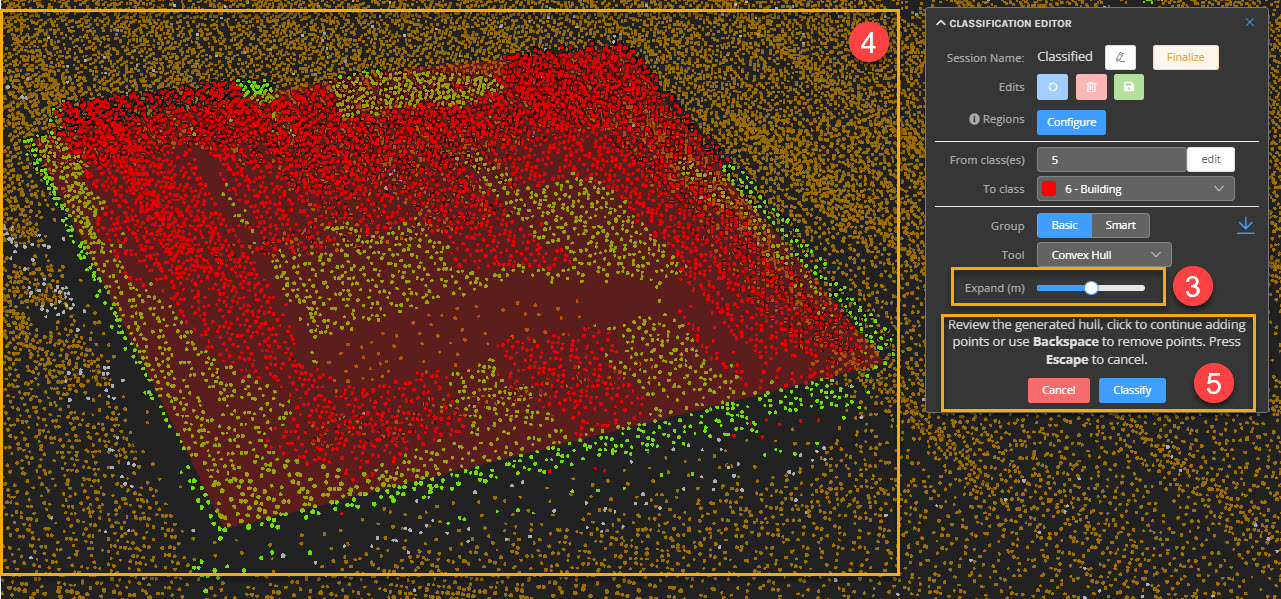
This convex hull tool is very useful for more precise 3D point selection when reclassifying. To begin using the tool, first you need to select the tool from the drop down menu (1), then select the points that you wish to create the 3D hull (2), then expand/contract the hull (3) so it includes the desired points (4), when done, select the classify button to finish the process (5)
NOTE: To add more points just select another point on the point cloud and it will take you back to the interface in (2), to adjust the points/vertices of the hull, just select the cancel button (5) and it will take you back to the stage at (2)
Above/Below line tool
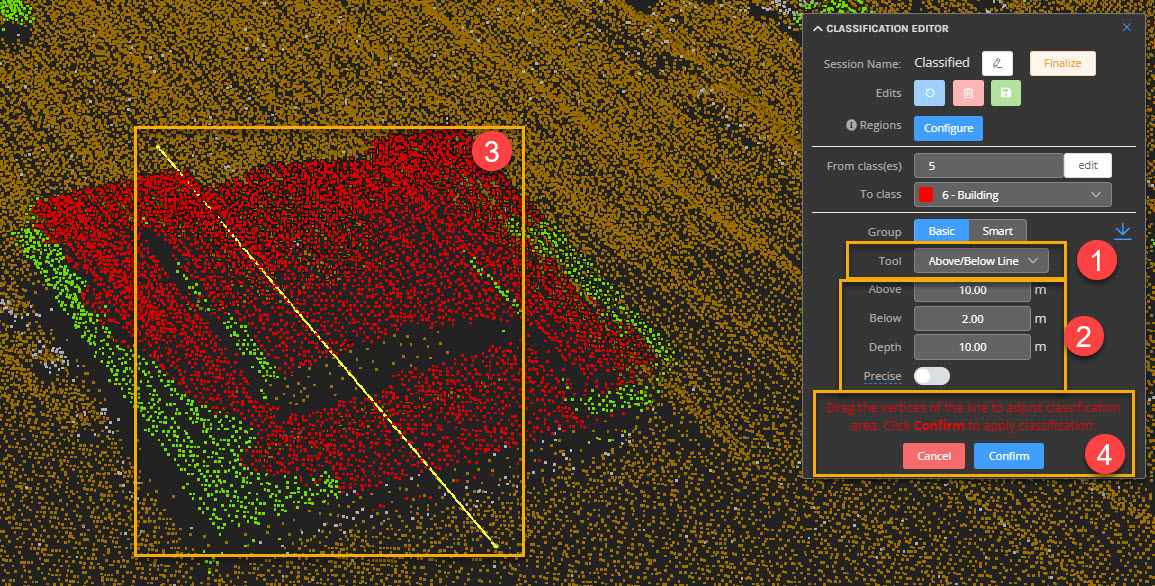
The above/below line tool is a useful classification editor when you are dealing with more vertical points. To begin using the tool, first you need to select the tool from the drop down menu (1), then adjust the values for the vertical reach above and below the line, as well as the horizontal distance (depth is not available while in cross section view (2), select two points to create the line between and adjust the position if needed (3), and finally confirm the reclassification (4).
Using the Smart Editing tools
The smart editing tools utilizes planar surface detection to reclassify nearby points to either building or vegetation depending on planarity of points. It is a very helpful feature that allows classification editing of buildings or vegetation to be done to a high degree of accuracy, so the editor does not have to spend more time accurately reclassifying points.
Roof Smart tool
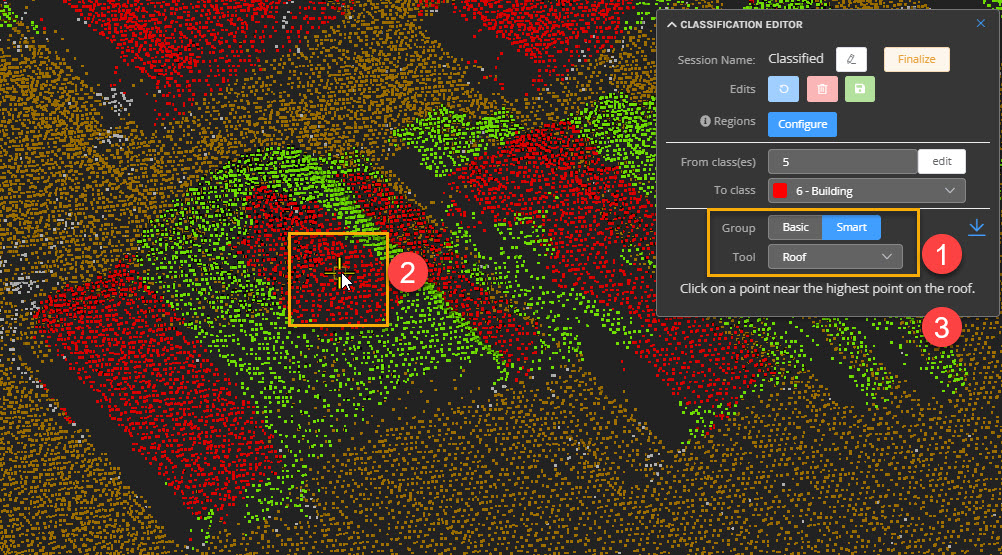
The roof tool is useful for dealing with roofs with multiple angles/planes. To use this tool, first select the 'Smart' tool group and the default smart tool option is the roof tool (1), then just select the highest point of the roof (as instructions state) (2) and then if the reclassification shown is as desired, then confirm the edit (3).
NOTE: Ensure that you are reclassifying to the 'building' class
Plane Smart tool
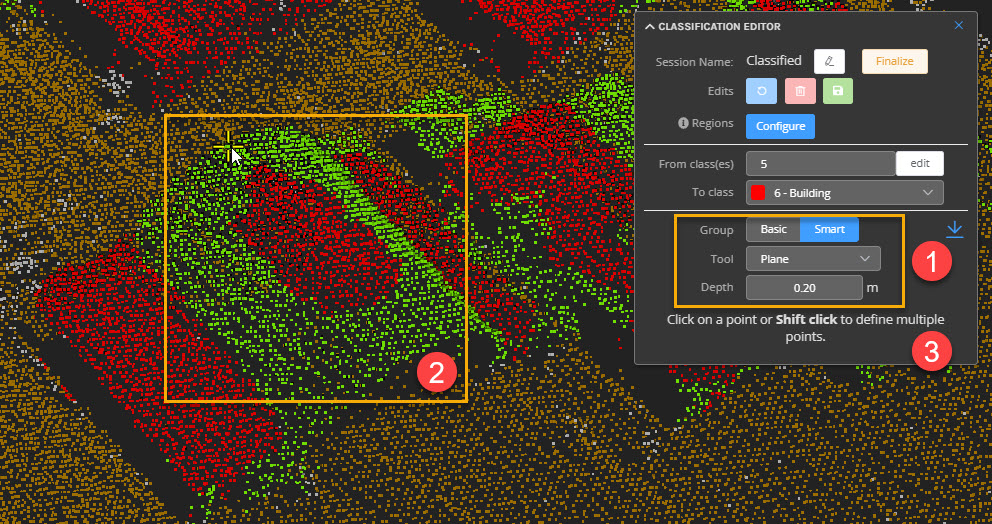
The plane tool is useful for dealing with flat buildings/structures/roofs. To use this tool, first select the 'Smart' tool group, the select 'Plane' in the tool drop down menu and adjust the depth value if needed (1), then select anywhere on the plane (2) and then if the reclassification shown is as desired, then confirm the edit or press Enter (3).
Finalizing the editing process
-
For the Method 1 workflow - once all edits are complete select the Finalize button in the Classification Editor.
-
A confirmation window will displaying asking you to confirm that all edits are complete and you would like to create a new Classification Version.
After selecting Confirm to proceed an analytic will run to create a new Classification Version.
You will receive an email once the new Classification Version is ready for viewing.
Once the email is received refresh the browser page and select the new Classification Version which will be the 'Edit Session Name' created in Activating stage above.