Mesh Clash Detector Analytics
For comparing as-built point clouds with CAD models, Pointerra has created a mesh clash detector analytic to highlight differences between the two. The point cloud project must contain the point cloud and CAD model in coincident locations for comparison.
Running the Analytic
- Load the point cloud project.
- Upload your 3D BIM/CAD model.
- Notes:
- The 3D model needs to be in attached to the project
- Currently the mesh clash comparison will run on the full 3D model that has been uploaded. If you wish to run it on particular components then the 3D model will need to be split up and uploaded as a separate dataset.
- If the mesh clash comparison is to be generated from a subset of the point cloud you must use the 'Rectangle Clip' tool first.
- Click the Project (1) button located at the bottom left of the window and select the Run analytic (2)

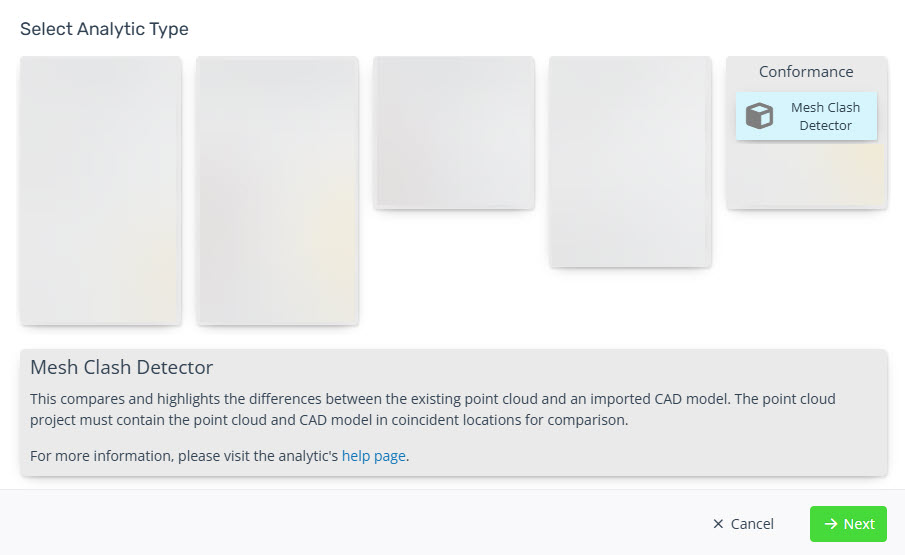
- Click the Mesh Clash Detector button and click next.

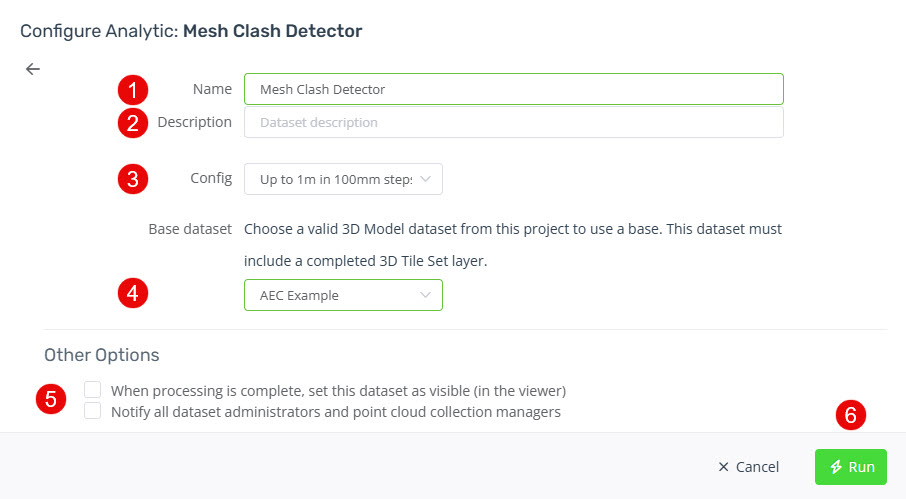
- In the settings window enter:
- Name (if appropriate to change the default)
- Description (optional)
- Config - select the appropriate configuration for your use case
- Example: 1m in 100mm steps means the comparison distance will be limited to 1m and each colour band is in 100mm steps.
- Note: Pointerra can add additional configs.
- Base dataset - select the applicable 3D Model for the mesh clash detector.
- Tick whether you wish for the dataset to be visible when loading and if you wish all dataset administrators to be notified.
- Click Run to start the analytic.

- Users will be notified via email once the analytic has finished processing that the comparison is available in the 3D Viewer.
Viewing the Results
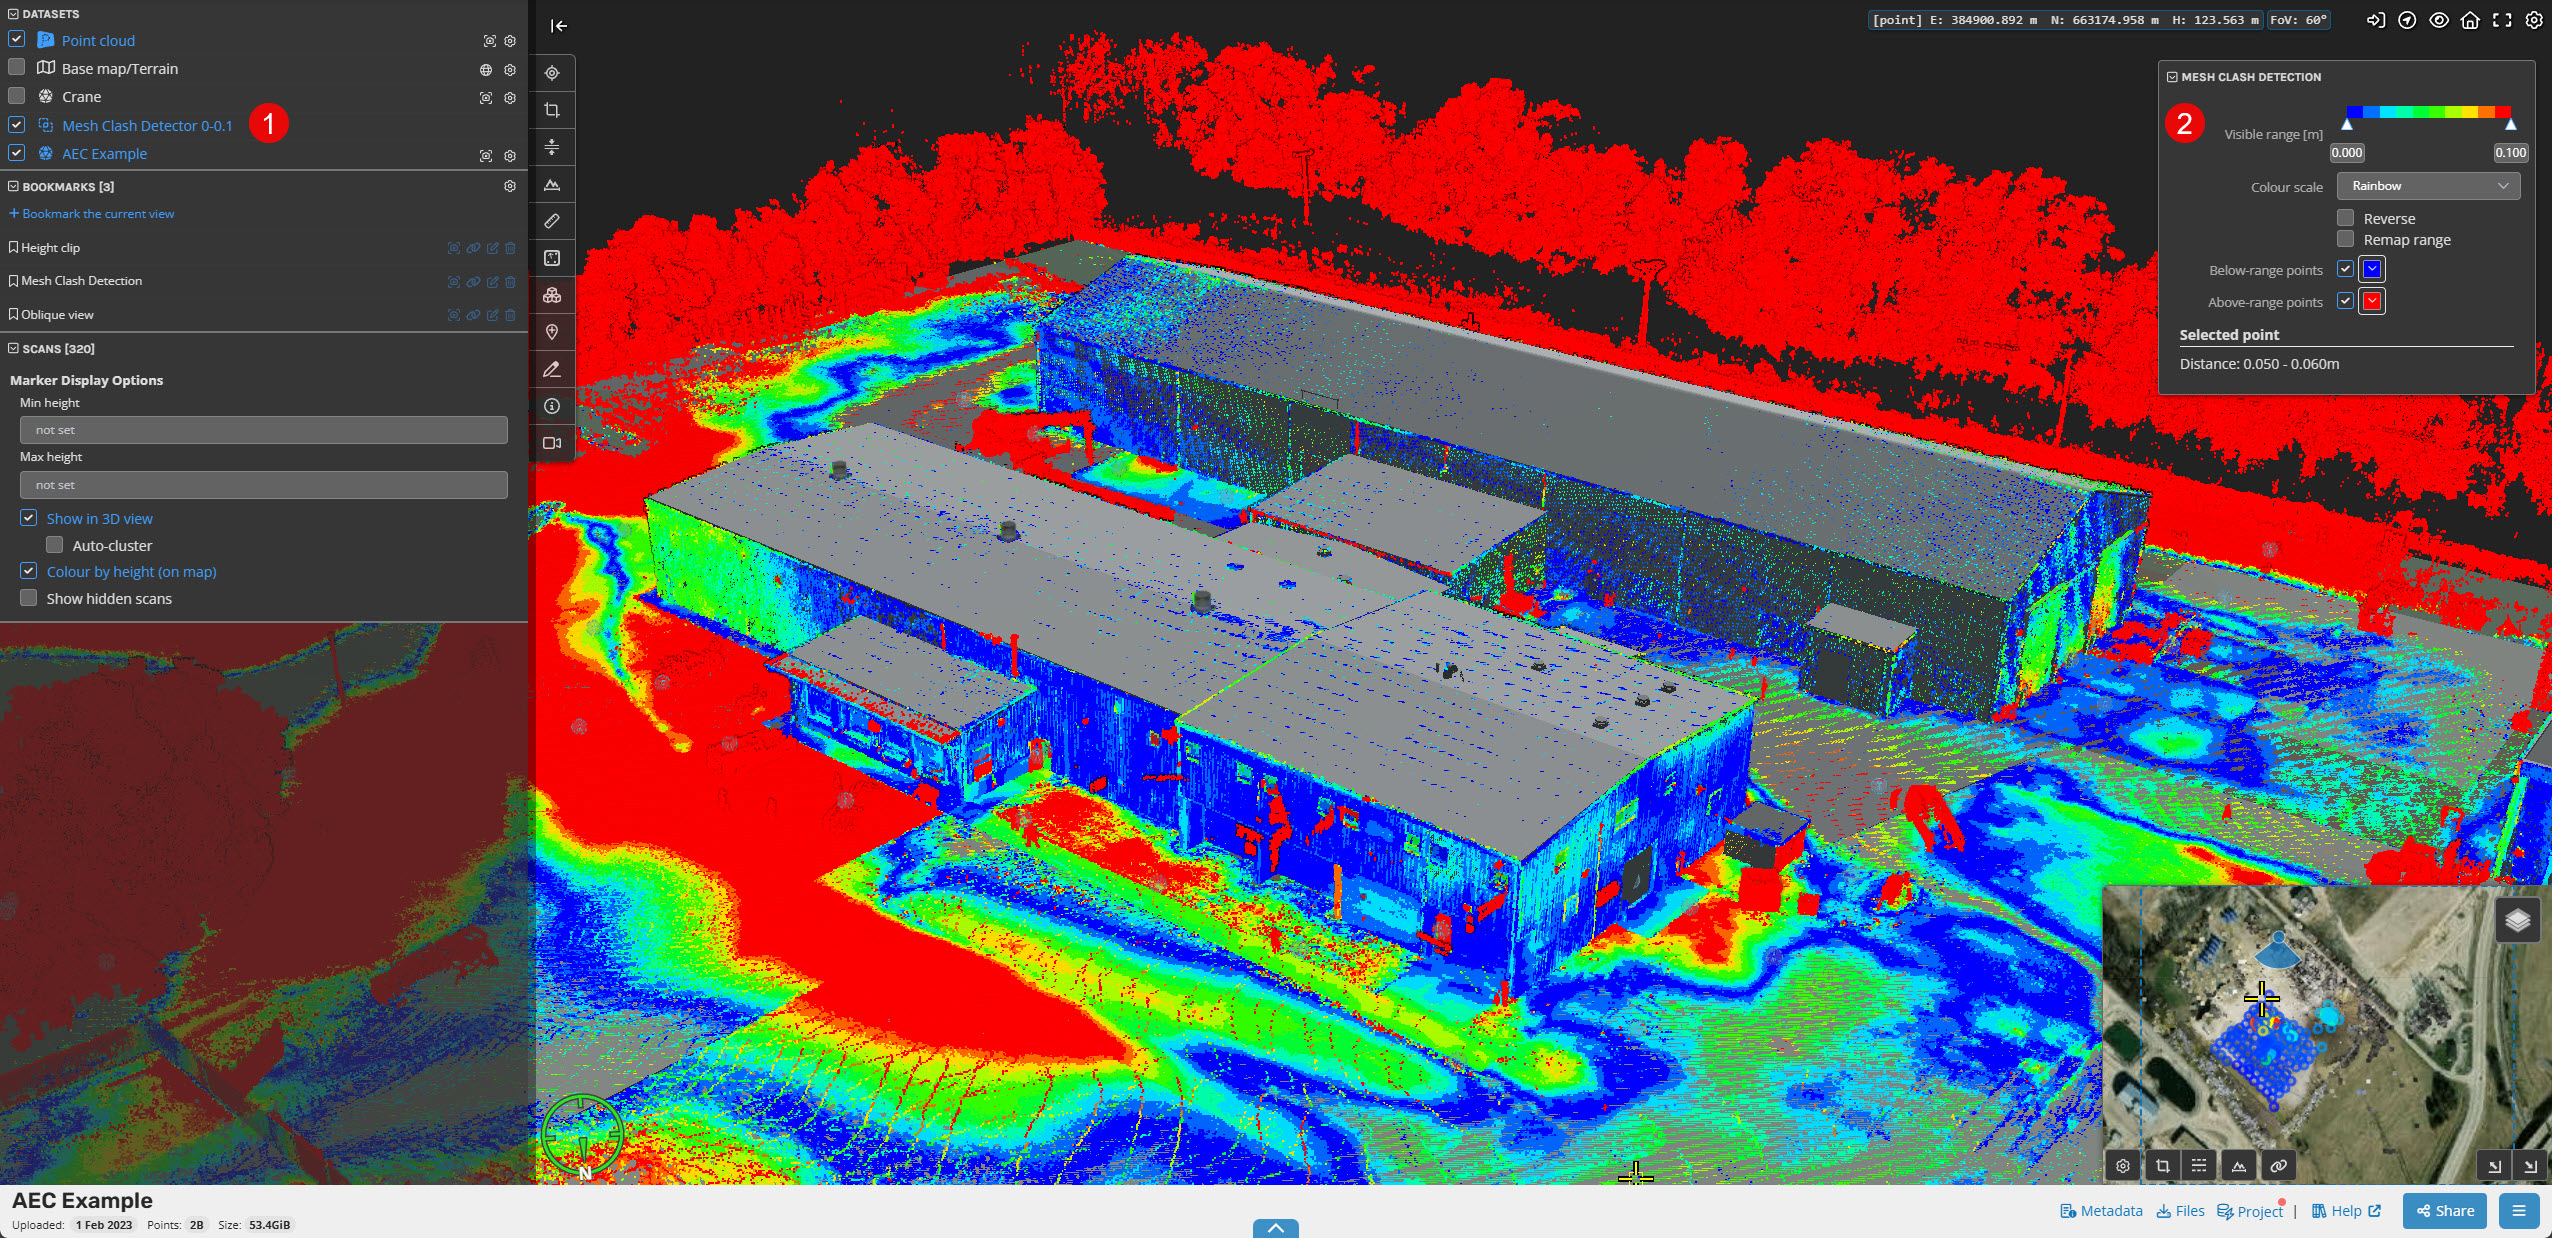
- From the Datasets list (left-hand side of Viewer) toggle on (if needed) the Mesh Clash Detector layer.
- This will activate the Mesh Clash Detection toolbox.

- Users can toggle:
- the visible range (using the slider)
- change the colour scale
- reverse and remap the colour range
- Toggle on/off the below and above range points (points not considered in the comparison).
