
How do I upload data?
Uploading 2D or 3D data on Pointerra creates a Dataset. Once created, datasets can be added and removed from projects for viewing, sharing, editing etc.
This article is only applicable to companies that have migrated to the new data management system (i.e. you have the Data Browser tab).
Locating the Upload Page
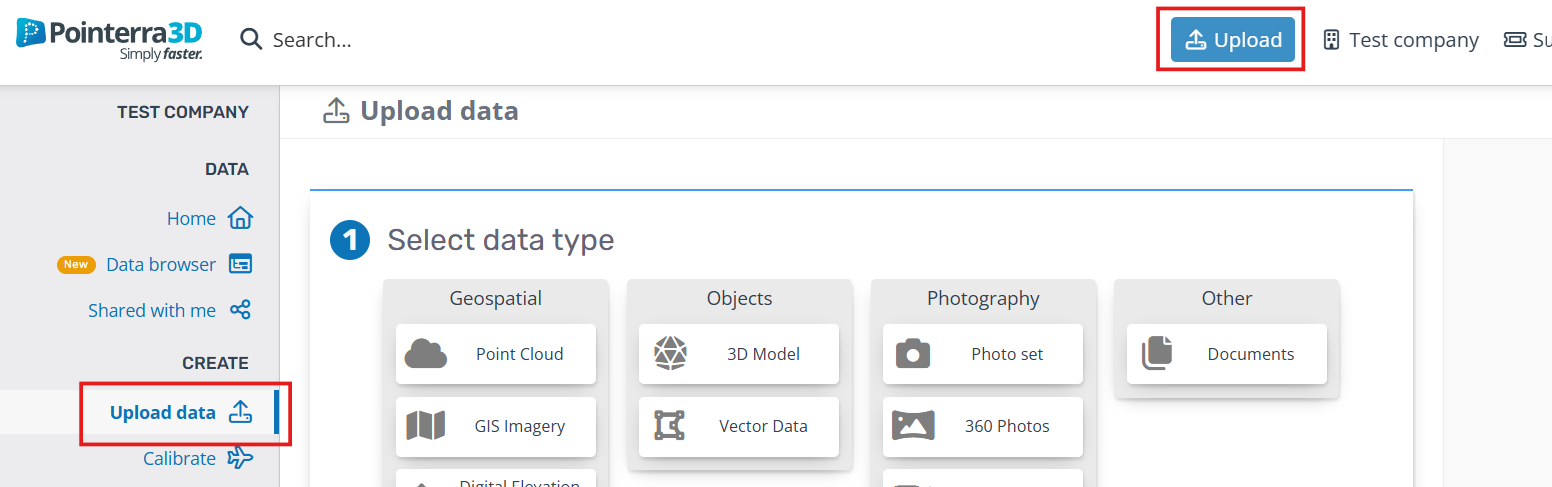
To upload a dataset, click the Upload button at the top of the page, or the Upload data tab from your company page.
If these buttons are not visible, you will need to request Upload permissions from your company administrators.
You can also directly upload datasets into a project in two ways:
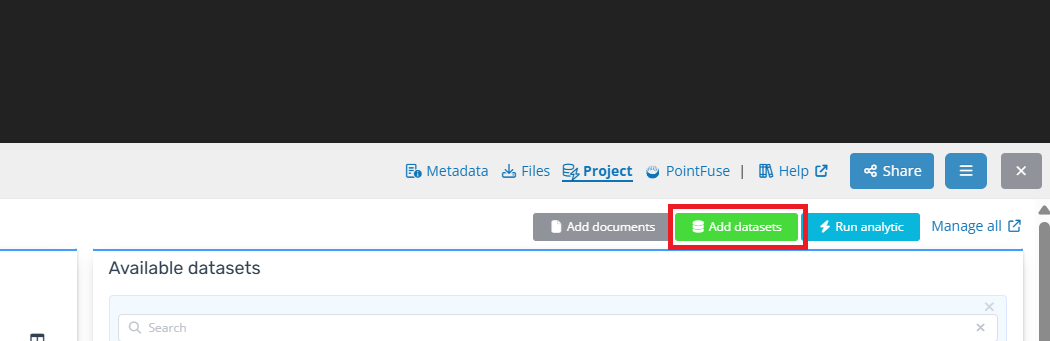
Use the Add datasets button in the project tab under the 3D Viewer.
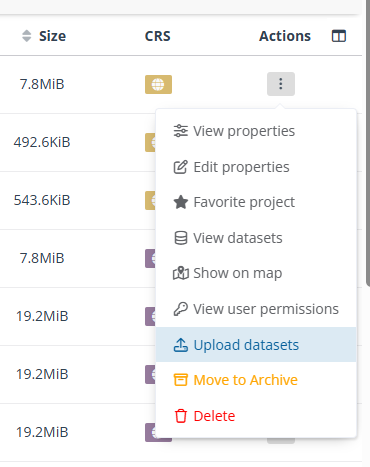
Select Upload datasets from a project's dropdown menu in the Data Browser.
Method 1 - Project viewer page:
Method 2 - Data browser:
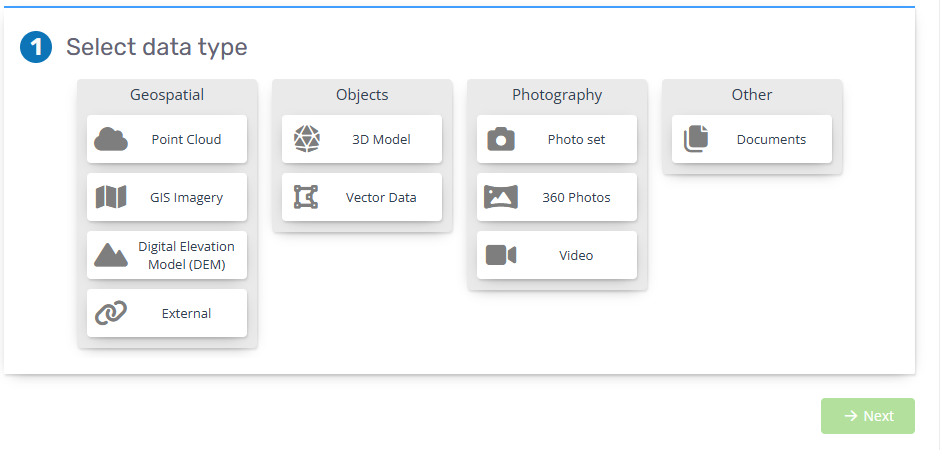
Select Dataset Type
To begin, you will first need to select the type of data you are uploading. Clicking on each type will show a description of the dataset and a list of file types we support. Double click the type, click next or press enter to select the data type. If your project has a point cloud, you can also select from a list of analytics, by switching the tab in the top right.
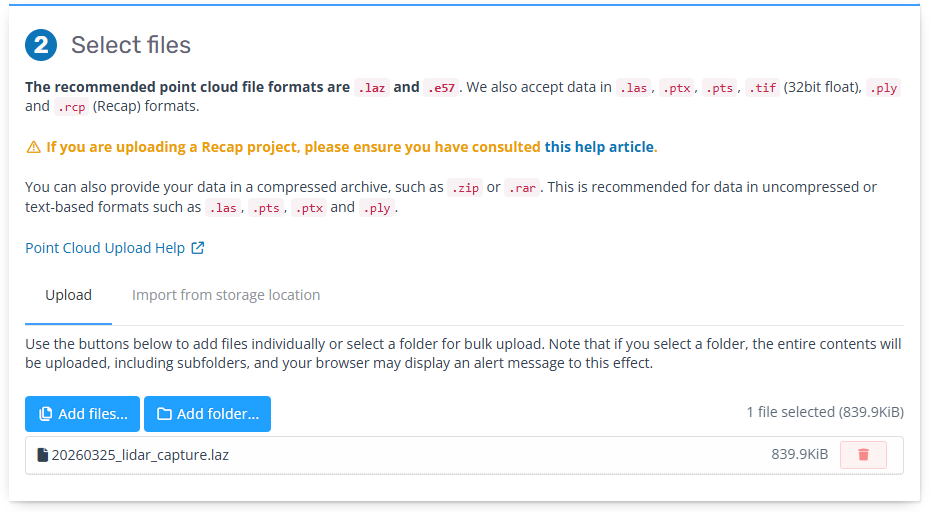
Upload files
You can add source files individually by using the Add files button or add all files from a folder using the Add folder button.
The page will list all files to be uploaded, but they will only be uploaded to Pointerra once you have finished filling out the form. Any folder names in this list will be preserved.
Source files can also be imported from external storage locations such as S3 or Azure Blob Storage. See this help article on how to set this up.
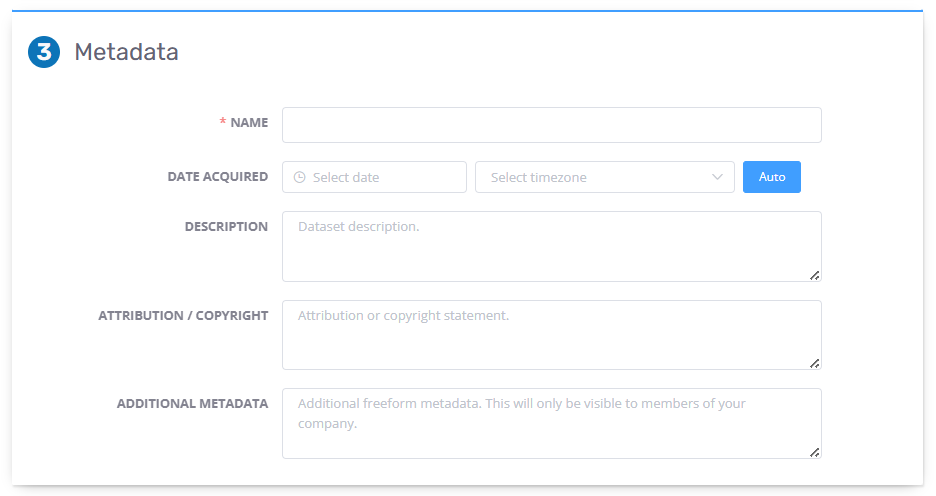
Metadata
Next, you can add general metadata to your dataset. These fields are optional (except for name) and can all be changed after the dataset has been processed.
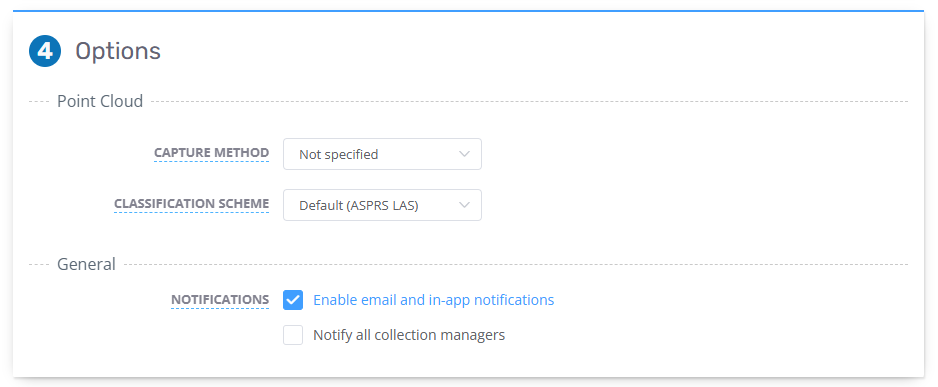
Processing Options
The Options section presents parameters that affect the processing and display of your dataset in the 3D viewer. These options change depending on the type of dataset you selected. Hover over options underlined in blue to show an explanation.
Only some of these can be changed after your dataset has been processed.
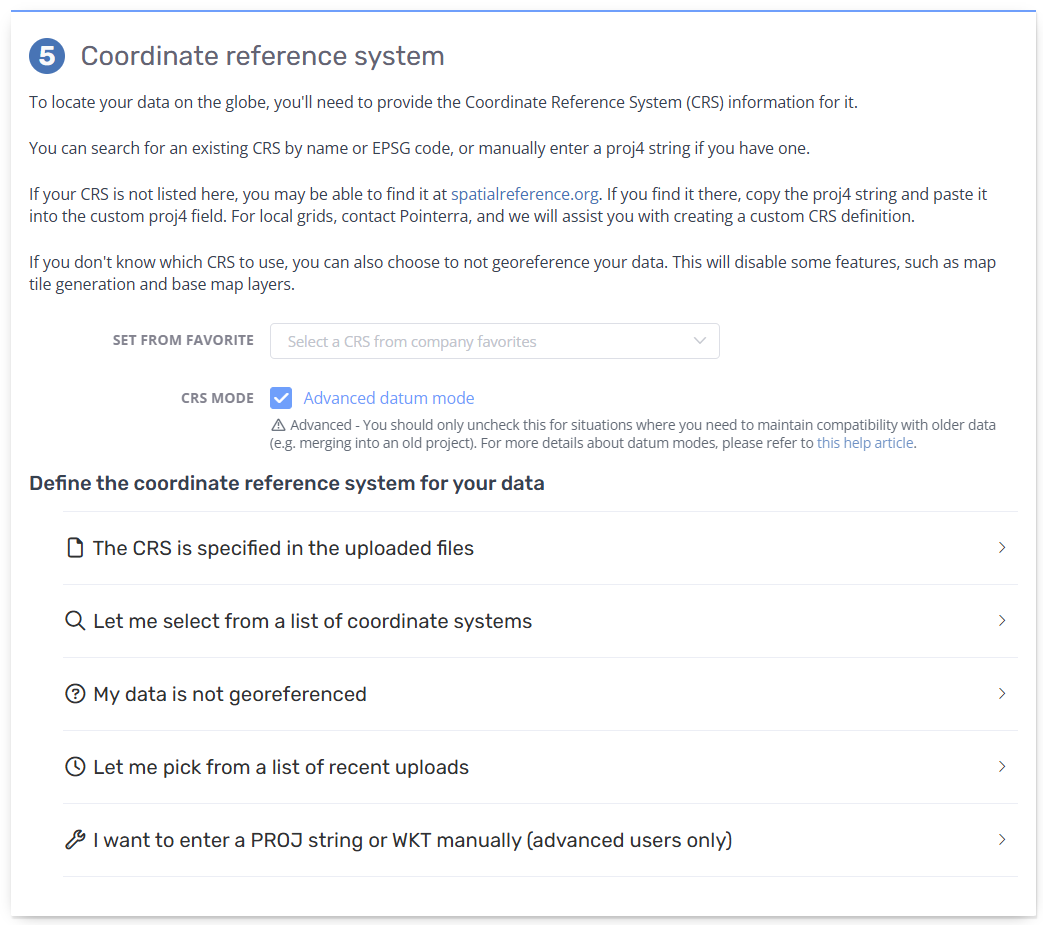
Coordinate System
Specifying a Coordinate Reference System (CRS) (a.k.a. Spatial Reference System (SRS)) for your dataset allows Pointerra to accurately position it on the globe and align it with your other datasets.
This section will be skipped for dataset types that have an implicitly defined coordinate system (e.g. KML vector datasets).
For CRS Mode, we recommend keeping the default value. See this help article on Advanced Datum Mode for more details.
There are several ways to define the CRS, select one of:
The CRS is specified in the uploaded files - This means the files you have selected already contain the CRS information. This is only available for some dataset uploads, such as a vector shape file with a .prj file.
Let me select from a list of coordinate systems - Use this if you know the CRS of your data. You can search for coordinate systems by name or EPSG/ESRI code. This is the recommended option for most data.
My data is not georeferenced - Use this if you don't know the coordinate system or a coordinate system is not relevant to your data. You can still set the vertical and horizontal units, and an approximate location on the map if applicable. Some features will be disabled if you choose this option.
I want to enter a PROJ string or WKT string manually - Select this if you are using your own coordinate system with a custom PROJ string or WKT definition. This is recommended for advanced users only.
Alternatively, if you use the same CRS for several datasets/projects, there are some shortcuts you can use:
Same as... - If you are uploading several datasets together, or uploading to a project, you can choose to reuse the same CRS.
Set from favorite - If you have configured a list of saved coordinate systems for your company, they will appear here. See this article on Creating CRS favorites.
Let me pick from a list of recent uploads - Use the same CRS as a dataset you have uploaded recently.
Collection
The last step is to select the collection where your dataset will be uploaded. Collections provide a way to organise your data, and manage permissions for your users and teams. See Using Collections for more information. This list will only show collections you have permission to upload to.
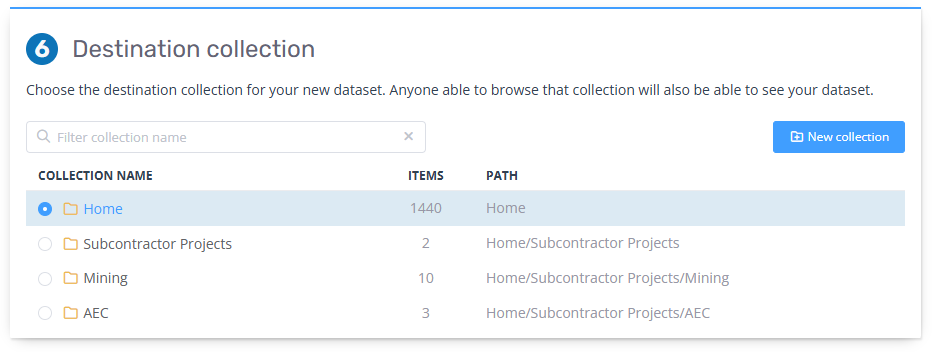
Once you have finished, click either Done or Add another at the bottom of the page. Choosing Add another will let you add additional datasets to be uploaded at the same time.
If you are uploading a point cloud, you will also get the option to add Analytics, which are a special type of dataset that analyzes existing datasets for QC, feature extraction and smart filtering. Analytics will run on all point clouds in the project once they have been uploaded. For more information on running analytics, see this article.
If you are already uploading into a project, skip the following Project Options section.
Project Options
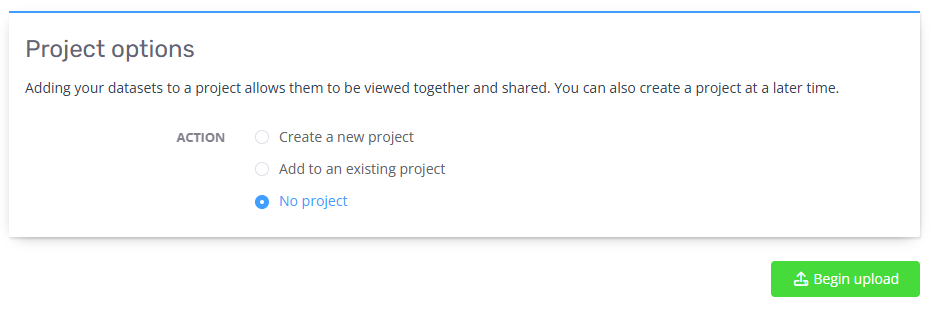
After you have finished adding your datasets, you will get the option to add your datasets into a project. There are three options:
Create a new project - Create a new empty project, and add the datasets to it. The new datasets will be viewable once processing has finished.
Add to an existing project - Select from a list of projects you can edit. The new datasets will be viewable once processing has finished.
No project - Just upload the datasets without adding them to a project. They can still be added to a project at a later time. You cannot choose this if you want to run analytics.
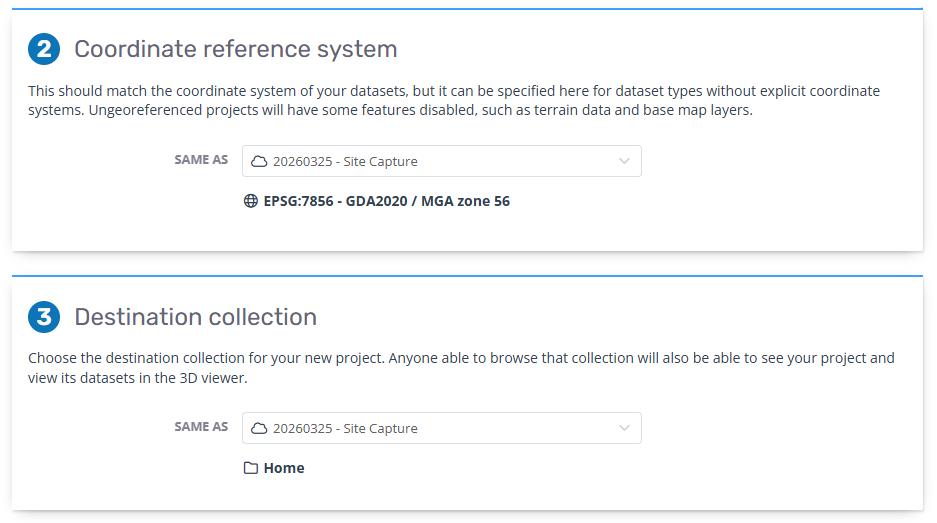
If you choose to create a new project, the CRS and destination collection can be prefilled from the datasets you are uploading.
Editing
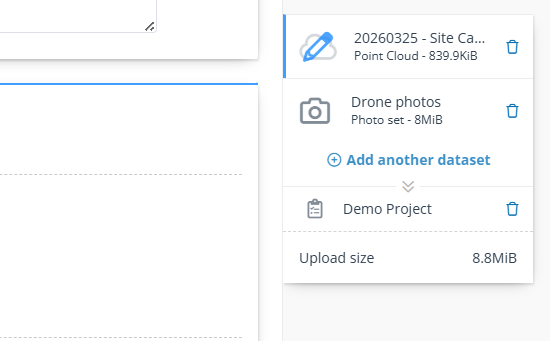
A summary list of datasets to be created and the selected project is shown on the right of the page.
If you need to go back and edit anything, just click the item in this summary list. To remove an item, click the trash can button on the right of the item.
Upload
Once everything looks good, click Begin upload at the bottom to confirm your selections and start the file upload.
Do not close your browser tab while this is in progress, you can continue using Pointerra in another tab. If you are uploading from the 3D viewer page, you can also collapse the upload panel and continue using the viewer.
Once all files have been uploaded, we will process your datasets into an optimized format for viewing on the web. This can take from a few minutes to several hours depending on the size of the upload. You can monitor the progress in the Data Browser and will receive an email or in-app message when it is complete.