How to inspect the source photos for a Point Cloud generated using Photogrammetry
Supported Photogrammetry software and upload instruction:
- iTwin Capture instructions (formerly ContextCapture)
- Agisoft Metashape instructions
- Pix4D instructions
- RealityCapture instructions
How to use
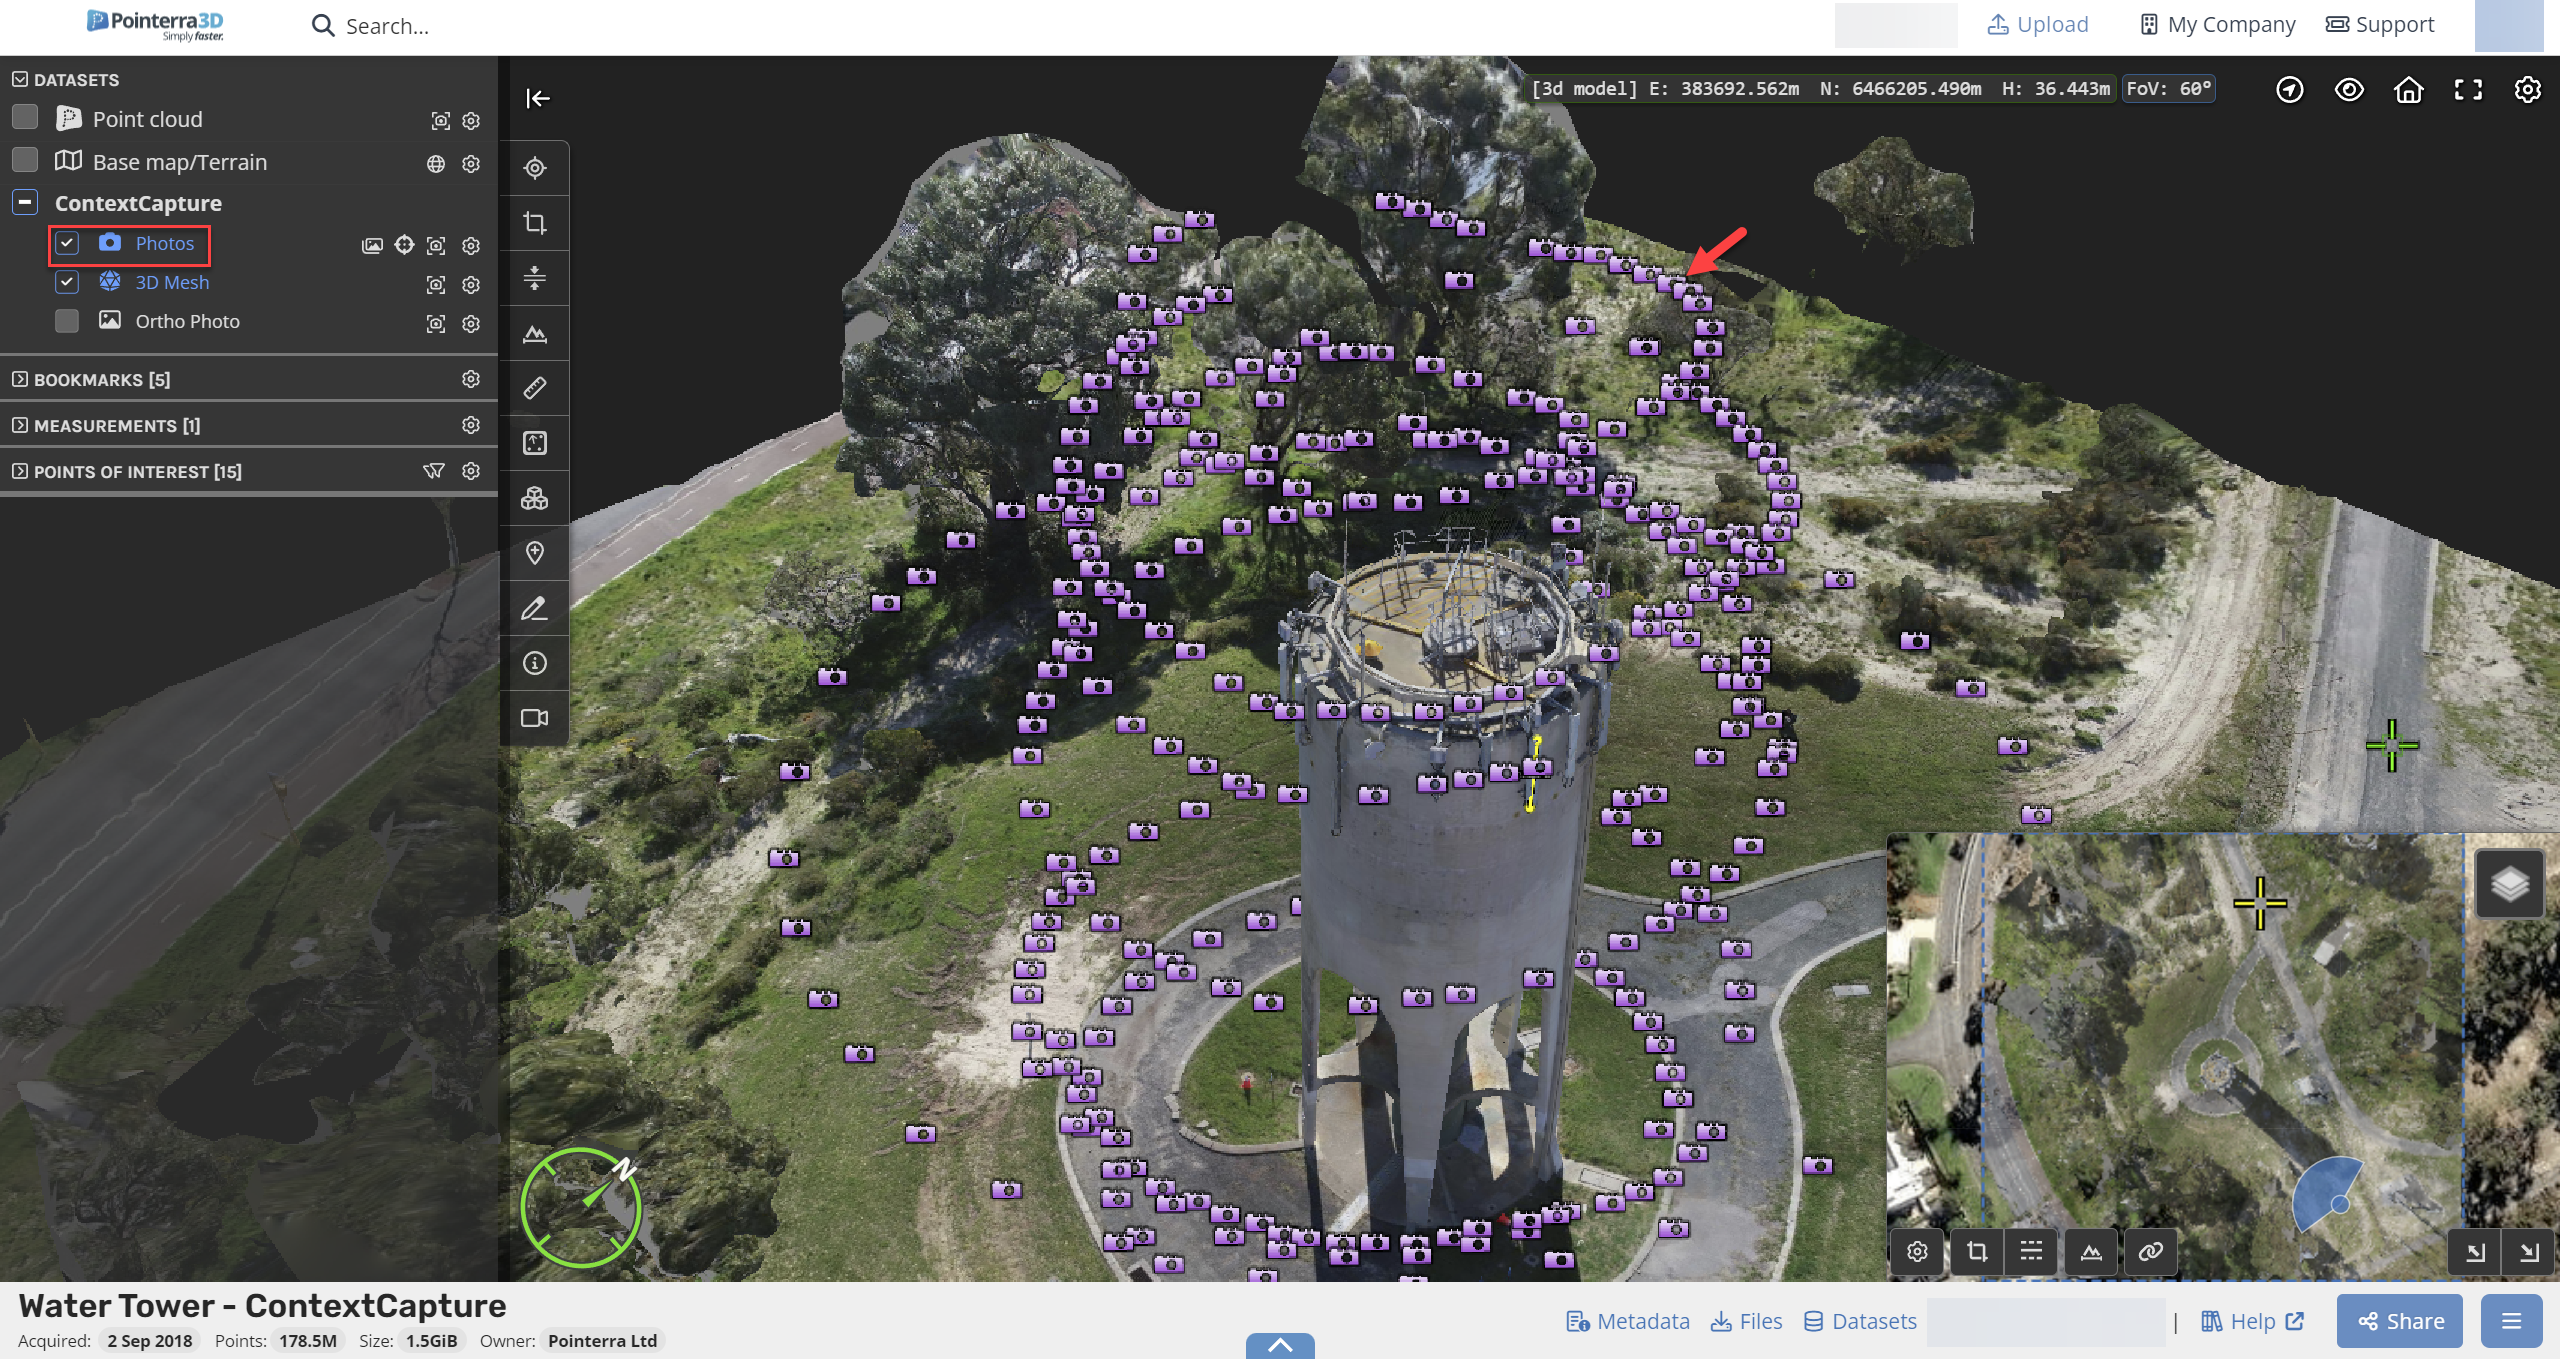
Firstly, on the left side tab, select the box for the photogrammetry dataset (this is indicated by a photo icon next to the name), if have selected the right dataset, the viewer will load purple camera icons scattered throughout the point cloud viewer.
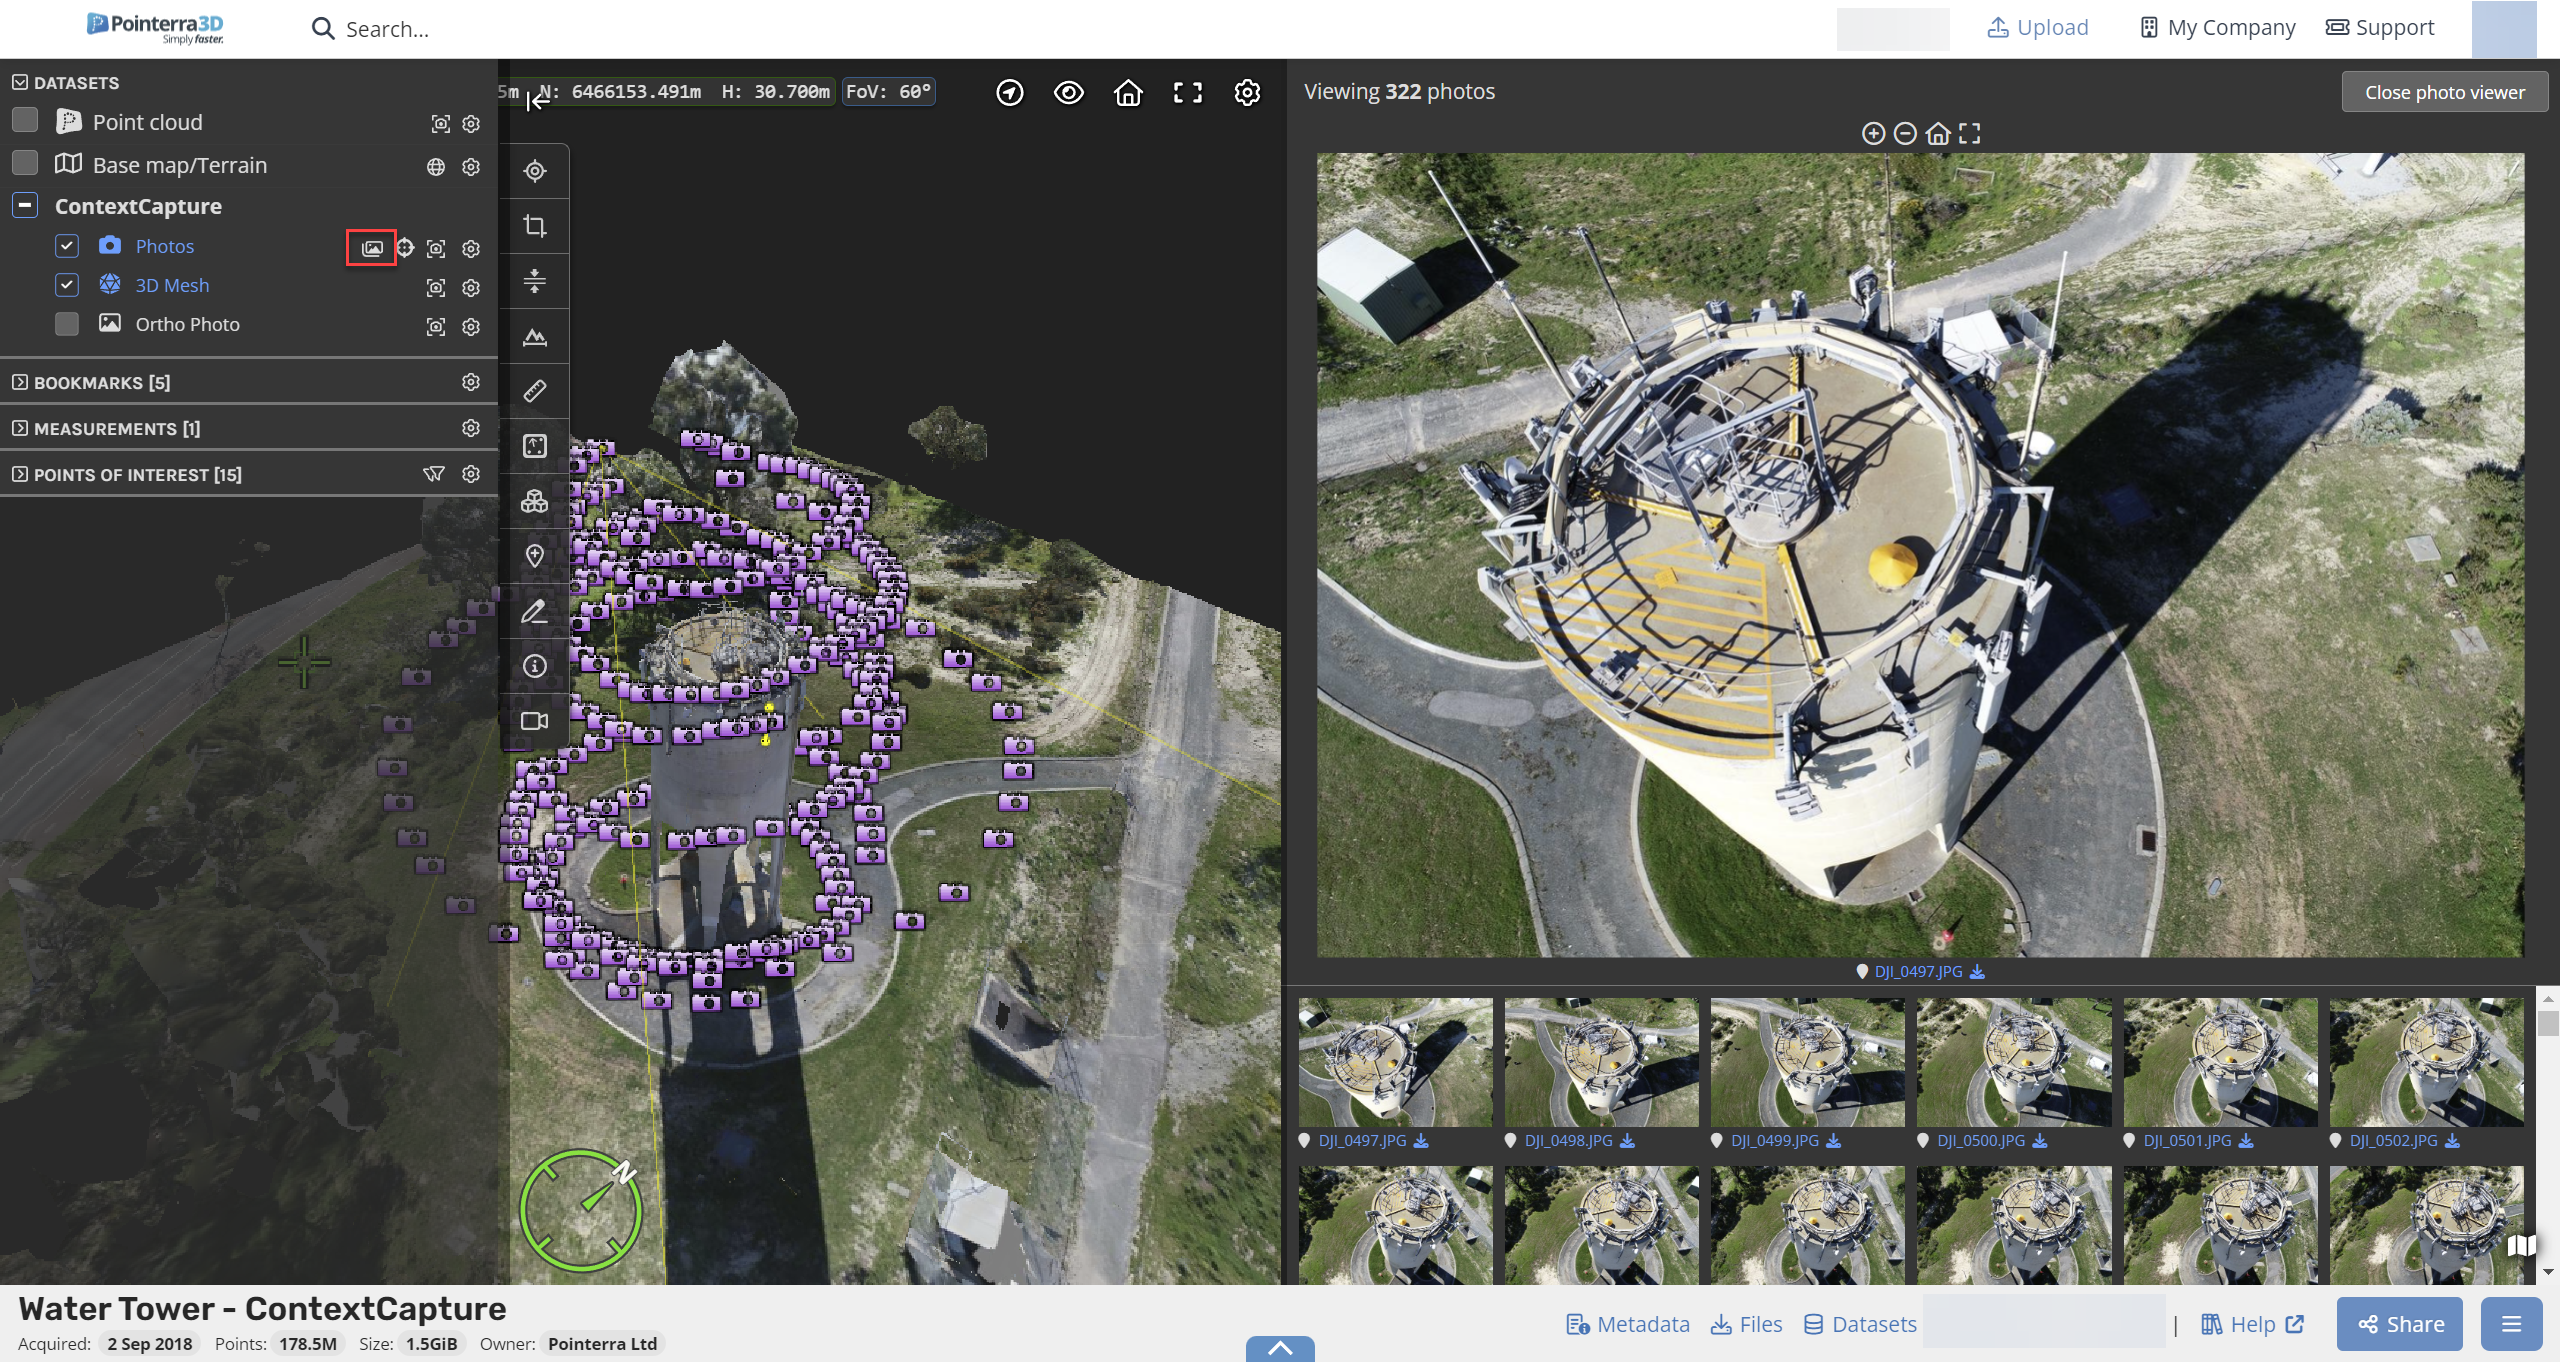
How to see all source photos
Then, click the photo icon next to the dataset name and a photo viewer will appear on the right hand side..
From here you can select a photo that you want to view (1), then:
(2) Use the Zoom in, zoom out, reset view, enter full screen buttons at the top of the image.
(3) Click on the image file name to either open it in a new browser window or download it.
(4) And finally close the viewer.
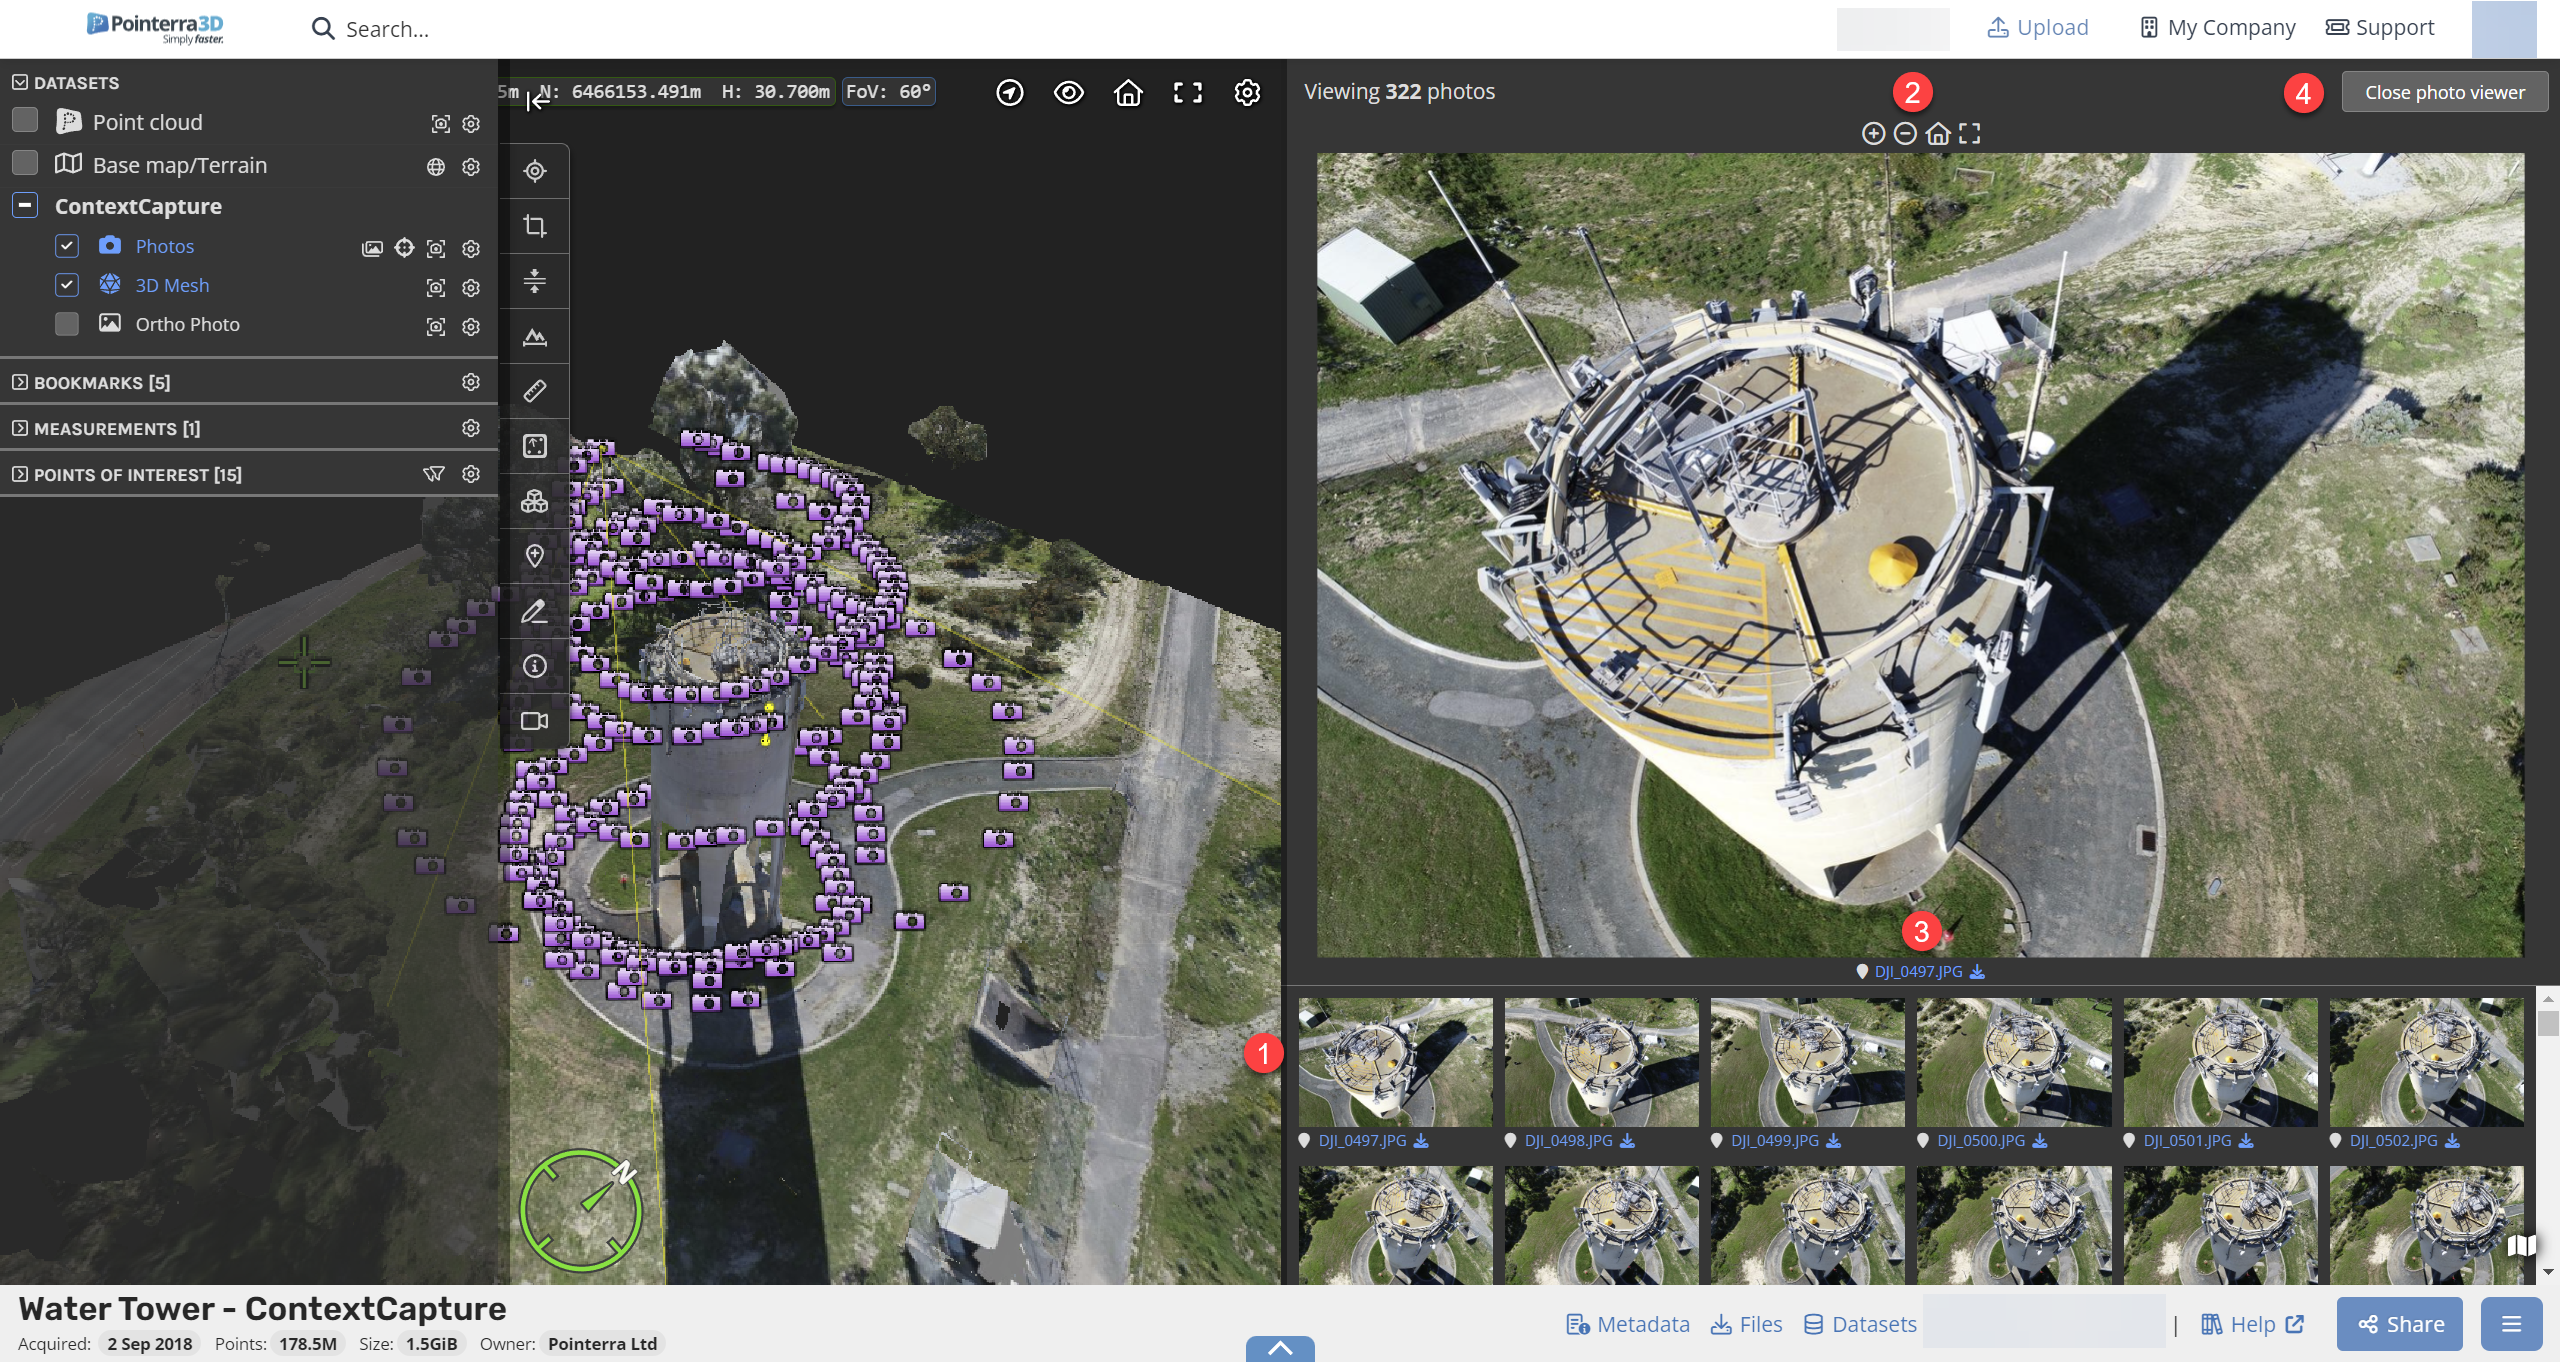
NOTE: The photo that you currently have selected will turn the corresponding camera icon yellow.
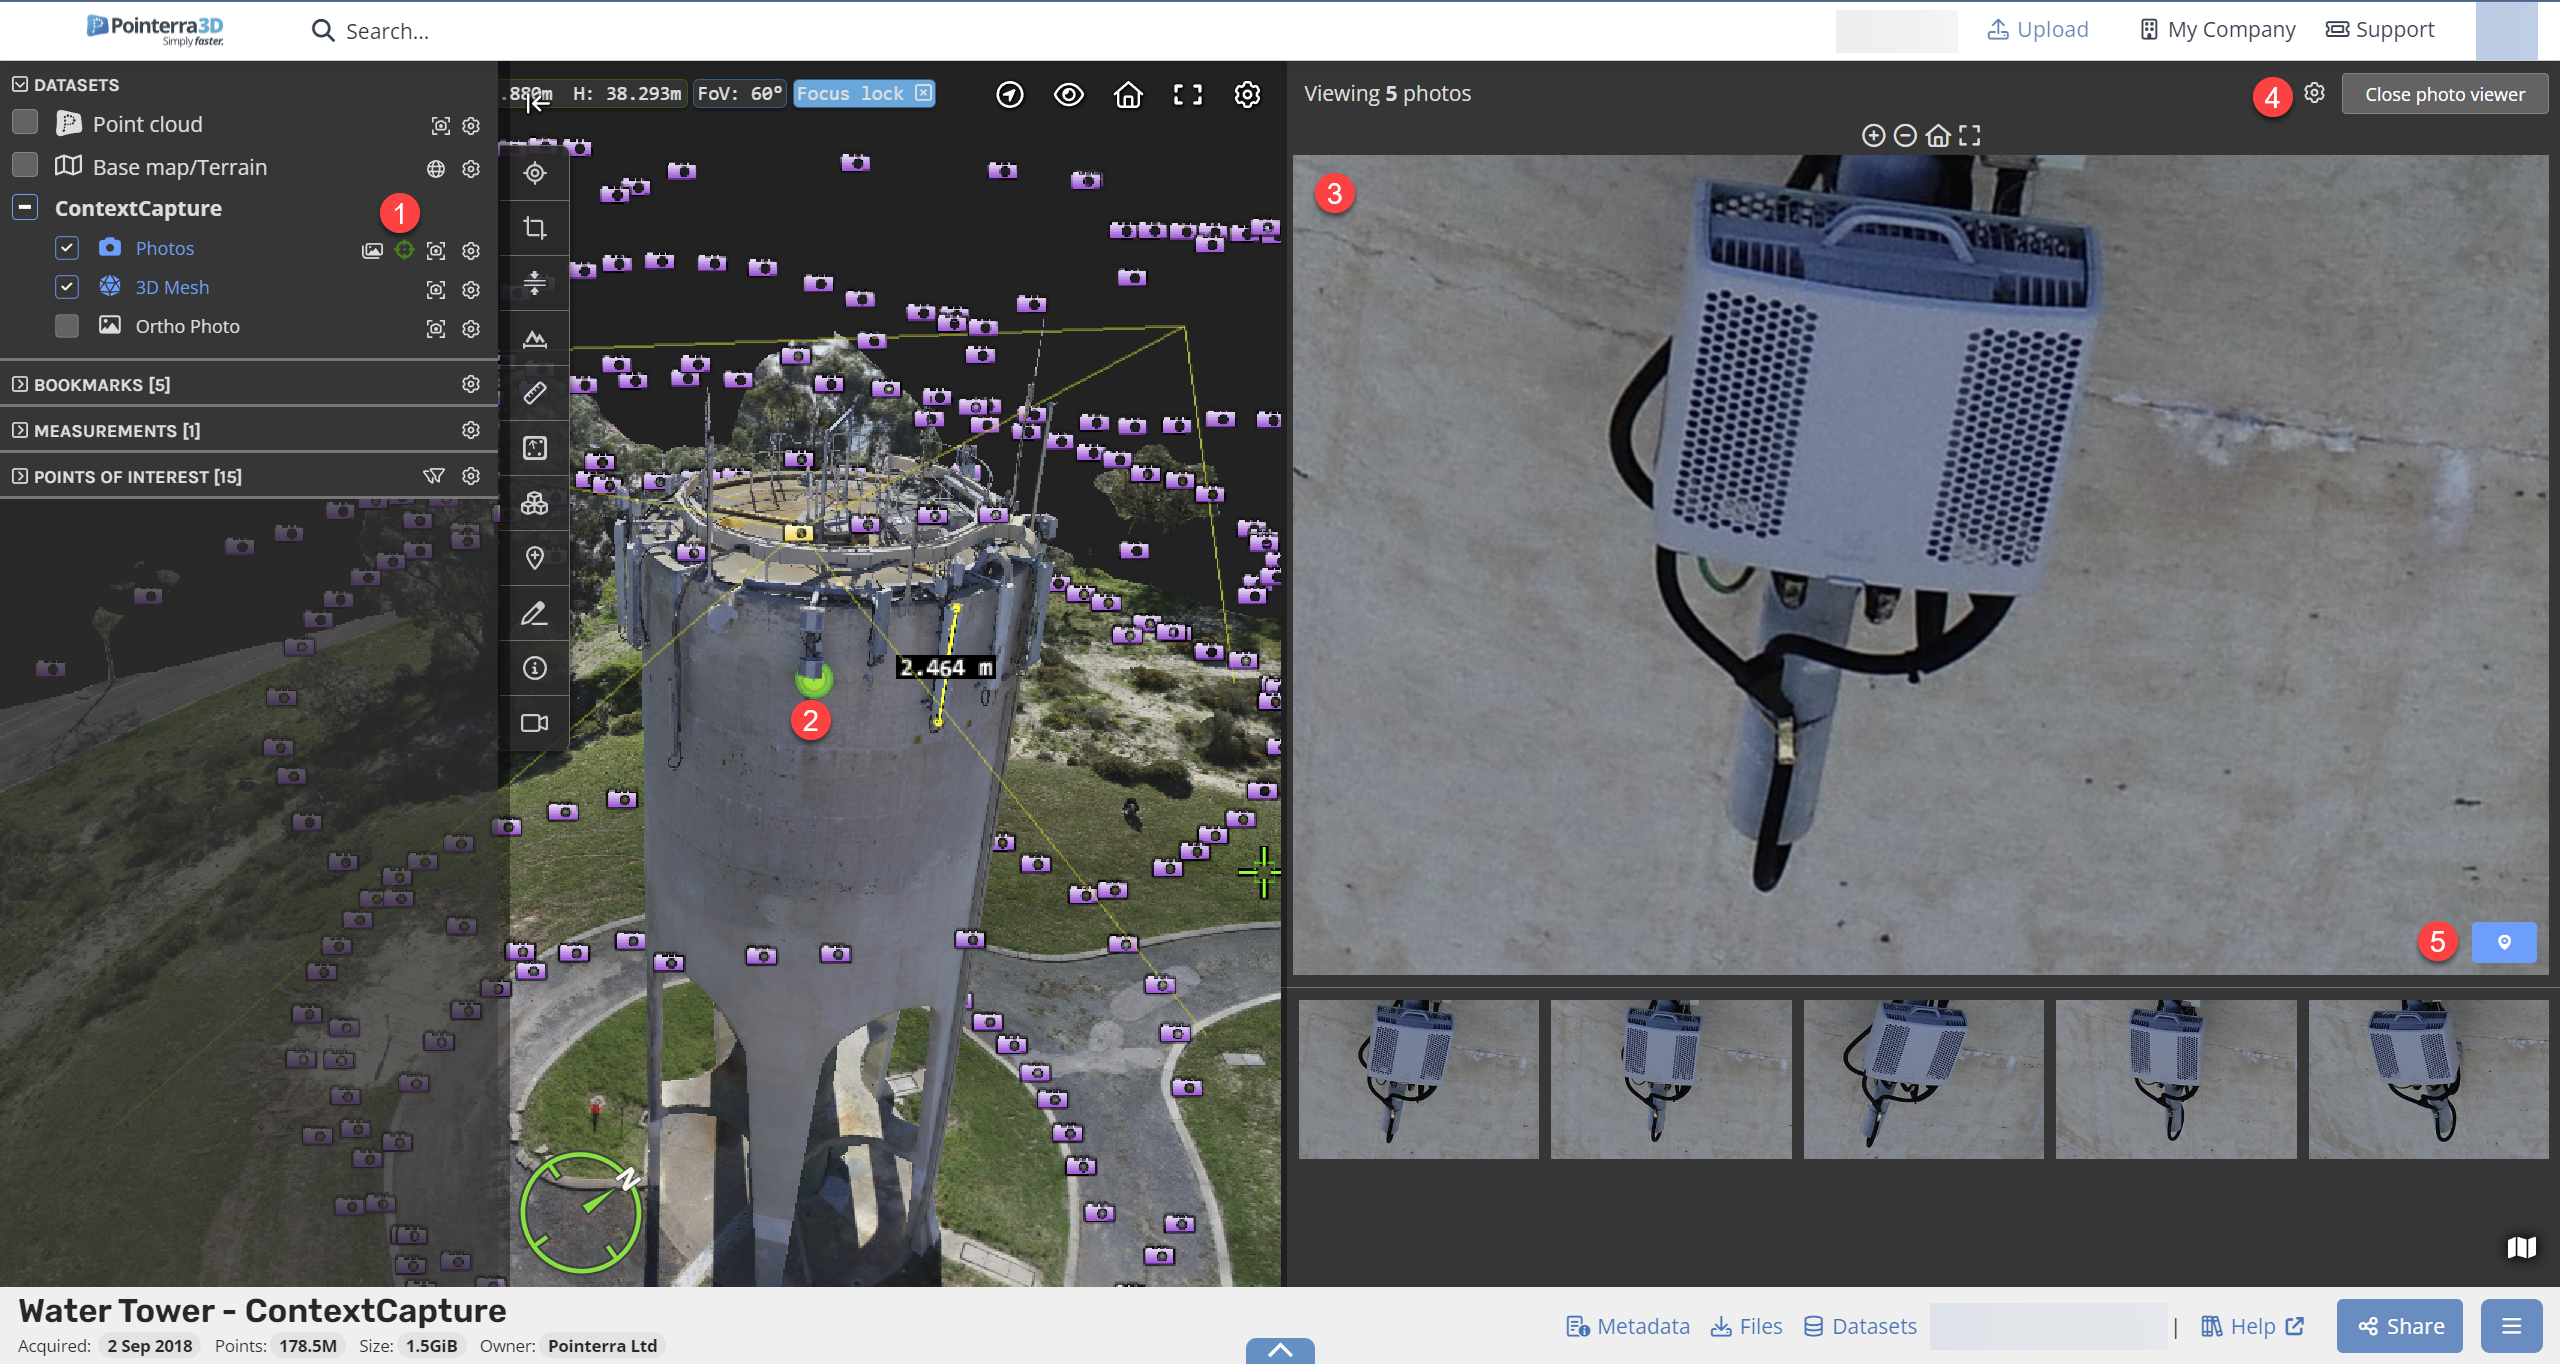
Using the photo inspection to find the best available photos
In order to find the best photos that correspond with a location on a point cloud or mesh, select the crosshair icon (1) and then select the desired point in the viewer (2).
By default, the photo viewer will then show the best five photos covering that point (3). This can be decreased or increased by navigating to the cog wheel next to the "Close photo viewer" (4).
POIs can be created that links a photo to that selected point (5).
At the top of the image are the zoom in, zoom out, reset view and enter full screen buttons (6).