Viewing Scans
ScanView provides a way to interactively view scans from the perspective of a specific scanner as a 360 degree scan image, allowing you to query the coordinates of points or make accurate 3D measurements within the scan. Viewing an individual scan can often be simpler than looking at the full 3D point cloud.
There are three modes:
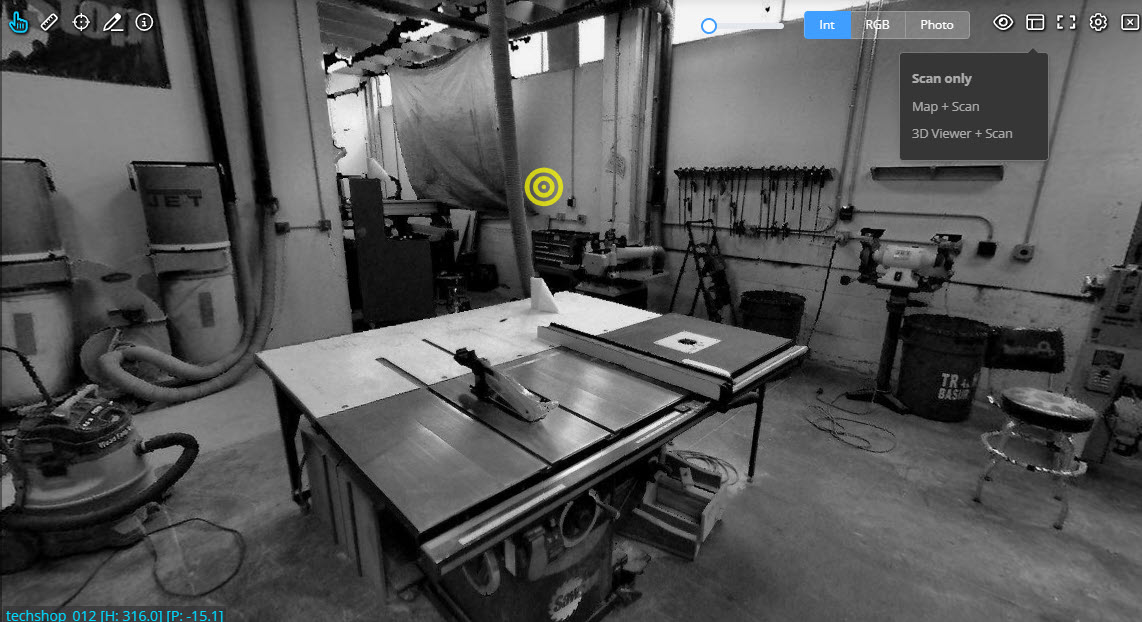
Int - Intensity, this is the base scanview
RGB - Colour, if the structured scans contain photos, then a colourised sphere from the points will be generated.
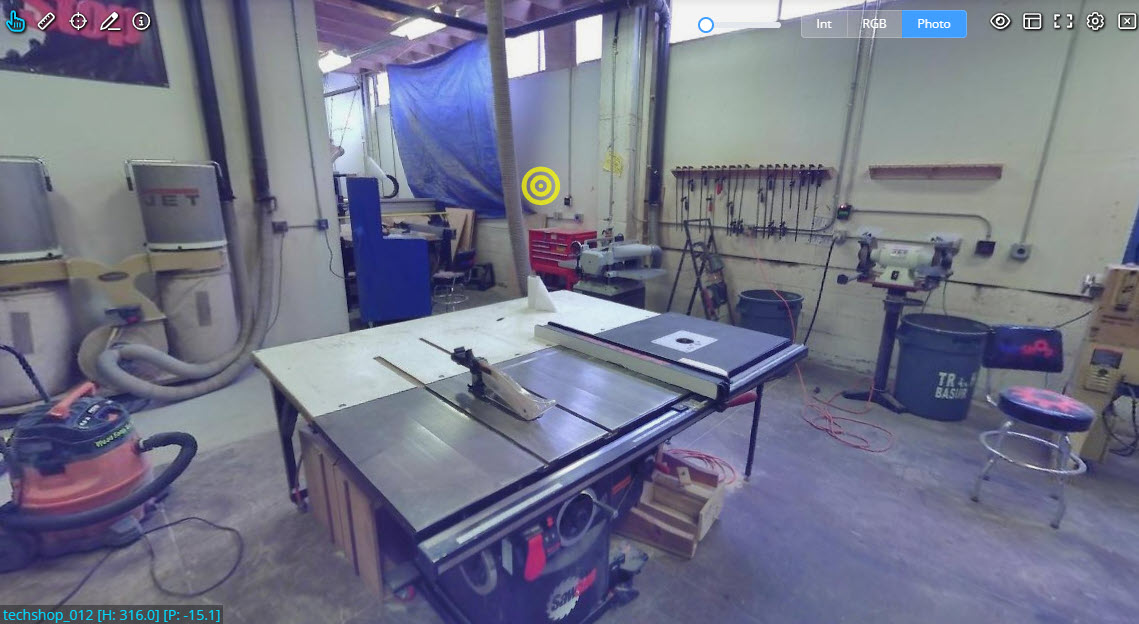
Photo - These are the photos that are extracted from the structured scans. They provide higher detail than the RGB mode as it is not dependent on the density of the point cloud scan. Note, they photos need to be imbedded in the E57 or Recap project.
Intensity Example
RGB Example

Photo Example
Accessing ScanView
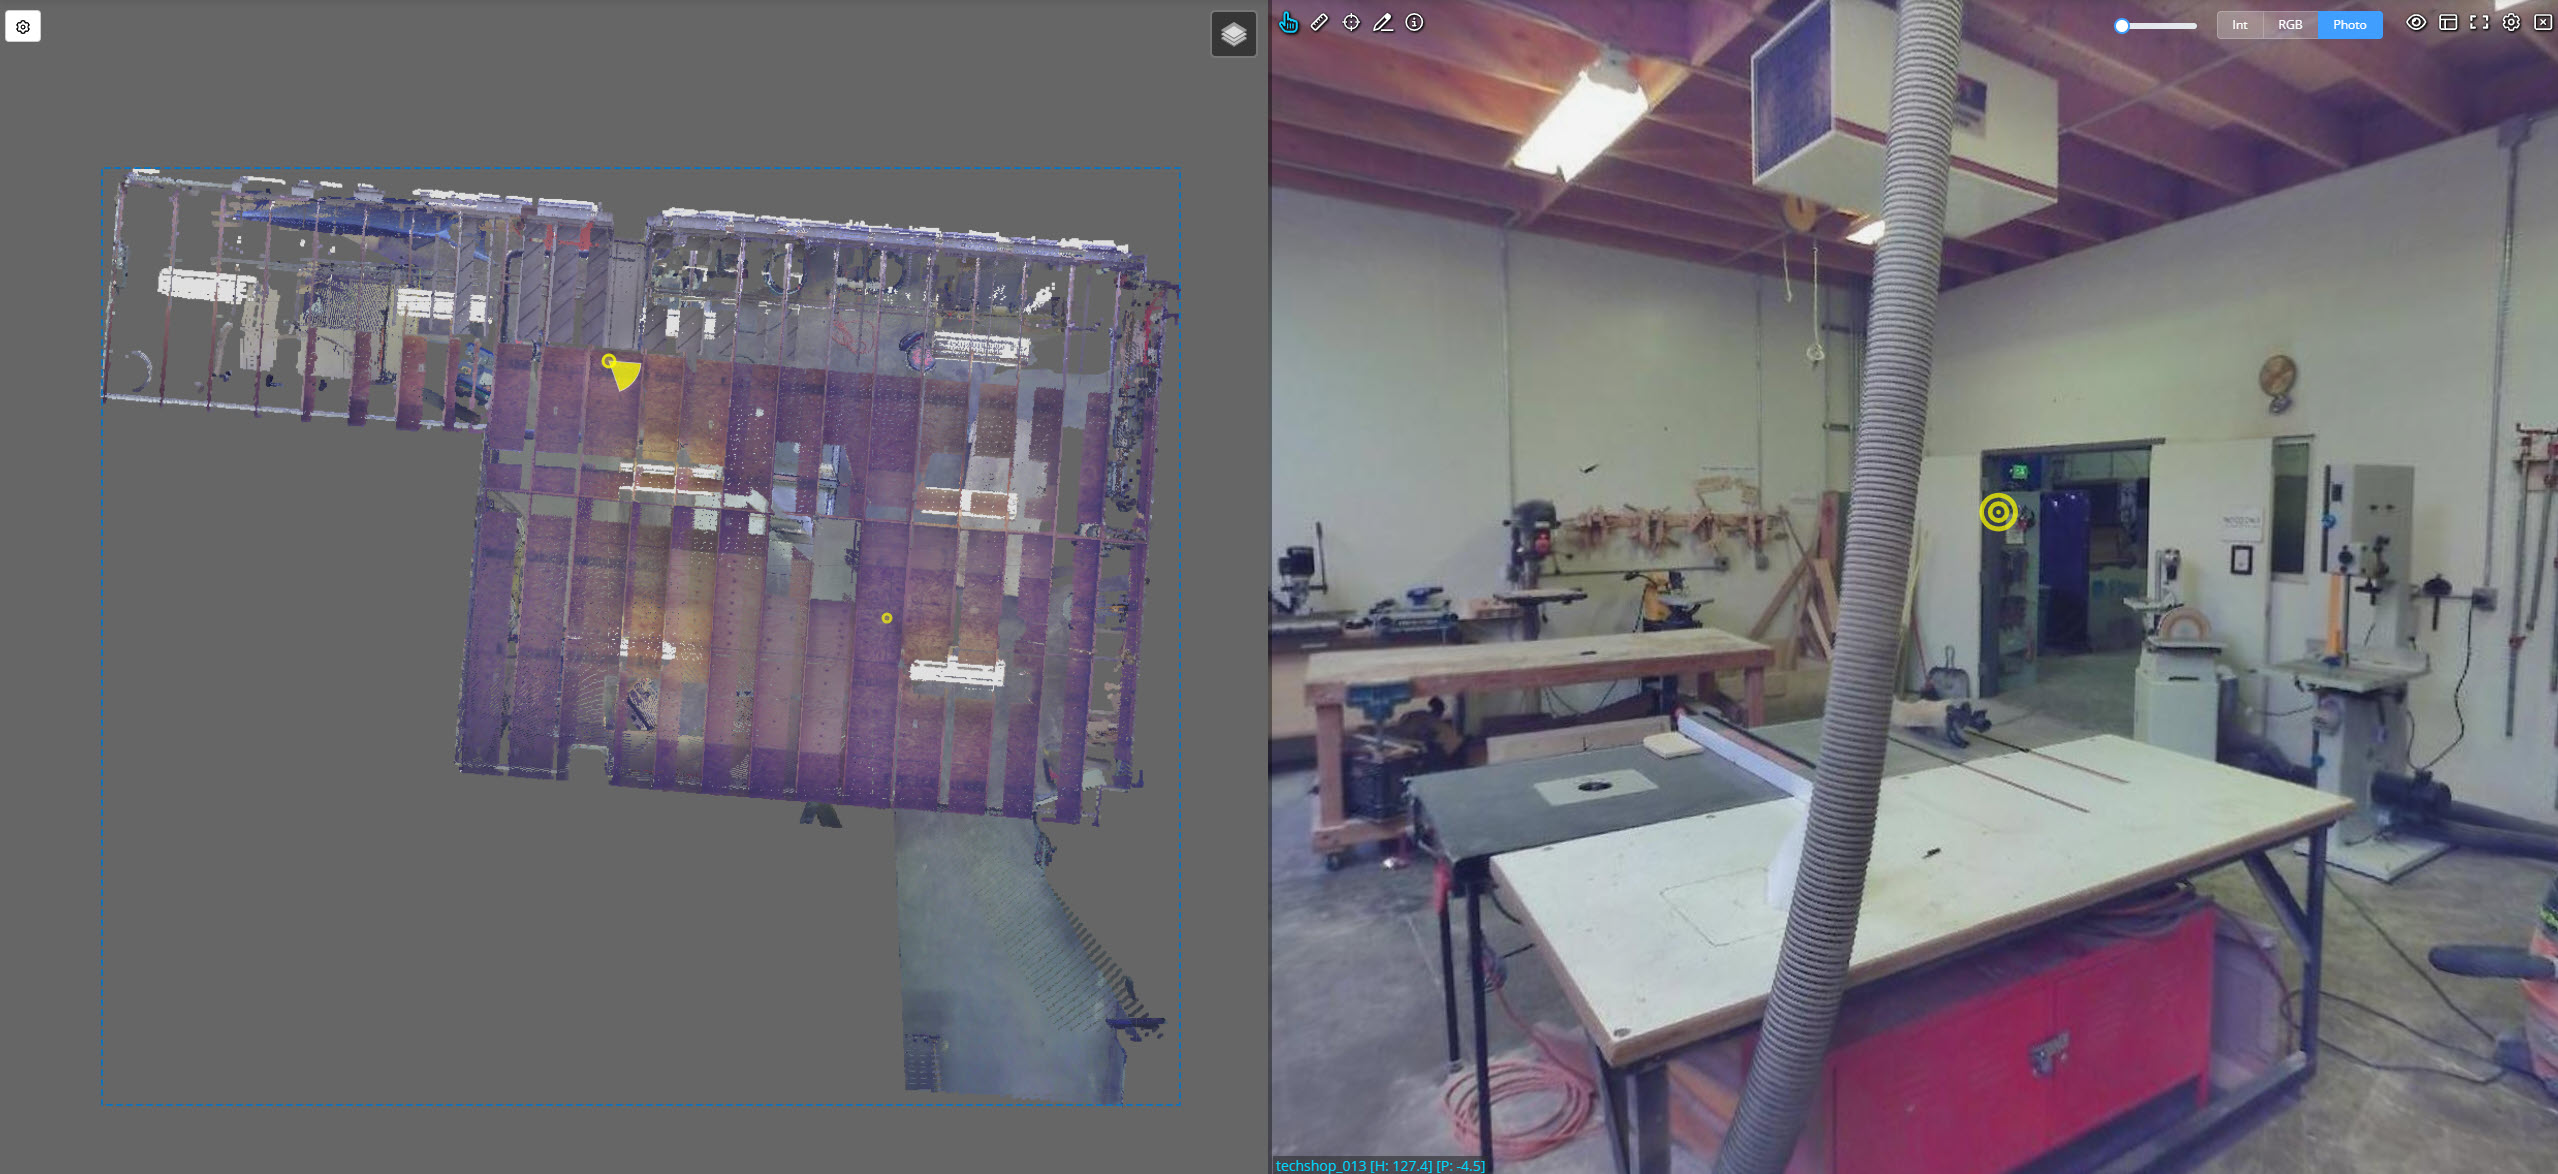
To view a scan, select a scanner by left clicking on a scan marker in either the 3D View or the 2D Map View. This will open the ScanView window (right) and the Scan positions pane (left).
Navigating ScanView
You can pan around in the ScanView window by dragging with the left mouse button. You can zoom in and out using the mouse scroll wheel (zooming out far enough will create a fish-eye effect).
Other scan locations will appear as translucent yellow markers in ScanView and coloured circles in the map window. Clicking either will shift your perspective to the newly selected scan. If you hover over a marker in the ScanView window, the equivalent scan marker on the map will be highlighted, and vice-versa. This will give you extra information about which scan station you are going to move to.
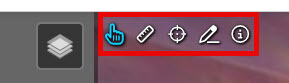
There are 5 tools in the upper left of the ScanView window that can be used to move the view, Taking Measurements, Query Coordinates, Drawing Tool or Info tool for querying overlayed vectors.
Setting ScanView Display Properties
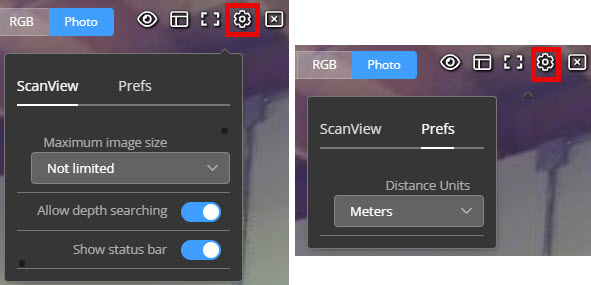
You can control many of the ScanView display properties from the tools in the upper right of the scan view. The slider can be used to change the brightness of the scan image (ranging from 100% to 200% of the original brightness, shortcut keys: left and right square brackets ( [ ), ( ] )). Next to the slider are options that allow you to change how the scan image is coloured (if multiple channels are available), layer and visibility options that allow you to control what can be seen in the scan view, the window layout options, toggle full screen and additional settings.

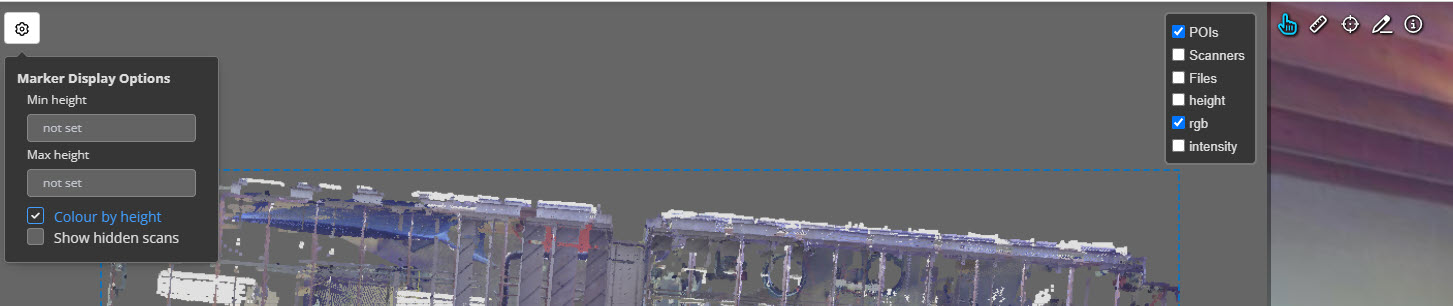
The visibility options provide the ability to disable and enable features such as Points of Interest of other scan markers in the scan view as well as filter scan markers based on distance.

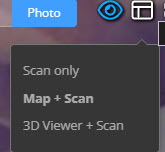
The window layout options can either be viewing the scan only, map and scan, or 3D viewer and scan. The 3D viewer adds the ability to sync the scanview and 3D view together.

The config button provides additional options for the user.
You can change the display properties of the Scan positions pane by hovering over the "Stack" icon in the upper right of the positions pane and choosing to enable or disable Points of Interest or scan markers as well as choose how to colour the map in this pane. The "Cog" icon in the upper left can be used to filter scanners by height as well as disable colouring them by height.
Exiting ScanView
To exit ScanView use the Exit button in the upper right of the scan view window. If you hover your mouse over the exit button, 3 exit options will be shown (clicking the exit button without hovering is equivalent to Exit to 3D at this location).
Exit to 3D at this location - return to the 3D Viewer with a view that closely matches the current ScanView view.
Switch to scan station view - similar to ScanView, however, instead of viewing scan images you can view the point cloud from the perspective of the scanner. A more in-depth guide can be found here Moving Between ScanView and 3D View.
Exit to 3D viewer - return to the 3D Viewer with the view as it was before entering ScanView.